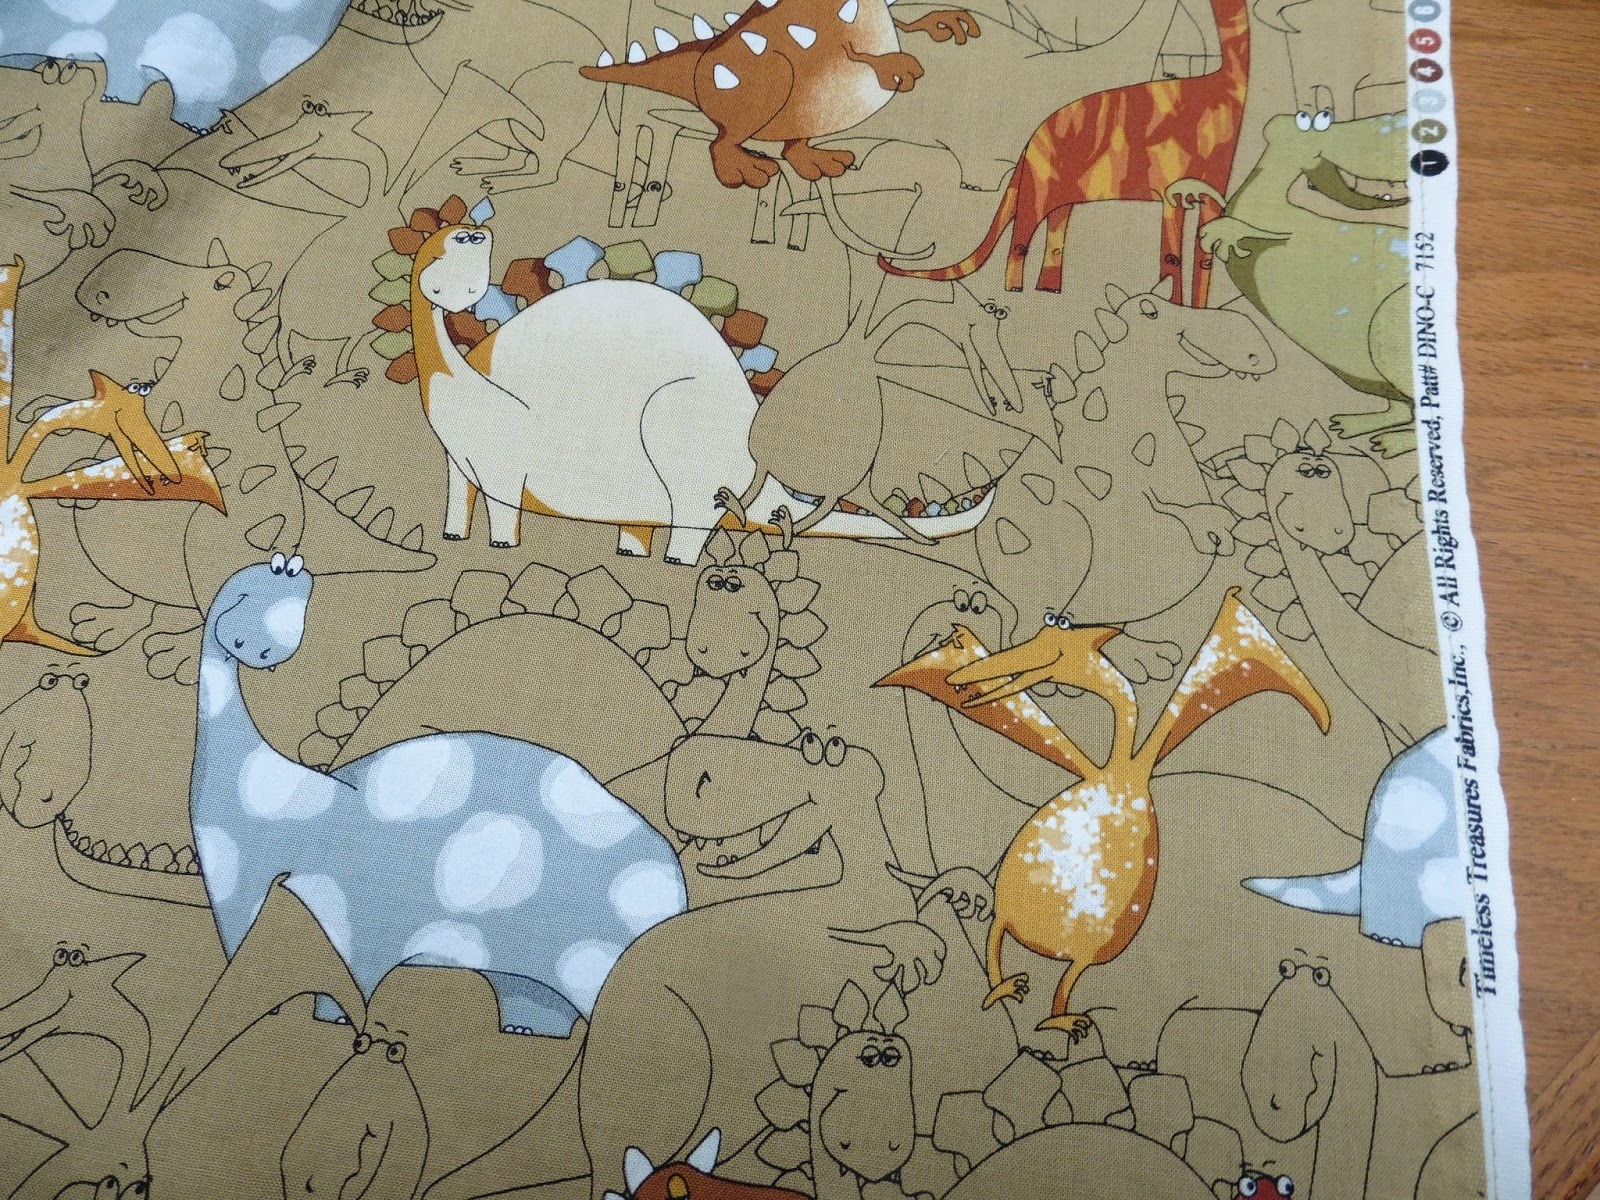
I had this adorable dinosaur fabric that I wanted to use but I only had 1½ yards of it. It is Timeless Treasures DINO-C 7152.
I had ½ yard of this pebbly fabric and decided to halve it and add ¼ yard at each end to reach the length I needed. Wasn't Pebbles the name of the little girl on the Flintstones? Aside from the color, maybe that is why it seemed to go with the dinosaurs.

The tutorial strongly recommends pre-washing the fabric since it is going into a sheet and will shrink. I did pre-wash it and it did shrink. The length loss was not just shrinkage – although granted 3% typical shrinkage of cotton works out to about 1" per yard – but loss of length was also due to fraying. Shrinkage and fraying and ⅝" seaming was significant enough that I had to add a third fabric at each end to reach a required 70" post laundering length. I suspect a bit under 70" would have been ok but this was my first time with these instructions and I did not want to push it.
I wanted the seams to be as flat as possible so there would be no "Prince and the Pea" issues. I used flat felled seams, something I have not done in a while. In a nutshell, flat felled seams, typically found on jeans, are made as follows: sew ⅝" seam wrong sides together, trim one side of seam allowance to ¼", fold untrimmed seam edge over trimmed seam edge and sew again on right side. I avoided that "trim to ¼" part" by offsetting the fabric edges by ⅜" when I sewed the wrong sides together initially. It worked like a charm. I saved ½" of fabric (insert sarcastic "Whoop-dee-doo" here) but mainly I avoided an awkward trim step. After 1½ hours of effort I was now at square one with two yards of fabric. But I did get practice with flat felled seams four times and each one came out very well. Here are my added fabrics as seamed together. The bottom gold will be totally hidden beneath the mattress. The pebbles will only be visible along the vertical sides at the head and foot of the crib mattress.

Now, I could finally start making those sheets per the tutorial! After cutting out a square from each of the four corners I seamed them with French seams and that went very smoothly. Pressing under the edge for the elastic casing was not difficult but a bit tedious - essentially two fabric widths (2x40"), and two ~2-yard lengths of fabric (2x70"), less corners (8x8"). This works out to 176" or almost 15 feet! Then, since elastic is 80" long, threading it through is pretty mindless but takes a bit of patience. A safety pin will do but these handy elastic threaders are well worth it.

But bummer! Halfway around my casing, my elastic pulled free of the slots in the threader. I had to pull all the length of elastic back out of the casing and start over. The second time, after threading the elastic through the two slots of the threader and doubling it back on itself, I used a very long stitch to sew the elastic to itself. It stayed in the threader while I pushed it through the entire casing this time. It was very easy to remove those long stitches and free the threader before I joined the two ends of the elastic. Last step was to stitch closed those final few inches of the casing access.
I do not have a crib mattress but this is how it looks on one of my couch cushions. The dinosaur to pebble fabric seams do not fall where the baby would be. They are near the head and foot edges of the mattress. The pebble to gold fabric seams are under the mattress.
I do not have a crib mattress but this is how it looks on one of my couch cushions. The dinosaur to pebble fabric seams do not fall where the baby would be. They are near the head and foot edges of the mattress. The pebble to gold fabric seams are under the mattress.

Without a true crib mattress to fill this sheet out, it looks a bit wrinkled. But what I wanted to illustrate in this photo is that having only 1½ yards of a fabric you really want to use instead of 2 yards is not a show stopper. However, I would recommend using that the second fabric be ¾ yard to avoid having to add a third fabric due to shrinkage and fraying and seaming.

I think this is a great use of fabric that is a large scale print or just too adorable to cut up. Here is the sheet all folded and ready to gift. It would have been an even quicker project if I hadn't felt the need to piece it from three fabrics first! Once a quilter, always a quilter, I guess.

Those $24 sheet at Pottery Barn do not seem so pricey now when I think of the cost of two yards of good quality cotton fabric and elastic. But getting a custom look to match curtains or a quilt or a theme ...? Priceless! And suppose you got that feature fabric on sale or it was pining away to be used in your stash...? Even better!
This is not a quilt but it is a Monday so I am linking up to Main Crush Monday at Cooking Up Quilts. I have a bit of a crush on those cute little dinosaurs you see.
This is not a quilt but it is a Monday so I am linking up to Main Crush Monday at Cooking Up Quilts. I have a bit of a crush on those cute little dinosaurs you see.


