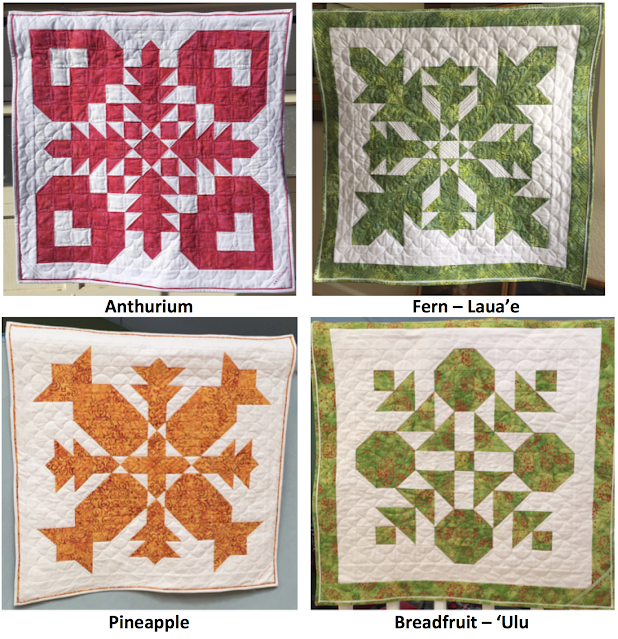
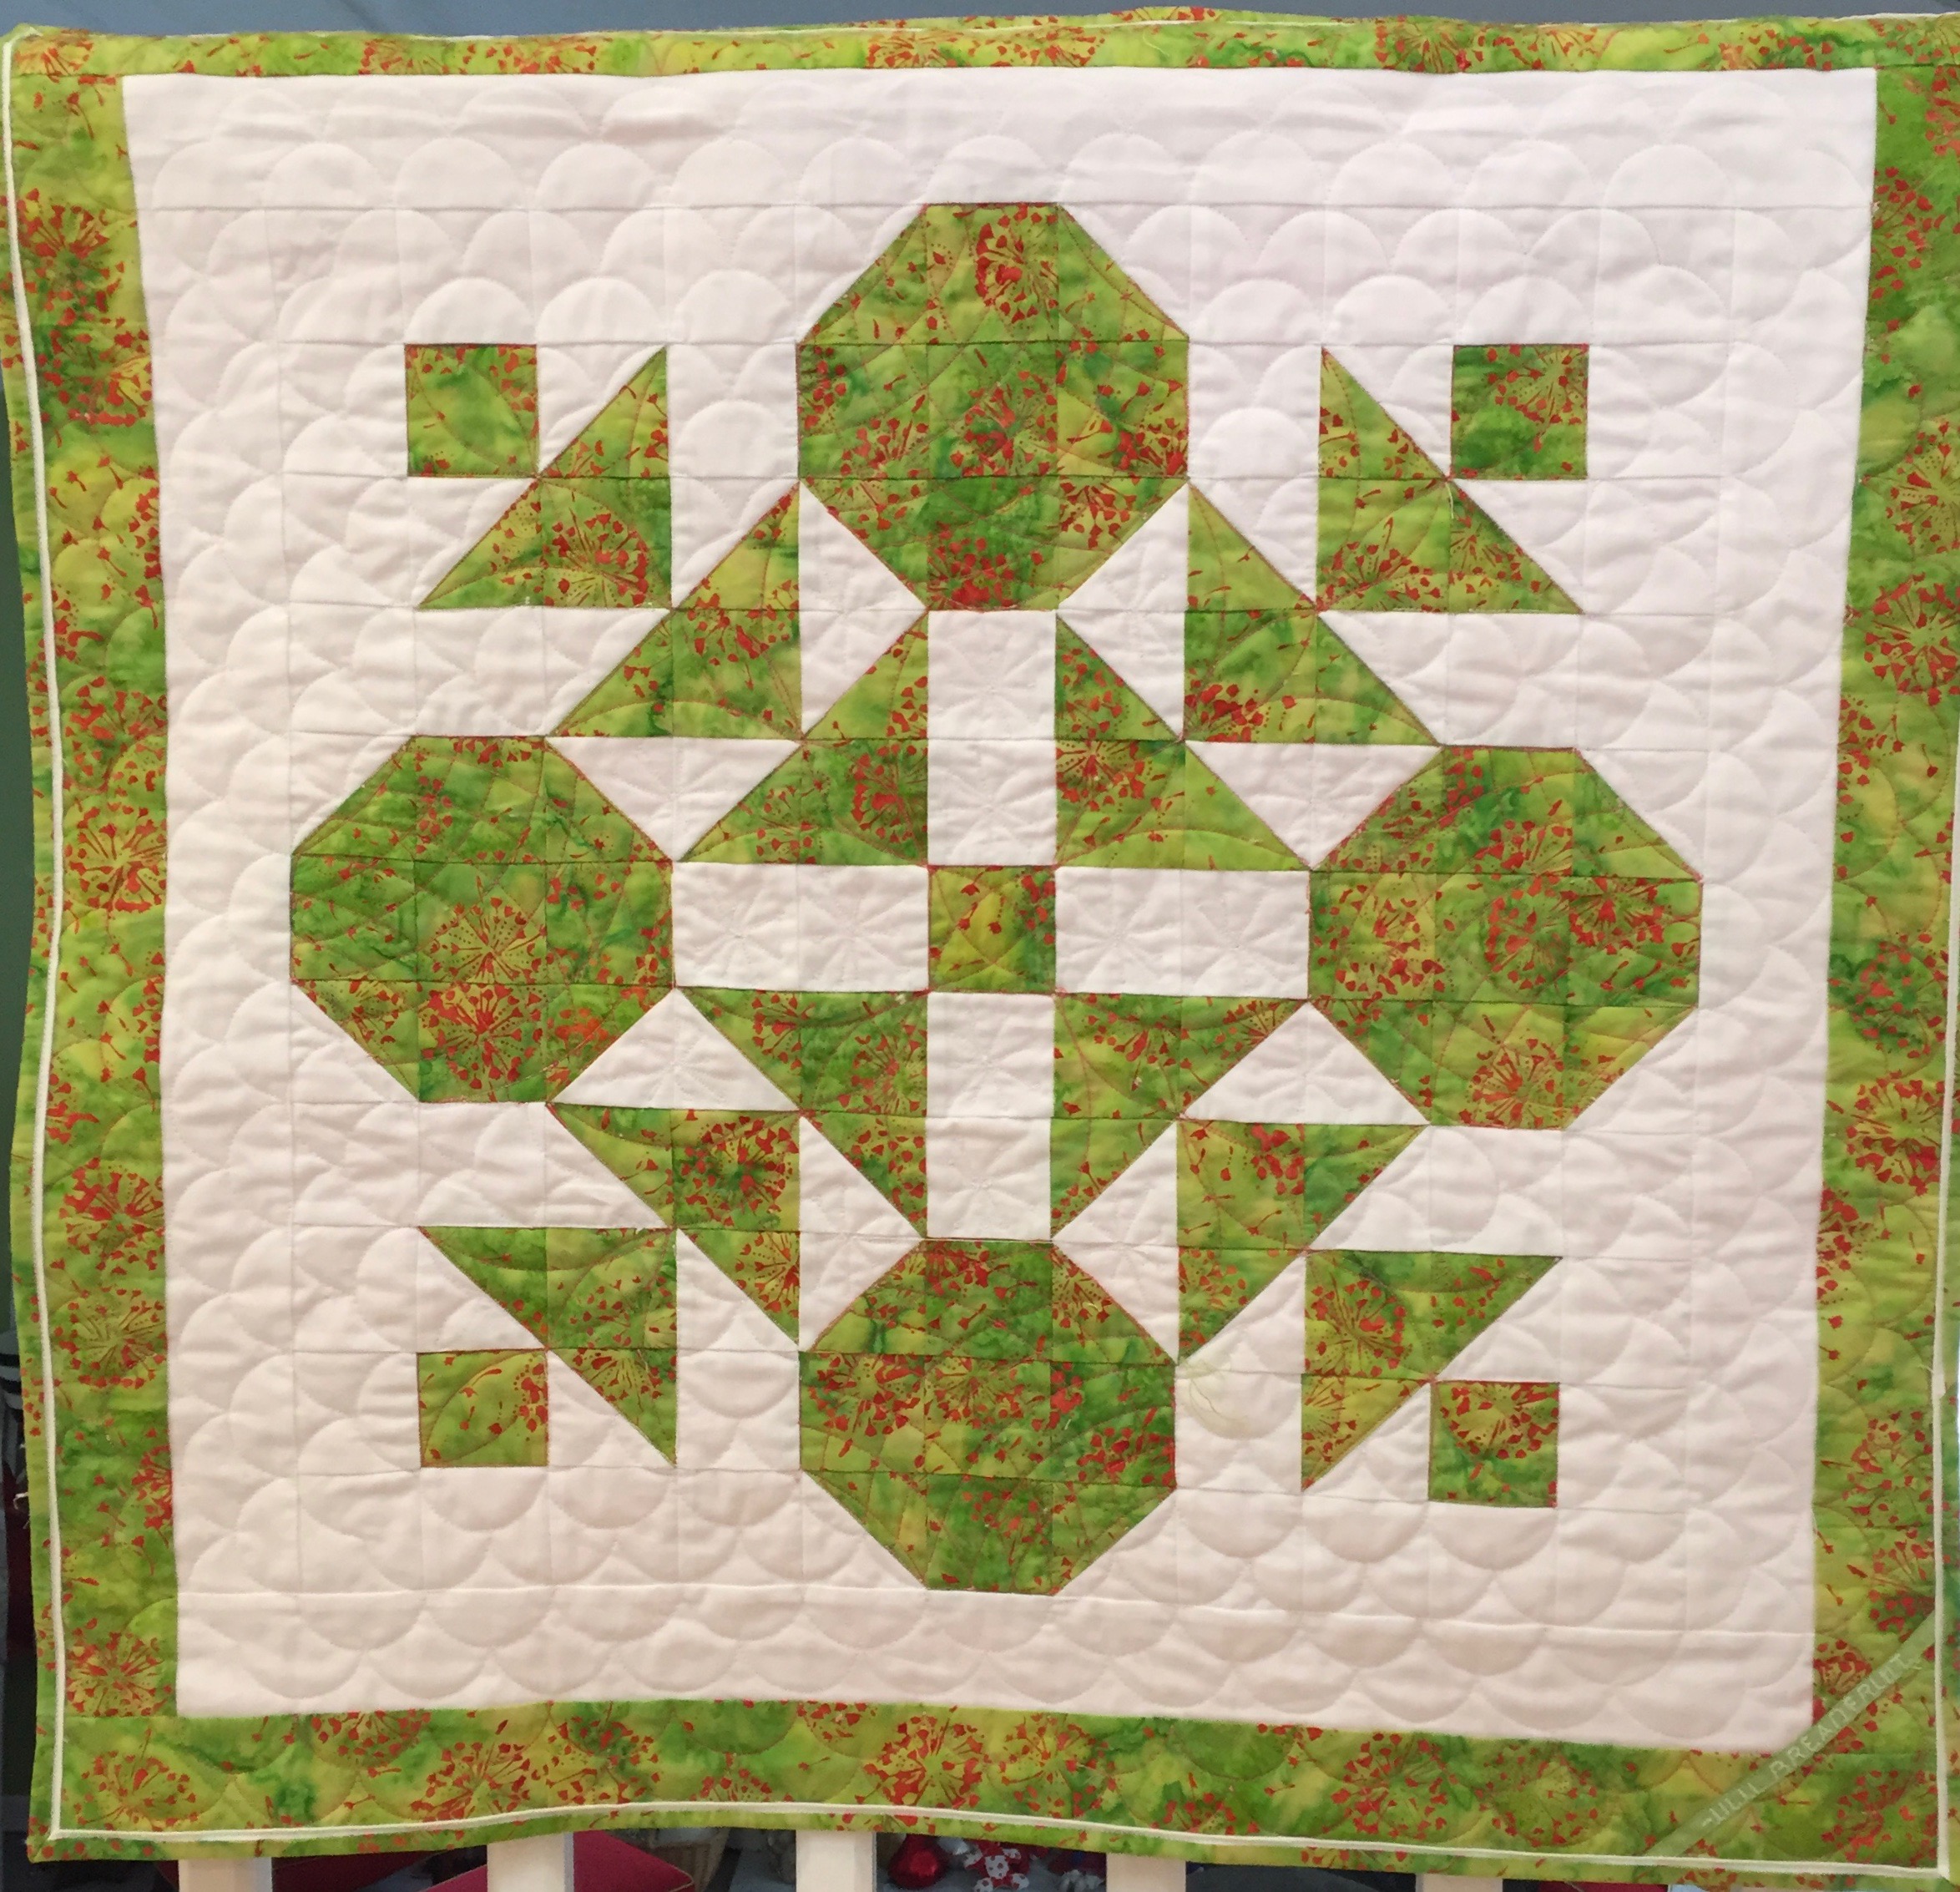
This month I completed the fourth and final of my set of pieced 30" x30" Hawaiian wallhangings out of batik fabrics. It was made from a pattern from beyond the reef that has a pixellated approach to achieving a Hawaiian feel as an alternative to the otherwise rather intimidating one piece appliqué technique. After the rose-colored Anthurium, mottled-green Fern (Laua'e), and golden Pineapple, the last was the Breadfruit ('Ulu) which I chose in a bright colorway. Breadfruit was the smallest (11 squares by 11 squares) and simplest of the four, which was good because by now I was somewhat bored but determined to make a complete set. I googled pictures of the breadfruit and its their coloration and cross sections to guide me in the batik I chose for the quilt.


Aspects of the assembly were already addressed in the Anthurium (2/18/22), Fern (3/13/22) , and Pineapple (6/1/22) posts so I devoted just one photo to the row by row assembly of the Breadfruit and focused this post more on the quilting portion. There are basically four rounds and four stems composed of inverted triangles for the breadfruit. I would need to pick a design for those two features. The background I would again do in clamshells, as I had done for the previous three wall hangings.


I auditioned thread colors for the FMQ. I try to keep the front and back colors the same or very close so that slight differences in thread tension would not be obvious. Although I usually do not like variegated thread in the bobbin, I chose the lower left coral mixture because it fit so well with the backing fabric. On the front I opted for the darker coral thinking it would bring out the bursts of coral on the green batik. Not only was I being brave, avoiding matching green to green fabric, but also the dark coral would blend with the variegated backing thread in case of a slight imbalance in thread tension.

The four rounds of the breadfruit seemed rather bland as piecing detail goes, so I wanted to punch them up with the FMQ. I had long admired curved cross hatching and wanted to learn how to do it. I also had cited learning to use my arc templates as a 2022 quilting goal. I decided to combine the two lessons, which would challenged me to stretch myself in creativity and skill. Sketching some arcs on a plastic sheet protectors overlay I picked a radius and spacing for the arcs. The larger arc and wider spacing appealed more.
I used an 8" arc with a 3" depth, A3; the 8" fit in well with the roughly 6" batik rounds. The 8" was wide enough, overlapping the perimeter sufficiently it did not intersect the edges at too shallow an angle. The rounds appeared more three dimensional, almost like spheres
Angel Walters'
Shape by Shape quilting book was my inspiration for the triangles along the stems. I inverted the book illustration and created four arcs facing to look like the opening petals along a stem.
I was on a roll with my arc templates. First I stitched diagonally down the line of inverted triangles with pairs of the smallest A5 arc, 4" wide x 1½" deep. Then I went back with the larger A4 arc, 6" wide x 2¼" deep and did the outer curves. My favorite straight edge,
Slim by Angela Walters helped me travel from point to point as needed. I was pleased with the combination on the stems with the adjacent curved cross hatching on the rounds.
Like on the other three wallhangings from the
beyond the reef pattern, I quilted clamshells in the outer borders. I used coral thread in the outer batik border. I used white thread in the inner border, tucking the clamshells down among the breadfruit. But this time, in the outer border, I did two rows of shells, even though suspecting that my binding would clip the tops off a second row. But I risked the clipping because I wanted the edges to be held in a bit so they would not be wavy as happened on the fern.

I did not want to finagle partial clamshells within the center portion, so I brainstormed other options. I tried straight lines but they seemed out of keeping with all the curves elsewhere. Then I looked at the coral fireworks type burst print within the batik fabric and decided echoing them might be appealing. Doing them freeform would also be a nice break from all the ruler work. I considered doing the bursts in coral but decided against it. They would be too distracting so I kept them in white for texture and not visual impact. Although I considered half-bursts in the triangles, I chose to keep things simple and put full bursts in squares and triangles alike.

I machine embroidered my name and year label for on the back; but I put the quilt title label subtly on the front lower right corner, 'ULU_BREADFRUIT.


The breadfruit may have been the least complicated from a piecing standpoint, but the quilting gave it some interest.
The
background story of the breadfruit – neither a bread nor a fruit – was fascinating and gave this project even more interest. I've included two excerpts from the background story link.
According to Hawaiian myth, the breadfruit tree originated from the war god Kū, who decided to live secretly among mortals and start a family. After a famine gripped their island, Kū told his wife that he could save them from starvation, but he would have to leave his family. Kū then descended into the ground where he stood, and his family watered the spot with their tears day and night until a small sapling sprouted, and quickly grew into a fully fruited breadfruit tree that saved Kū’s family and neighbors from starvation. This led to a Hawaiian saying about marriage: “look for the oozing breadfruit,” or in other words, look for the one who will always be able to feed you as Kū did for his wife and family.
- All parts of the tree, including the unripe fruit, are rich in latex, which can be used as a waterproof sealant, a paint when mixed with pigments, or in chewing gum.
- The leaves of the tree are often used as feed for livestock, fiber from the bark is traditionally fashioned into fabric for clothing, and the flowers can be burnt as a natural, powerful, insect repellant.
- The wood of the breadfruit tree is especially useful, thanks to its light weight and durability. The wood is used for everything from surfboards, traditional Hawaiian drums, and canoes, to building materials for houses, especially roofs.
- The breadfruit leaves are even believed to have medicinal properties that can alleviate asthma, cure ear and skin infections, and ease toothaches.
Here are all four 30" x 30" wallhangings completed – and in the same calendar year, too! Plus, I was able to check off a 2022 goal of using my arc templates. This was a fun project and very doable having been broken up into four smaller projects.