When I attended the Long Beach International Quilt Festival with my two granddaughters last July, they were fascinated by an embroidery machine that was stitching an image of Minnie Mouse. The previous day, when we were not there, the demo embroidery sample had been Mickey Mouse and we got to take that sample home with us. It has about a 4" border on all four sides of Mickey before trimming. I promised the girls I would make Mickey into a pillow.
Friday, November 24, 2023
Mickey Mouse Pillow
Wednesday, October 25, 2023
Mini Pillows from Extra Blocks
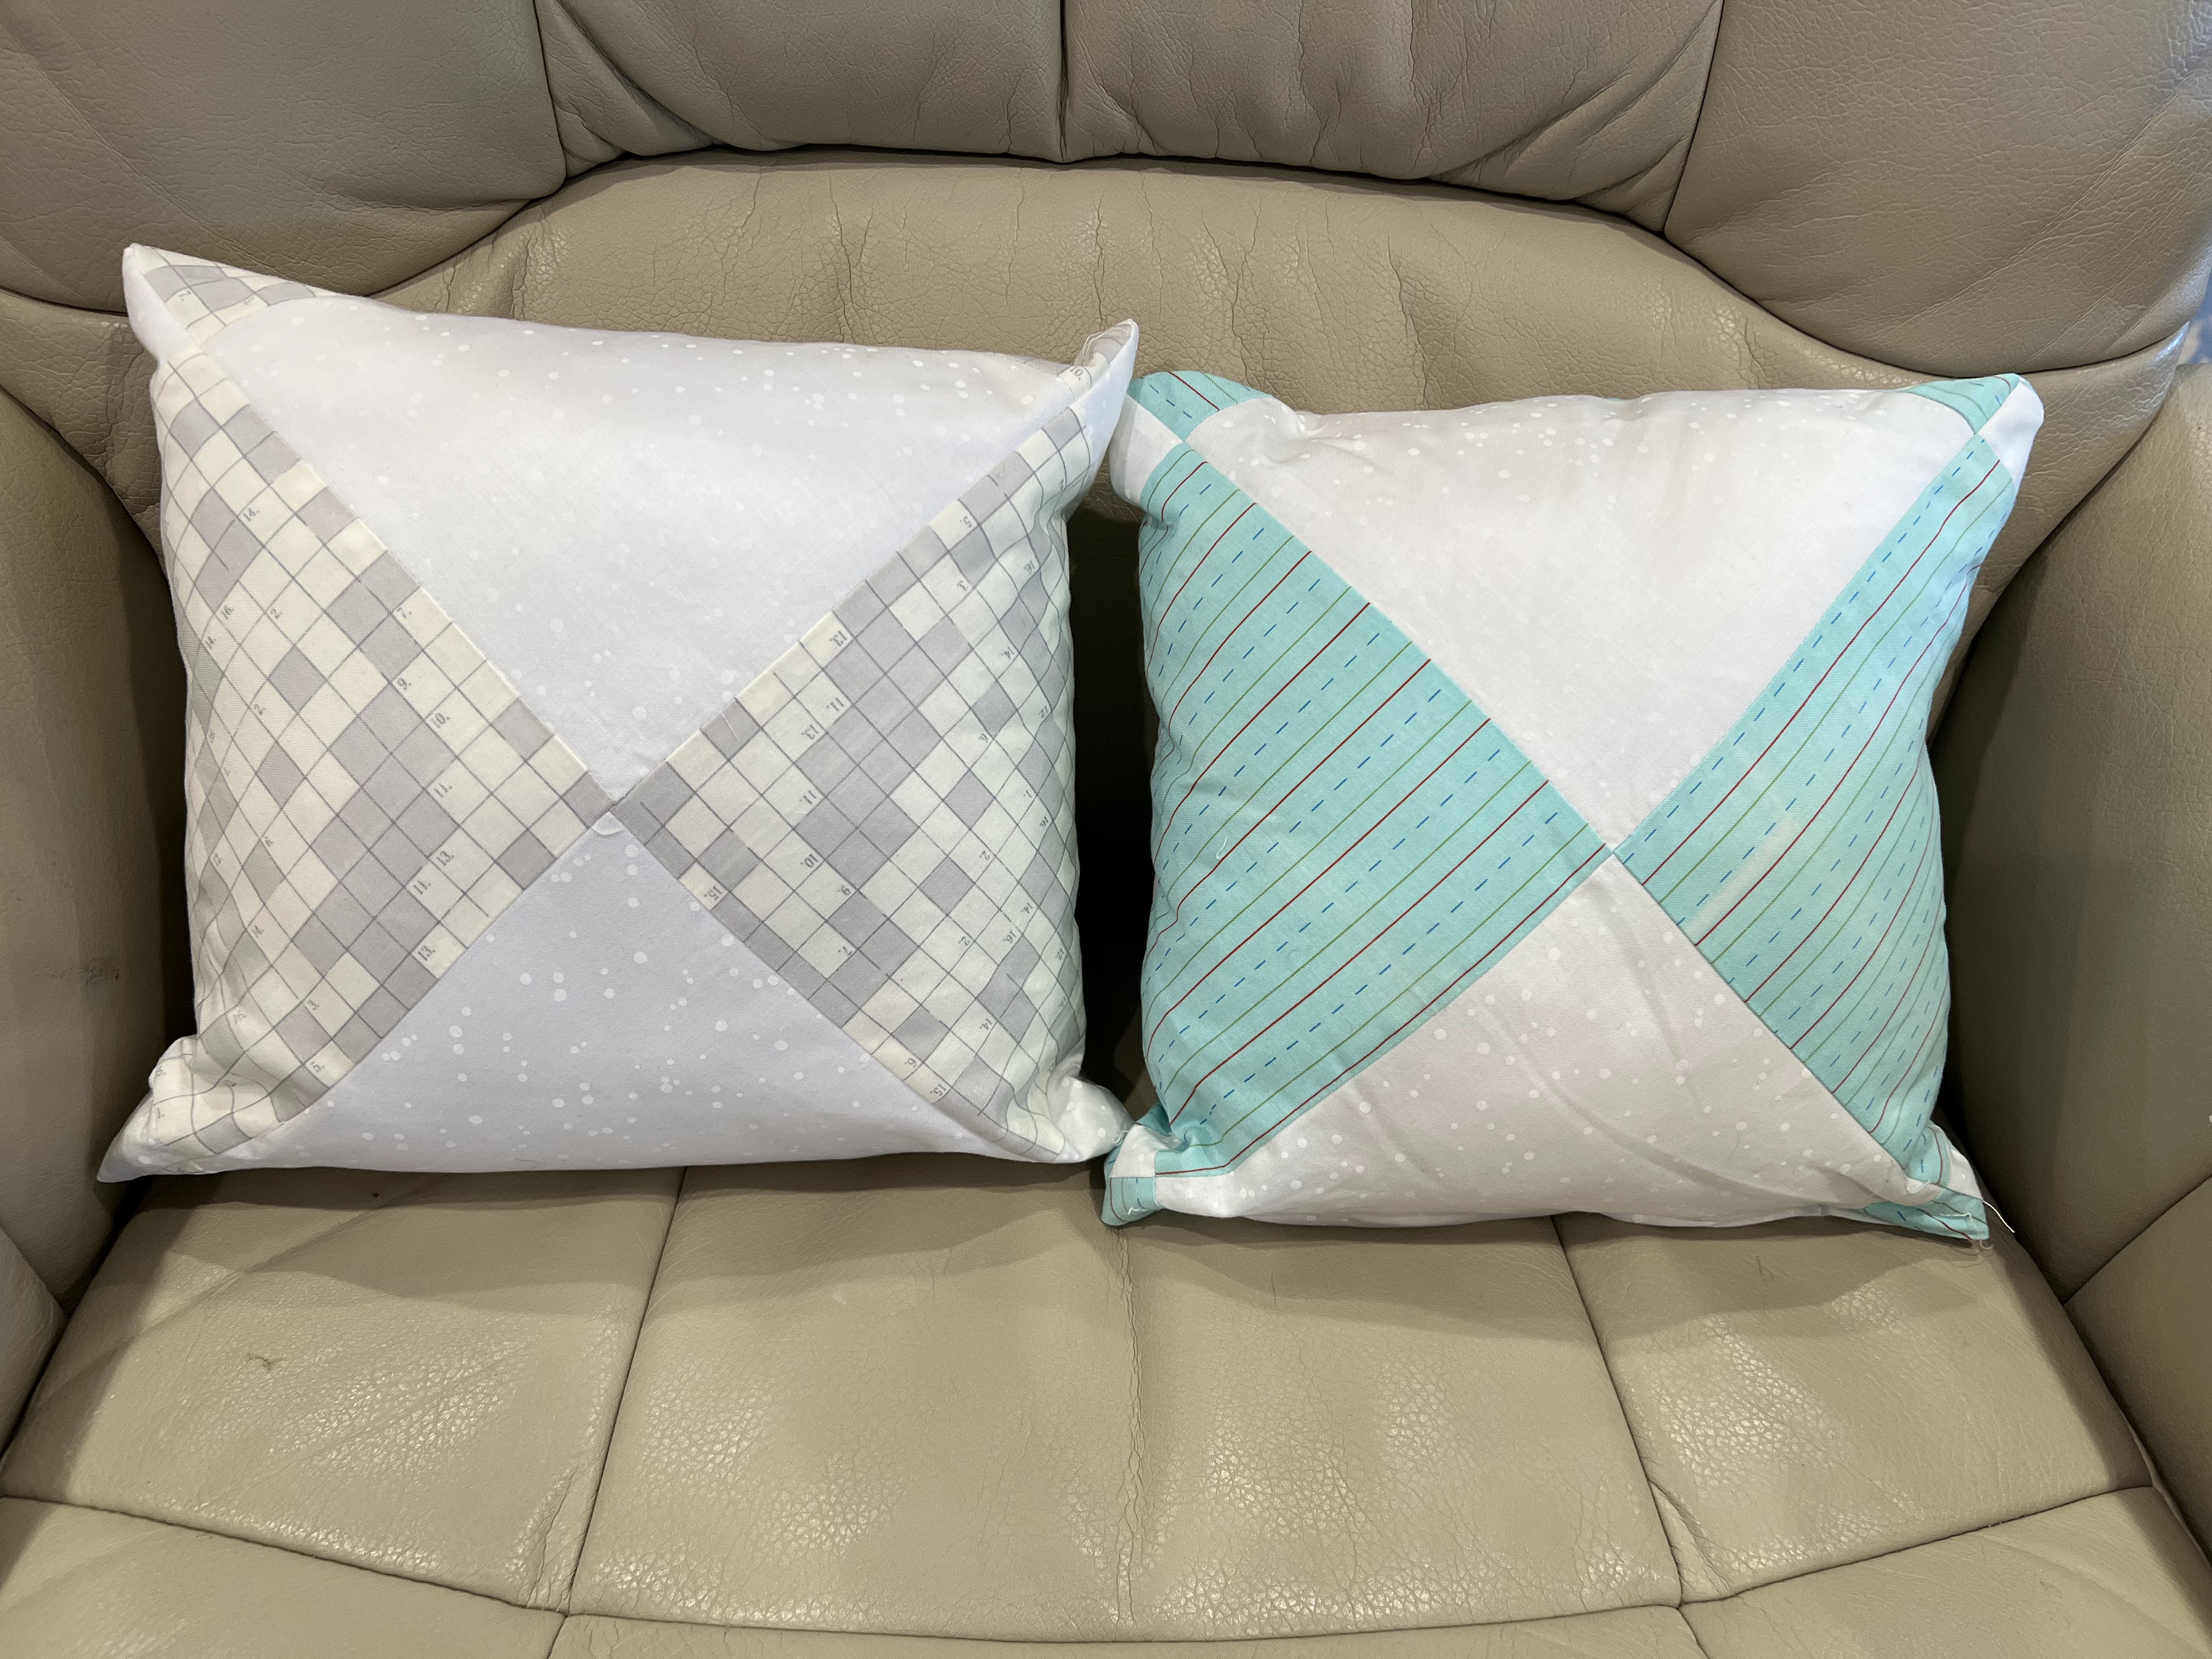
While working on a community quilt with some of my quilty friends, I had two sets of a four block quad leftover from the quilt pattern Open Options by Material Girlfriends. I could have made one two-sided pillow but it would have been rather large. Instead, I had two pillow forms that were each approximately half the square size of a four block quad. By placing a form on the diagonal and folding the quad block corners in to the center I could make two mini-pillows. I would remove half of one block and insert a zipper in that seam, carefully, since it was a bias seam and could stretch. Then there would be an access side to insert the pillow form.
- I thought I needed to add a strip to give more seam allowance and supply more fabric for overlap at the zipper. I did not. I wound up ripping it off.
- I underestimated the seam allowance size needed to make the pillow cover fit the form snugly. I re-seamed three times going from ¼" to ½" to ¾" before saying this is good enough. It could have been tighter still, but I wanted to declare this "quick" project done!
- I took the first zipper, the one in the aqua pillow, out twice and inserted it a third time due to the seam allowance change. You can guess how this warped that bias edge and how difficult it was to pick out stitches from the zipper tape. I had learned by the second grey pillow; I only inserted the 9" zipper once using the largest seam allowance.
- I should not have used zippers at all and just stitched the opening closed. These pillows are small enough at under 11" to be just tossed in the wash as is, without removing the covers.
Those triangles peek out differently for the front and the back of each pillow.
I still think this is a cute idea for leftover blocks. Remember the old adage, "Measure twice, cut once"? I need a new adage. "Measure once to avoid sewing three times!"
Tuesday, October 17, 2023
House Pillowcases
My friend Kathie and I get together once a month to sew a project or try a new technique. In October I was going to demonstrate, and she was going to learn, the burrito method of making pillowcases. My 5/27/19 blog post has a brief tutorial on the sewing portion of how I make these. She made one pillowcase at my house with my fabric selections and me coaching her. I just love that house fabric! I waffled between orange and brown as the color for the accent strip and then decided the brown would bring out the tree trunks.
A couple days later, I got out my fabrics again to make the complementary partner to the king size pillowcase we had made that day as a learning tool. I had assured Kathie that after she'd made a few pillowcases and the technique was no longer new, she could whip out a pillowcase in 20-30 minutes. Confident I knew what I was doing, I sewed my second pillowcase up in short order, being careful enough to reverse the polarity of the band side. Then I went to photograph the pair for my blog and ... whoops! They were different widths. So much for cocky self confidence. At least I discovered this faux pas before deploying them on the bed.
In my blog post for 5/11/19 I had stated cutting instruction for standard, queen, and king size pillowcases for directional and non-directional fabric. I quote here, highlighting where I had goofed.
With directional fabric for a king size pillow (20" x 36"):
Cut the main body 41"along the grain x 37" slightly less than the WOF. The 41" wraps around the pillow with only one seam along the length. Main body needs 1¼ yards to accommodate the 41".


Monday, March 6, 2023
Bathing Beauties for My Husband
My husband and I were going into JOANN™ fabrics on a whim to look at their jigsaw puzzles. They have quite a selection in our Livermore store and we are hooked on buying and assembling them. As we walked in the door, there smack dab in front of us was their clearance rack of fabric. My husband immediately glommed onto a bathing beauty print. I will agree it was very striking and I did love the blue background. He loved other parts. I asked him if he wanted pillowcases out of it. He agreed that pillowcases would assure him sweet dreams.

I bought 2½ yards of fabric to make two king size cases. Because of the directionality of the print, 1¼ yards is needed to wrap around each pillowcase. The border and accent strip fabrics I would get from my stash. Even though none of the girls is wearing an Itsy Bitsy Teenie Weenie Yellow Polka Dot Bikini, the fabric reminded me of that song and so I felt polka dots were an appropriate embellishment. Here is what my husband will see when he first opens his eyes in the morning.
Friday, December 30, 2022
Pair of Christmas Train Pillowcases
While I had the fabric combinations decided, I wanted to finish two more king-size pillowcases. The feature fabric was scenic with Christmassy red and green trains.
I was not completely successful in my fabric reduction because here is what I have left.
Train Fabric: 30" x WOF + twice 3" wide x 41"Swirl Fabric: 17" x WOFRed Accent: 7" x ½ WOF
Tuesday, December 27, 2022
Christmas Season Pillowcases
There are piles of Christmas fabric on the dedicated top shelve of my stash closet. Each piece was irresistible when I purchased it, yet they do not necessarily go together with each other for a quilt. I got the idea of clearing some space in the crammed shelf by making pillowcases from these fabrics. I made four pillowcases before before running out of time/steam but I also set aside fabric selected for another pair.
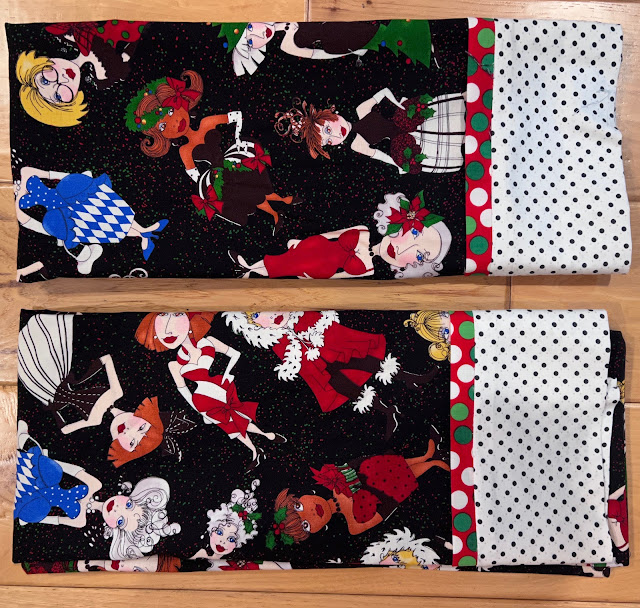
A good portion of these fabrics were a raffle prize from my guild's 2017 quilt show (post for 5/2/2017). The fabrics I won there were of a party lady theme and a nutcracker theme. The party ladies I paired with some of my polka dots. Seems to me partying and polka dots naturally go together – kinda like the bubbles in champagne. I gifted this pair of pillowcases.

Saturday, October 23, 2021
Operation Tea Towel


Tuesday, November 24, 2020
Masquerade Extras
The completion of Masquerade, a quilt in the making for nine years, was announced last month in my post for 10/16/20. You do not make a quilt from 173 hexagons, each from 6 equilateral triangles, without having some leftover triangles. What a shame to toss out those perfectly uniform shapes as scraps. I joined them together as far as they would go in quasi-random order to make one side of a pillow. I was not free-spirited enough to be totally random. Total randomness would have resulted in two triangles of the same color falling side by side somewhere, and I prohibited that from happening.
I also had a narrow strip of the mask fabric left over. Not large enough to make a pillowcase but certainly adequate to add a focus band on a pillow. I flat fell seamed a blue band and a green band on either side of this mask piece.
I joined the banded mask section to the pieced triangle section right sides together to create sort of wrap-around seams. The result was a tube size 21" x 13". I sewed one short end closed and turned the unit right side out. A couple straight stitching lines an inch or so in from the long edges gave it two solid-color flanges. This pillow was a quick, spontaneous, impromptu creation so I added no zipper nor Velcro nor overlapping flap. I stuffed it as is and machine sewed the remaining short edge closed. The result was this pillow. The following photos show front and back – or maybe back and front depending on your preference.
But wait! I still had some half-equilateral triangles left over from the edges of the strips used to cut the full triangles. How could I waste those luscious colors and toss them in the trash? Granted they were small and showed the selvage printing, but that could be interesting, too. I sewed them together matching those with similar angle slants and leaving the selvage printing in place. Some were bigger than others but since they had all been cut from 3½" strips, they made several uniform width columns. If grouped judiciously, they could approach approximately equal heights. I had leftover piped, striped binding from the Masquerade quilt, so I tucked some in the seam at either end before adding orange vertical edge strips. After trimming, I added blue and green horizontal bands on the top and bottom as on the previous pillow. I sized the added blue and green strips such that this pillow also ended up at 21" x 13". Since these blue and green bands were narrower, I chose not to stitch them flat as flanges. They adjoined a swirly orange back in a continuous soft contour.
The front fabric of the quilt was not all I had left over. I had 8 yards of the fabric to use for the backing of the king-size quilt. See my 9/16/20 post for the story behind the graphic blue backing fabric. There was a fair amount remaining, but not necessarily in the size configuration for a pair of king size pillowcases. But I am quilter! I can piece! Aha! I was careful to use flat fell seams so there would be no raw edges nor bumps where the sleeper might choose to lay his head. My resulting jigsaw puzzle ended up with an embedded mask band in the discontinuous backing fabric and a pillowcase border of black and white stripe binding fabric. The white accent band was from the same piping fabric as the quilt binding.
So here are the three pillows, a pillowcase, and a section of Masquerade folded back to expose the backing fabric. I had better be dark in my daughter's bedroom. This is a pretty wild combination of colors and shapes and patterns, not necessarily conducive to falling asleep.


.jpg)
.jpg)

.jpg)