Remembering and organizing:
I'd bought one repeat of the rooster fabric. It had six roosters but I'd originally planned to make only four placemats so I would not need to skimp on the red border. I am glad I blogged about the rooster fabric. I had forgotten how I had planned to deploy it and the post jogged my memory. I find that when I blog, I often need to refer back to my posts to see what I had planned to do with a project or purchase when I have set aside for a bit. Reviewing my blog entries also helps me ferret out answers to those "Whatever was I thinking?" questions.

I looked up what the standard size for placemats is and it was about 14" x 18". Since I'd only bought ¾ yard of the backing, I would need to skim a bit off that 14" height dimension. I planned to make the mat asymmetric and use a larger area off to the right to practice some FMQ patterns. This design would work out in an informal setting where the plate could be to the left and all the flatware together on the right. As I cut the strips and sections for the placemats I organized them together with Wonder Clips not pins. These really are handy little notions. I am only gripping two layers of fabric here, but they work really well for grouping items with several thicknesses.
Assembling and quilting:
I poured through my scraps of batting trying to find small pieces enough for placemats but in the end had to cut into a piece large enough for a crib size quilt. Oh, well. I am sure there are some cloth books in my future. The quilt sandwich clung so neatly and firmly in layers that I felt I could forgo the spray basting and pinning. I got to try out a new stitch-in-the-ditch pressure foot for my Pfaff to secure some key places. That leading blade works very well at keeping the stitching line straight without jumping out of the groove but I did learn it helps to stretch the seam open a bit to aid in getting the stitching nestled deeper into the ditch.

I sewed a few other straight lines on my domestic with the feed dogs engaged before I intended to move over to my HQ-16 sit down mid-arm to do some curves and some ruler work. In the rectangular section on the right side of the placemats I had planned to use the new HQ Mini Scallop Ruler™ I had just purchased .

I was trying to decide the orientation of the scallops – horizontal, vertical, or on a diagonal like the dots. I began to fret over if the repeat of the scallop would interfere with the dot repeat. Then I decided I had a natural grid so why fight it. I opted to keep it simple. Sometimes less is more and I stayed on my domestic and put diagonal straight lines only on the right section.

I guess I really did want something squiggly though. I put wavy lines in the upper and lower band with feed dogs of my Pfaff still engaged, slaloming around the dots in a selected row.

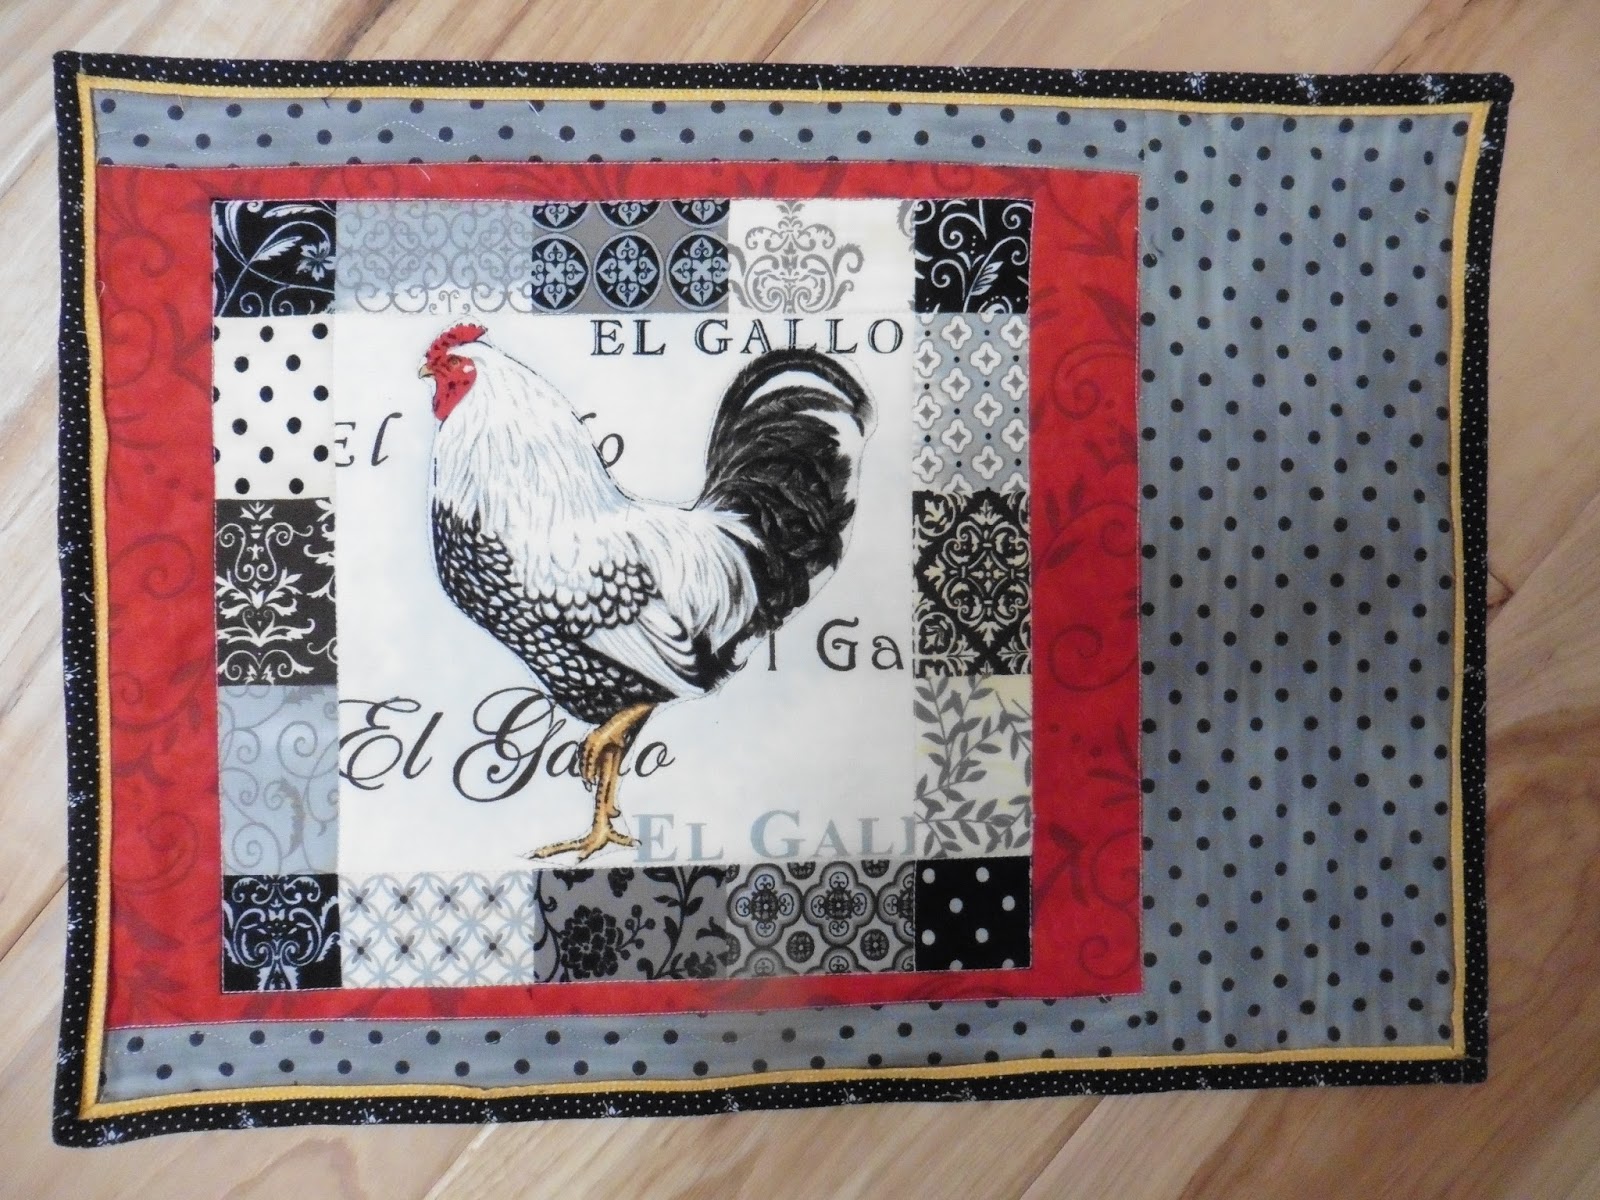
Once I'd come that far I also sewed around the rooster, rotating the placemat. As luck would have it, I ran out of bobbin thread on the fourth placement with just a short stretch to complete at the roosters butt. It is marked as the space between the two pins. Aargh... a minor annoyance but no big deal.

Part of the point of this placemat exercise was to get facile with rulers and my HQ-16. But sometimes the fabric just speaks to you in a different way. Just because you have a hammer, all the world is not necessarily a nail. I never did use Heidi (my HQ-16). Maybe I will on the next set of placemats.

Binding and fabric storage:
The grey dots and backing fabric had been pre-decided. I planned to bind the mats with the "magic binding" method because I wanted to introduce a spark of yellow and that approach is conducive to successful machine finishing. I'd last used the magic binding on my Fun Guys quilt. Its turquoise with orange accent can be seen in my post for June 17, 2015. I auditioned several yellow options, picking the brightest so it would show up, finishing only ⅛" wide. It is the brightest one on the bottom left. It had originally been my first choice but I thought I did not have enough of it. It had been folded in my stash like a fat quarter and I calculated I needed closer to a half-yard. Good fortune smiled on me. It was under a half-yard, but just barely, and so I could use it after all. I did not learn this until I had pulled three other yellows from my stash.
The grey dots and backing fabric had been pre-decided. I planned to bind the mats with the "magic binding" method because I wanted to introduce a spark of yellow and that approach is conducive to successful machine finishing. I'd last used the magic binding on my Fun Guys quilt. Its turquoise with orange accent can be seen in my post for June 17, 2015. I auditioned several yellow options, picking the brightest so it would show up, finishing only ⅛" wide. It is the brightest one on the bottom left. It had originally been my first choice but I thought I did not have enough of it. It had been folded in my stash like a fat quarter and I calculated I needed closer to a half-yard. Good fortune smiled on me. It was under a half-yard, but just barely, and so I could use it after all. I did not learn this until I had pulled three other yellows from my stash.

I have different folding sequences in my stash that allow me to tell at a glance how much of a fabric I have. My self-imposed rule is that a length of fabric has to be at least a particular amount to qualify for the associated folding sequence. Then I get pleasantly surprised if I have more than I need, instead of disappointed that I am short. (My daughter sorts by color; my method drives her crazy when she come to "shop" my stash. It is her birthday today, by the way. Happy Birthday, Robin!) The ones on the right were bright enough but I thought that the pattern was sufficiently large that a narrow accent would appear to keep changing color and be distracting. The straw like one with the woven pattern on the upper left matched the color of the rooster's legs and I thought the pattern would be a clever touch. But once I realized I had enough of my initial choice, the brightest option, I went with it.
I cut my strips for the binding 1½" wide for the black and 1¾" wide for the accent yellow. I calculated I needed 7 WOFs. Then I thought, with four placemats, why not just cut eight strips, two per mat? I did not have do deal with shuffling around one long length of binding, just four shorter lengths. I allowed myself the luxury of a bit of waste. Though knowing me, I will put it in my leftover binding box and not toss it.

The yellow and black were joined lengthwise

and pressed over in half so that an ⅛" of yellow peeks out.

Here the binding is attached to the wrong side of the mat, about to be folded over to the right side and stitched in place. The trickiest part is joining the tail end of the binding to the beginning end, but that is no different than any other type of binding. By the fourth placemat I had it down.

Here is a closeup of along the edge after the binding is pulled to the front and stitched in the ditch at the seam line between the contrasting yellow and the black. I used my stitch in the ditch foot here as well and it was helpful.

The mitering on the corners went well, too.

Completion:
Here are all four placemats completed, followed by closeups of each one. I hope Anna likes them.


Linking up now with this week's Freshly Pieced's WIPs.
Love your placemats! The yellow piping is great, thanks for the tutorial.
ReplyDeleteThank you. The placemats were fun to make. For a more detailed tutorial on the "piping" please check out the originator at
Deletehttp://www.52quilts.com/2012/05/tuesday-tutorial-susies-magic-binding.html
I'd referenced previous post of mine that used that magic binding method and buried within my post was a link to the tutorial from Susie. Hers is much more detailed. I also love that if you are short of a fabric you want to bind with, this method lets you get away with half the yardage since it is seamed lengthwise.
Thanks for the birthday wishes! Those placemats sure did turn out great, and I think both your FMQ and the contrast binding were really nice touches. That stitch-in-the-ditch foot is also a really good idea - how long have you had that?
ReplyDeleteAnd, I sort by size, THEN color, so that I don't even *see* fabrics that I don't have enough of to do a particular job. I'll admit I do wonder how you find anything, but you also spend a lot more time actually *looking* at/memorizing your stash than I do.
And, for the "OMG we are so related" files, I, too, have a plastic bag filled with nothing but excess binding. I tell myself the stuff is a pain to make, and you never know when something excess will come in handy for something scrappy!
I ordered the stitch in the ditch foot from Amazon about 18 months ago. At first I was not impressed but with a bit of practice and learning just where to look when I sewed, I do like using it. This application of it is perfect since there is a definite height difference along the contrast seam. Perhaps Santa will check in his bag and see if he has any for a Janome.
DeleteAnd for the record, my fat quarters and half yard lengths are sorted by color within their drawers. It is just the larger yardage stash that I pile on the shelves by quantity. But it is true. I sure do make a mess dragging out fabrics when I audition fabrics to start something new - or when a certain daughter of mine makes a request of some sort.
I keep imagining a strip pieced quilt in my future with all that binding ironed open and joined in a harmonious and eye-catching manner... Yeah, right!