My daughter-in-law's brother and his wife were having a baby and chose to not know the gender until the child was born. That is an unfortunate situation for quilt makers. But then I realized, I had not known the gender of my three children now 41, 38, and 35, when they were born, either. I could deal with a post-birth gender reveal several ways. I could make a gender neutral quilt or I could intentionally wait until the baby was born. Or I could procrastinate until the whole decision was moot. I procrastinated. But while I was dallying, I did have in mind some fabric I'd been saving that featured a cowboy and cowgirl in three gender neutral colorways. Several years ago, I'd bought a layer cake of twenty-two 10" squares and also a half yard each of the three feature fabrics. The line was called Sasparilla by Riley Bake Designs, dated from 2013.


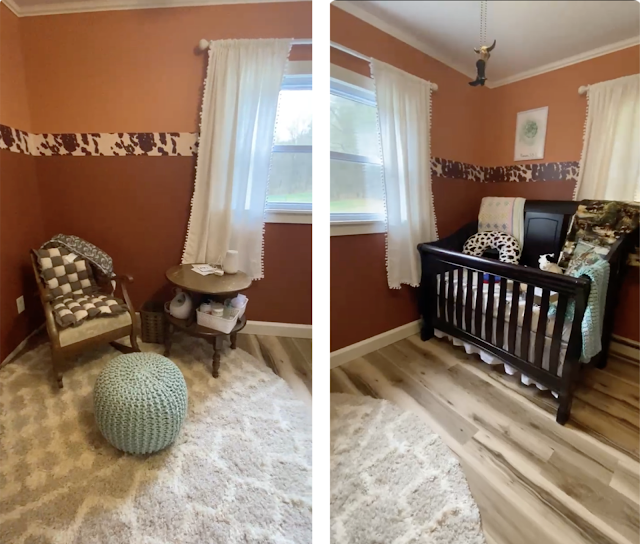
Procrastination paid off. I learned they'd had a baby girl. I asked my daughter-in-law what the tastes of the parents were and she sent me a video of the baby's room that meshed perfectly with the fabric I had tentatively chosen. Here are two images from that video. The colors of the
Sasparilla fabric line would go well: the browns of the walls, the grays of the rug, the black crib, and even the aqua accents of the puff and the afghan draped over the crib. Instead of choosing among the colorways I would use all three. The pulls for the ceiling fan/light were a cowboy boot and a pair of steer horns, so the theme would fit right in. The checkerboard puff on the rocker gave me a clue that their tastes ran rural traditional and that hinted to me that a square blocks kind of quilt would be preferred to something more asymmetric modern. Although that gray multi-patterned graphic rug did give me pause for thought.
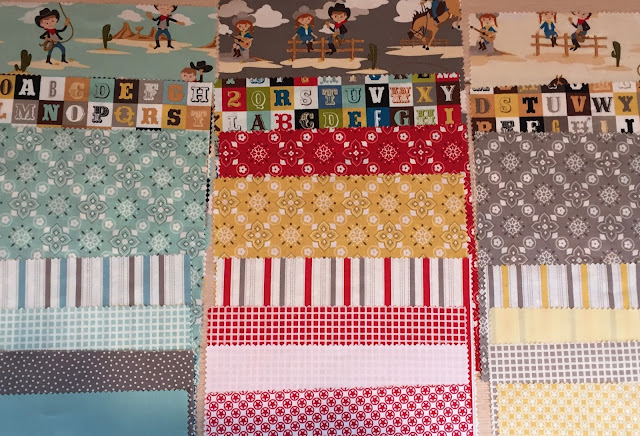
Studying my fabric choices I noted four distinct families. Top row was the three feature cowboy/cowgirl fabrics. Second row were three alphabet prints in an old western type font. Both of these were a large enough scale I did not want to cut them up into smaller pieces. Next was a grouping of four bandana type blender fabrics - bold colors but smaller scale print. Finally was a group of twelve fabrics in three colorways with four prints that were a stripe, a check, a dot and a solid. These three sets of four cried out to me to be made into blocks of Quarter Square Triangles. A QST block was slighter smaller than a 10" starting square. Arranging the QST blocks in a rotating group of four formed a pinwheel. This was interesting but a bit distracting from the feature fabric prints.
I wanted to feature the cowboy/cowgirl prints since they were cutest in my opinion and my favorite. I have never been good at random and so I chose to alternate the 10" squares of those prints with the QST blocks and impose a symmetry about the triangle placements. I pushed the strongest colored blocks to the outer edges so they did not dominate the softer hued cowboy/cowgirl scenes. This meant the darker gray scenes and the strong bandana print QSTs went toward the corners. I set aside the three alphabet squares since three did not fit well into my five by five arrangement but I have a plan for them. The red QST blocks were too jarring so I left them out entirely.
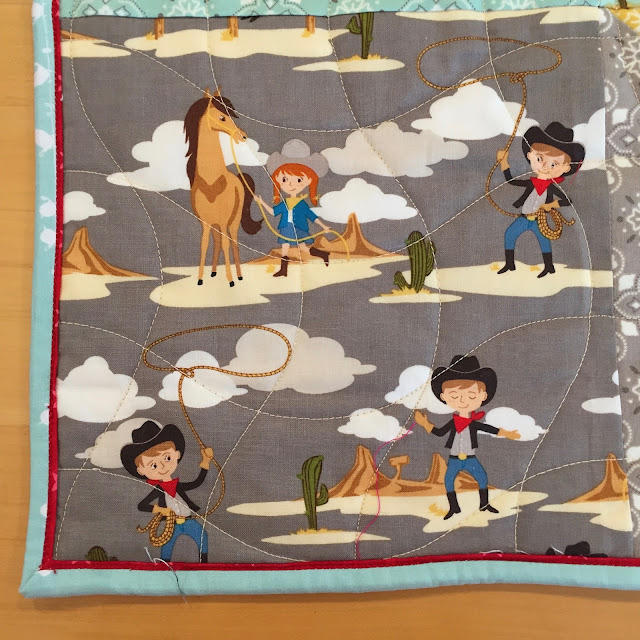
Noticing the print on the horse-shoe shaped nursing pillow in the crib, I chose this cow spot themed fabric from my stash for the backing. I cut out the batting and backing to go with the top and sandwiched all three. I set aside the assembled top while I let my mind mull over the quilting pattern. While waiting for inspiration I made the binding. I chose a pale aqua like the puffs and blanket in the room and added a narrow ⅛" hint of red peeking out to accentuate the red bandanas the cowboys and cowgirls were wearing.

For the focus fabrics of the cow persons and horses I wanted to quilt a simple grid so it did not distract from the print. But a plain grid was too boring so I knew I wanted something more interesting. I put to work my Handi-Quilter Wave C Template and tried a wavy grid. It would overlay nicely with the focus fabric. The lower edge has a deeper wave than the top edge and I chose to use that edge for more motion. I practiced the pattern with dry erase markers on clear page protectors and then overlaid it on a block to see if it looked pleasing. I was content. It was good to go ahead and stitch.

For the alternating Quarter Square Triangle (QST) blocks I thought I wanted something that would accentuated the "hourglass" feature of them and auditioned my old tried and true design for a square from Angela Walters. It looked ok, but I knew I would need a steady hand to make those arcs look smooth in a block as large as 8½". The big hangup I had with it though, was that the corners would not meet up and mesh with the wavy grid. How would the wavy grid look on the QST block? It would solve the continuity at the corners issue. On its own, the wavy lines design over the QSTs did not look particularly striking, but I thought the continuity with the other blocks would make the compromise worthwhile. So I abandoned the petal-like arcs, and did waves on both kinds of blocks all over in two orthogonal directions.


When I set out to quilt the wavy grid, I picked a pale golden yellow thread that blended well with the aqua and gray blocks as well as the soft beige-yellow blocks; pale golden yellow thread was also a success on the QST blocks. I did the horizontal waves first using the deeper wave side of the ruler on the lower edge. The orange sticky index tabs mark the midline of the wave for centering and spacing purposes. I did prefer the continuity between the blocks over an alternating quilting pattern.
When I added the vertical waves, that clinched the deal for me. I liked the consistent wavy grid all over. The curves complement the straightness of the blocks. Sometimes, less is more. And those wavy curves also echo the shape of a rope being swung into a lasso.
I suspect this little girl will be raised to be independent and to think for herself. I wanted the name for this quilt to reflect that sentiment so I decided to title it
Don't Fence Me In. I made grosgrain ribbon labels in black to show up against the cow print backing and sewed them on before adding the binding. Here are some edge and corner details showing the labels and the accent red flange on the aqua binding.
The finished quilt, front and back, is being held by my husband in the outdoor sunshine for lighting. The texture of the wavy grid really shows up. The finished quilt measures 43" square, a convenient size for "tummy time". It was not a convenient width for the cow spotted background fabric; I had to piece it. With combination of skill and luck, however, I matched those black spots and the vertical seam is well camouflaged.
I made three small pillows out of the alphabet prints. I experimented with pillow forms but learned that just soft pillows like stuffed toys were more cuddly and potentially more useful for propping up or cushioning baby. I opted for simplicity; no edge ruffles from which to clean baby upchuck and no zippers to remove a cover. Just toss the whole pillow in the washer and tumble dry at a warm setting. Following are photos of fabric and resulting the pillows. In the first photo, the six fabric squares for the pre-pillows are displayed on my design wall; in the second and third photos, the front and back of the three stuffed, plump pillows are shown next to their matching quilt. Once I have pre-washed the quilt, I will mail it and the pillows off to the new baby.


Beautifully done! I'm sure they will be so excited to receive it and use it!
ReplyDeleteWow - that is a spot-on make for the theming of that room! What a great gift! I love the way you sorted the colorways, and the secondary pattern it makes on the quilt. The binding also definitely makes it pop, and that cow backing guarantees that this quilt is perfectly suited for the environment no matter which way you face it!
ReplyDelete