What could be easier that sewing a pillowcase, right? (Oh, wait, maybe burp cloths are easier. As of my
2018 Year in Review summary I'd made over 200 of those little gems over that past seven years.) But either pillowcases or burp cloths are great log jam busters for me when I am in a quilting lull – reluctant to start a new quilt while stuck on further progress on the ones I need to figure out how to FMQ to finish. Burp cloths and pillowcases use up stash and give me a sense of accomplishment without generating UFOs. In my post about
Themed Pillowcases dated 5/11/19, I included cutting instructions for pillowcases but not sewing instructions. Here is a pictorial tutorial with mostly tips and reminders for myself... and my daughter.
I made up one complementary pair each for my Oklahoma granddaughter and grandson with a patriotic theme. I will be visiting when Flag Day June 14 occurs and there is still July 4th and Labor Day. They will not have the pillowcases for Memorial Day but at least I am blogging about them today. The flags and swirls are intended for the girl and the fireworks and stripes are intended for the boy. But I may be surprised when they demonstrate they have other ideas.
I used the fireworks pillowcase pair in the picture examples for the instructions. In the pinning, sewing, and pressing photos the stripe fabric is the body, the fireworks fabric is the border, and the paint splatters is the accent strip. I summarized the steps first in three groupings and then elaborated each at its associated photo.
Group A – Joining Body, Border, and Accent:
- Stack body, border, and accent piece aligning fold
- Cut at 20½ inches all at once to assure same width
- Fold over accent piece
- Pin and sew to body
- Lay on surface with right side of body up, i.e., outer side, accent side up
a) On top of body at accent end, pin border right side facing down (top: right to right) OR
b) Beneath body at accent end, pin border right side facing up (beneath: right to wrong)
- Sew along stitching line from adding accent
- Starting at body end, roll so wrong side of border fabric is facing out
- Wrap border fabric around and sew along same stitching line
- Pull out inner roll; keep pulling; do not lose faith
In joining steps 1 and 2, I layered and aligned each of the three fabrics on my cutting mat. In this case the center fold of each fabric is on the left and I have positioned the ruler to cut off at 20½", half of 41". The yellow stickie is to illustrate that I have folded the firework fabric back on itself so I do not have as long a stroke to cut with the rotary cutter. By aligning the fold and cutting all three at once I am assured that they have the same length measured as a circumference around the pillow. That fold also acted as a great matching point to find center when joining the pieces. I used to be stingy and try to refold the fabric so I would have a wider strip cut off rather than two thin ones. It is not worth it! I repeated the process with the stripe as the body and the fireworks as the border but neglected to photograph it. I usually do tend to cut the two complementary cases at the same time while I am at it.
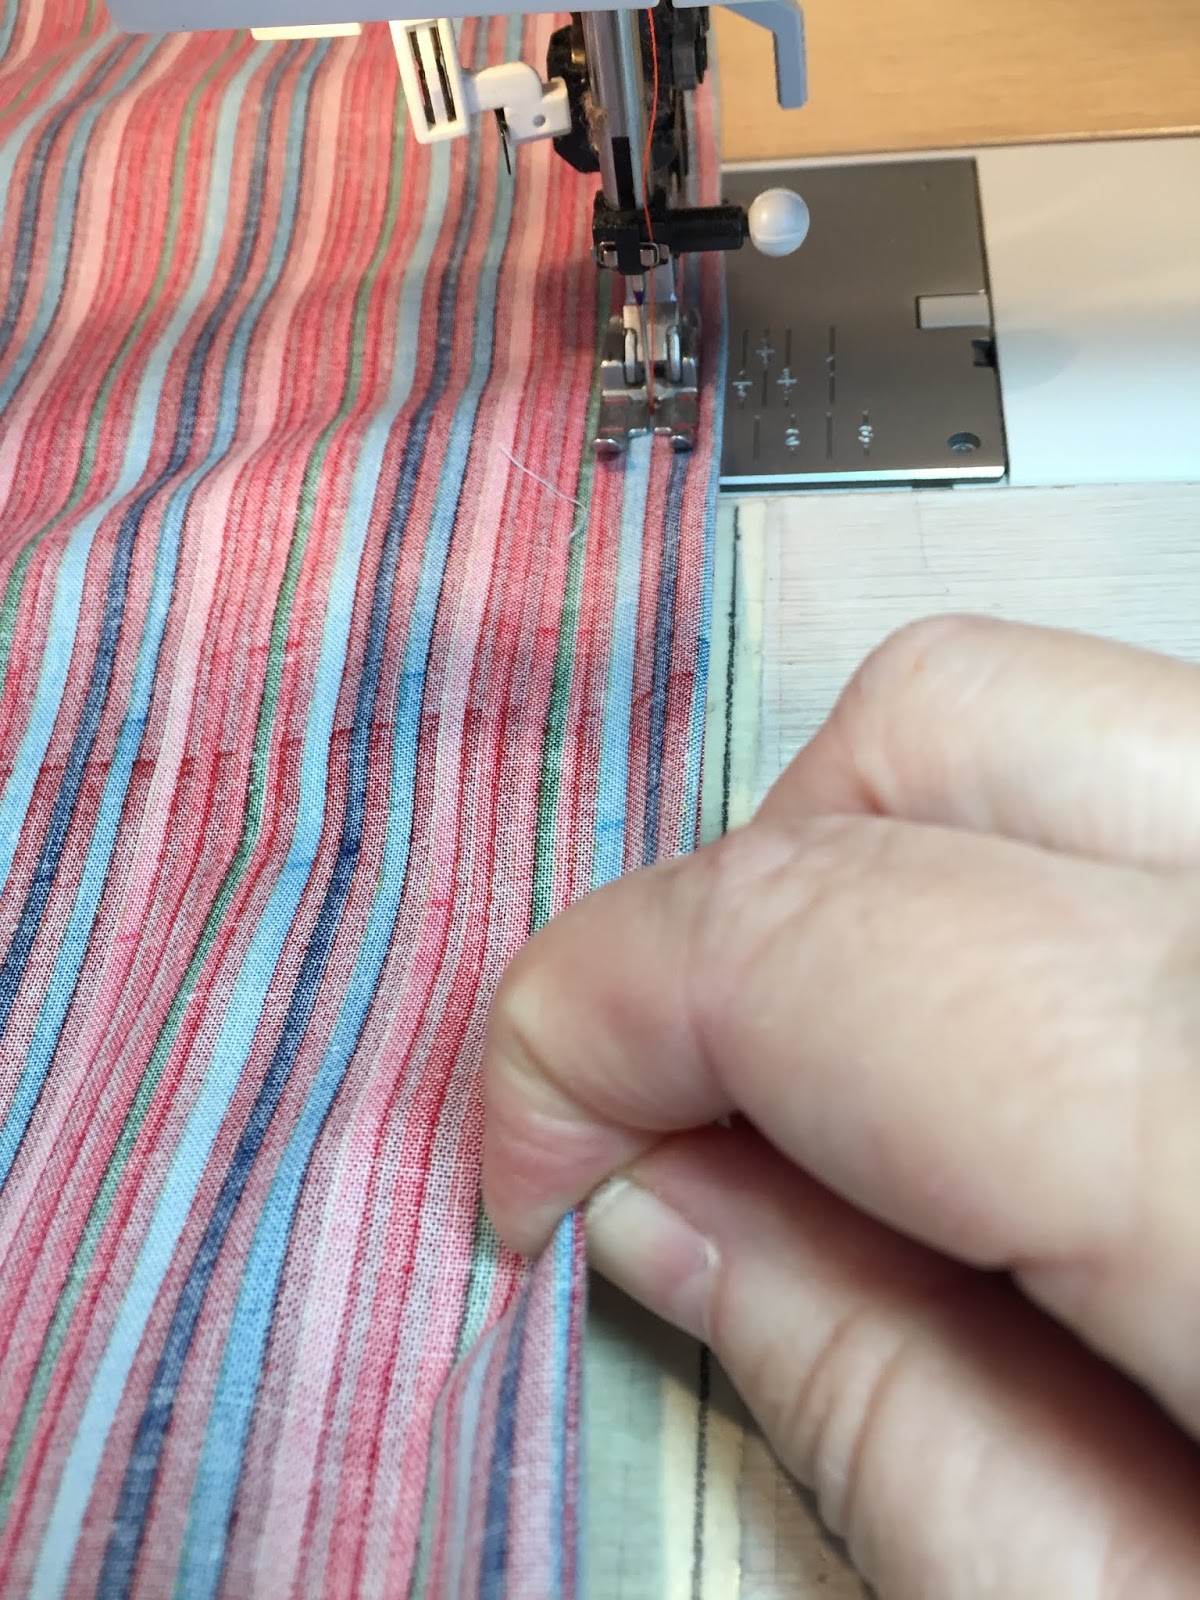
In joining steps 3 and 4, I have folded that accent strip in half lengthwise, right sides out and pinned it to the edge of the body. Remember that center crease? It is a helpful marker in locating the center of the accent strip and matching it with the center of the body. Then I sewed along the three thickness with a ½" seam allowance, removing the pins as I went. There is a ½" mark on the throat plate of my Pfaff but note I also have a masking tape strip on the lead in to my needle to help guide edges before they even reach that point.


Joining steps 5, 6 and 7 always make me stop and think. When I add the border, the right side always faces the body, whether I pin it to the right side of the body or wrong side of the body. In this photo I added the body to the border. This way the pins were on the top side. I could just have easily had the body facing right side up and added the border face down to the body. I will still flip it over to sew so I can follow the previous stitching line. Pins can still be removed from the bottom as long as they are perpendicular to the stitching and extend over the edge.
In joining steps 8 and 9 the goal is to align both long edges of the border with each other, right sides facing, assuring that the body remains rolled up neatly inside. I started by folding the body approximately down to the accent strip so I do not have as much distance to roll. The I rolled, rolled, rolled with the wrong side of the body to the outside, over and into the border.
Then I wrapped that opposite edge of the border up on itself and pinned, pinned, pinned. Here is another place when that center crease was helpful in alignment. I ended up with a long cylinder with the rolled up body within and safely away from the edge to be sewn. The accent strip was sandwiched between the two raw edges of the border.
Joining step 10 is when the magic happens. Have faith. Keep pulling and pulling and pulling and the body will pop out from within the border and the border will turn its self right side out. Magic! This is my favorite part – when I have done what comes before right. I once (once!) had added the accent strip unevenly so it did not peek out a uniform width. Undoing that whole seam to access that short area was not fun!
Group B – Pressing Tips and Order:
- From wrong side, press border away from body
- From right side press border away from accent strip
- From wrong side, press outward to crease border edge
This pressing instructions are more tips than a necessities but I included them because I think it makes for a tidier, flatter pillowcase. In pressing step 1, smooth out the border away from the body on the wrong side, pressing toward but not yet extending into the folded edge of the border.
Then in pressing step 2, iron the border away from the accent strip. Creases may have been introduced in the border fabric from pressing step one since both side are not visible at once.
For pressing step 3 again press from the wrong side but this time extend to the edge and iron a sharp crease into the border.
Check back on the right side and all will be neat and tidy. The accent strip will be free, of uniform width, and not partially covered by portions of a wayward border
Group C – French Seaming:
- Sew wrong sides together with 1/4 '' seam on short and long edges
- Turn wrong sides out and poke out corners
- Press short end seam, easing out seam allowance
- Press long side seam to one side by opening pillowcase sliding over ironing board
- Sew right sides together with 3/8" to scant 1/2" seam
- Turn right sides out and poke out corners
- Press short end seam, easing out seam allowance
- Press long side seam to one side by opening pillowcase sliding over ironing board
- Touch up pillowcase body
The French seaming steps are tips that reduce (still can't quite completely eliminate) all those pesky threads peeking out from enclosed seam allowances. Step 1 in French seaming begins with wrong sides together. Repeat. Wrong sides together. Wrong sides together. This is hard to remember. I cannot count the number of times I have forgotten this important first step in a French seam. The first seam, with wrong sides together, has a ¼" seam allowance.
A tool I find best for getting into the corners and sliding along the seam line is a
Dritz point turner and seam creaser.
Once the wrong sides have been turned out and the corners finessed (French seaming step 2) run the pointed end of the tool along that short seam from the inside. In French seaming step 3, pressing the short edge of the pillowcase is best done done two layers at a time since it is hard to get in there by placing the case over the ironing board.
The long seam of the pillowcase is best ironed by drawing it over the ironing board and pressing the seam to one side by feel, Step 4. In the next photo, the tip of the iron is at the seam line. It is difficult to discern with the stripe fabric.
French seaming steps 5, 6, 7, and 8 are basically repeats of steps 1, 2, 3, and 4 from the opposite side of the fabric and with a slightly larger seam allowance. With right sides together I pinch that seam and sew with a generous ⅜" or scant ½" seam allowance to capture all those itty-bitty threads that want to poke out from the ¼" enclosed seam allowance.
After a final good pressing the first pillowcase of the pair is complete.
Now for the extra credit challenge, should you choose to accept it. I sewed the striped body pillowcase first for a reason. Now, to make the complement... I wanted it to lie on the bed, with the opening in the opposite direction but with the border stripes in the same orientation as the stripes on the body of the first pillowcase. In the next photo note that the shocking pink stripe lies close to and below the royal blue stripe alerting me to the fact that this striped fabric is directional. Which raw edge of the border I sew adjacent to the accent strip determines the stripe sequence.
Once I decided which edge to place next to the accent strip I mark it with a pin so I do not have to wrack my brain a second time.
Had I wanted the pillowcases to open in the same direction (as they might on a twin bed), I would have picked the opposite edge. Think about it. Or don't. Probably nobody will notice it or care unless I point it out. And I can't. I live 1600 miles away.
I also made a pair of pillowcases for the parents' king size bed. These I prefer to match instead of making complements. They too have a patriotic red, white, and blue theme. I scratched my head on them because the fabric was directional and so was the map print I chose for the border. See directional discussion in pillowcase
blog post for 5/11/19. I guess I am just a glutton for punishment.
These are two standard pillowcases I made for my son Alex's birthday yesterday. The bunny fabric is printed the "easy" orientation across the grain so I only needed 3/4 yard for each pillow. The accent stripe and border were non-directional. I completed them late at night the day before his birthday so it is fortunate I did not have to think much. Here are photos of both sides of each pillow case.
Alex points out the bunnies on his pillowcase. Note I used those selvage edges as part of the ribbon trim to wrap his present.
I counted up and the pillowcases in this post consumed 8½ yards of fabric from my stash. That is progress of a different sort during my quilting lull. But enough blogging for now. I will link up to
Cooking Up Quilts' MCM #155 and then go get some sewing done.