Showing posts with label napkins. Show all posts

Friday, January 16, 2026

Six Placemats

My daughter sent me yardage of a Hoffman Spectrum Digital print titled Wanderlust Rome (ProductID: ZF-PAN-Q4441-339) and asked that I make placemats from it. The fabric is printed "sideways", in that the selvages are at the top and bottom of the following image. The horizontal repeat I measured as 17¼" is shown.  I cut the yardage horizontally (along the grain) into three 14" high bands each the ~2 yard length of fabric.


Each band I cut into 17¼" wide rectangles, but I offset them so each placemat would have a centered building, either the Capitol (from the top band) or the Coliseum (from the middle band). To center the Capitol on each of the placemats, I had to shift the band sideways, out of alignment from originally printed, and seam two partial Capitols to make one centered one; but the print was busy enough the seam was well camouflaged. I let the flowers of the bottom band fall where they may. I used the self-binding method where a backing fabric I supplied wrapped to the front and resulted in a narrow ½" border. Sandwiched between the front and backing was a layer of bamboo batting. Here are three of the six placemats prior to quilting.


The quilting pattern I used is right out of Angela Walter's free motion quilting book Shape by Shape. It shows up much better on the back. The petaled squares add a nice texture to the front without obscuring or distracting from the color-washed print.


With the leftovers from the horizontal band and leftover backing fabric there was enough to cut out six 14" squares. They will make matching napkins with serged edges. Since I do not have a serger, my daughter will do that part.

Thursday, September 25, 2014

Cleaning and Remembering

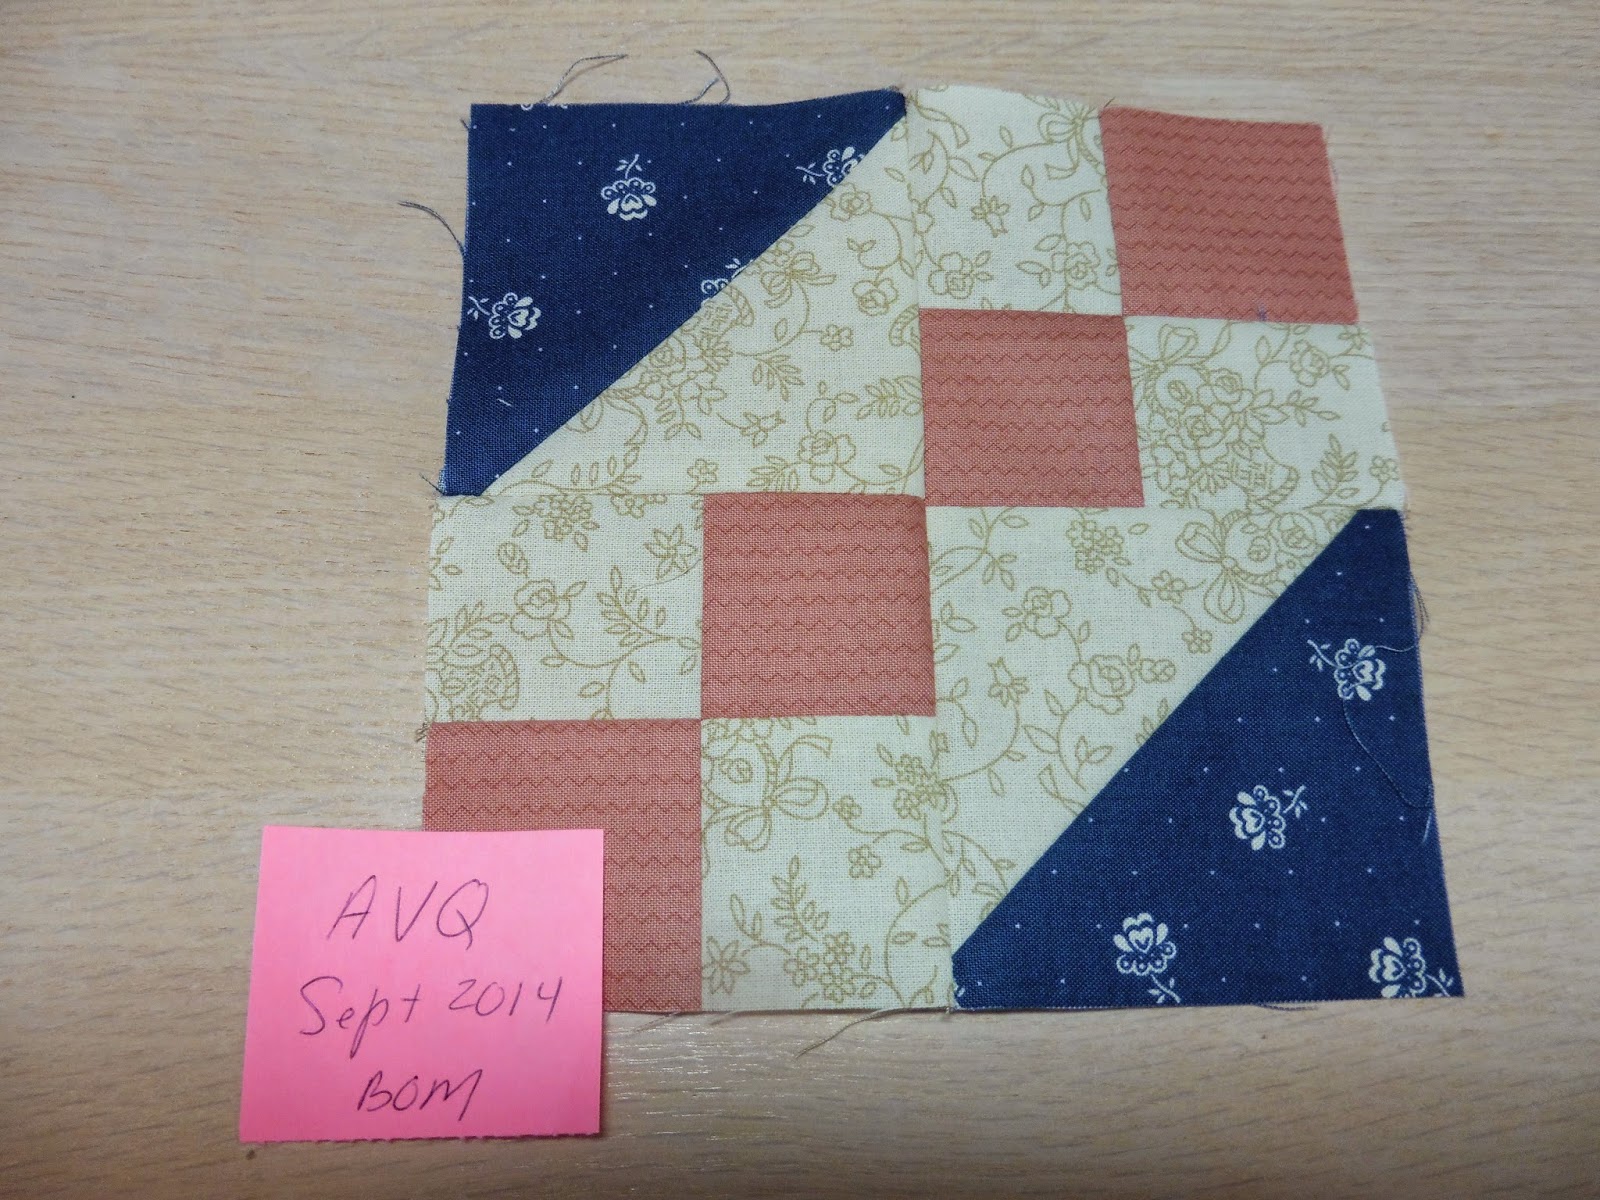
My daughter arrives tomorrow and we plan to spend a quilt-y weekend together, sewing, attending a couple of quilt shows, and taking a class. I was on a mission to clean up my sewing room so that she and I could both work in there. Clean up to me means recovering from past projects and beginning some sort of cohesive approach to managing my scraps. I came across my guild's block of the month and so sewed that up. I will turn that in next month.


I also found a block from many, many years ago, from another small quilt group at my work. When I began to assemble it, I discovered that the strip of the paisley print fabric that was provided was not long enough to cut out the four corners squares. Perhaps that it why I never did the block. Anyway, I substituted something in the blue-violet family from my stash for the four corners. The pattern is called broken dishes. I like the feature where the square in the center of the edge spans a seam instead of mating at a seam. Three blocks on the middle of the perimeter mate with two in the central section. This is kind of unusual and I will keep it in mind for a future quilt. The perimeter is based on a 2" grid while the center is based on a 3" grid; yielding a 10" finished block. 


I suspect the block looks better in multiple repetitions when the corners are the same as the large HSTs. But this is a singleton and the date to turn it in has long since passed. I will add it to my box of blocks designated for future use somewhere, sometime. This orphan will eventually get incorporated into my "glorious scrap quilt of the undefined future". The broken dishes pattern may live on in another quilt of a more planned, rather than random scrap colorway.

Something else surfaced during my cleaning efforts – remnants of some coral colored fabric. Last week we'd had a couple over for dinner and I'd bought flowers for the table, a dozen roses from the grocery store that I could not pass up because of their luscious color. I'd put three each in a bud vase by each person's plate. Then my quilter's brain recalled I had a fabric almost identical in color to the flowers. With guest arrival two hours away, I set out to find that fabric and make some matching napkins. I allowed myself an hour and, if unsuccessful in finding the fabric and making those napkins, I would settle for classic, but ho-hum, white napkins. I found the fabric I'd remembered having and had time to make just four napkins to use at dinner. I took the photo below during my sewing room cleanup when the roses are nine days old – and they still look pretty. What a color match!


Without my hemmer foot I doubt that I could have churned out those four napkins in so short a time. I'd had two yards of fabric, enough for six 20" napkins, but I'd set aside the remaining fabric to make more another time. That other time was during this clean-up when I unearthed the remnant. I finished the other two napkins then. I am so glad that I took the time a few months ago to learn how to use my hemmer foot. (I have an April 8, 2013 post on it.) It can do such a tidy, quick job once I mastered the trickiness of getting it started. See the edges in the following photo.


I still have three trays of recent leftovers to sort. During a project, I cannot bear to toss all but the tiniest pieces of fabric, and so the remains pile up. So here is the counter top stuff I need to deal with. (There is lots more in my closet, this is just the recent visible stuff.) I plan to tame the mess while my daughter sits and sews. It will recall memories of past quilts. I see flannel strips from burp cloths, the remains of the Ghastlies Quilt, and the baby Nautical Quilt, and the Owl and Pussycat quilt, and the newly made napkins, and I am sure others will surface. Yep. There is a piece of backing from the my son's Monkey quilt and some cloth books, too.


For inspiration I keep referring back to the QuiltingIsMoreFunThanHouseworkBlog and all her Scrap-A-Palooza tips. Be sure to check out the Scrap-A-Palooza Quilt Gallery tab to see what marvels can be made of all those scraps! I am impressed.

Tuesday, April 8, 2014

WIP: Home Decor Items

This week I finished the piecing on my son's Monkey quilt and made the binding. The piecing went very quickly, taking less than two afternoons. I have not yet decided how to quilt it. This is the central panel section. It is from the Lollipop collection by Sandy Gervais for Moda.


I will save the reveal of the whole top until after I've it quilted. In this central section I think I will outline the critters and leaves. I am lukewarm about doing a meander or loops in the borders (shown in my previous post) so I'm waiting for other inspiration to strike. I set this quilt aside until I have a better sense of how I want to quilt it. In the meantime I am working on some home decor projects - napkins, a lampshade, and a couple of pillows.

I am a person who is really into color, so it is unusual that something black and white appeals. But I think if it has a quirky aspect about it and does not take itself too seriously, I like it. A good example is this set of dishes I own and love called Barnyard Toile by J. Willfred Ceramics. Here is the pig plate from the set. There is also a cow, a sheep, and a rooster.


I have a red tablecloth that I can use with these dishes, but when I want all the leaves in my dining room table, the only color I really have for the longer size is a white tablecloth. White does not display these dishes to their potential. But yellow! Yellow goes really well with white and black, so I ordered a tablecloth in lemon from the online site LinenTablecloth.com. Then I spotted this fabric. I thought it would make really cute napkins to go with those plates set against a yellow tablecloth.  I do not have a serger but I figured that hemming eight napkins would be a good way to build my skills with my hemmer specialty foot for my Pfaff. I bought 2 1/4 yards of Taxi Black Viney Stripe by Alice Kennedy for Timeless Treasures to make eight 20" square napkins.


The last time I used my hemmer foot was for the hem of a silky chiffon dress in my post for May 20, 2013. In that post I cited a "trick" someone had told me about feeding a thread through the spiral toe of the foot to start off your hem. Well, that trick was pretty worthless. This time I watched some YouTube videos on how to use a hemmer foot and learned a few things that made my life much easier. One video stated that the hemmer foot was the most frustrating specialty foot to learn. That made me feel a bit better. Both this video https://www.youtube.com/watch?v=GdDysubNrdM and this video  https://www.youtube.com/watch?v=qxoN77Vu6aI were good. First off, by looking at the underside of the hemmer foot there is an indented channel. I was unaware of this. Here is a good image of the underside I found at https://www.threadsmagazine.com/. From the size of the channel you can tell for what hem width the foot was designed.


Second, several videos concurred that to start off you fold over your hem by hand for a short distance, finger press it in place, and place it under the spiral toed foot, not coiled in the entrance funnel. Once you have sewn an inch or so, you stop, lift the foot, and then coax the raw edge over the toe and at the start of the funnel entrance. It feeds itself from there with just your finger to gently guide it. I sewed eight napkins with ease and, after starting at 32 corners, it was a piece of cake. Here is what the rolled edges look like from the right side and the wrong side.


Here is a table setting with the tablecloth I just bought. I've displayed the plate both with a folded napkin peeking out of a water goblet and an alternative napkin folded beside the plate.


Although the napkins here are all alike, I can easily see myself making a coordinated set of six or eight out of six or eight fat quarters. Next time I buy a coordinated bundle that I find hard to split up, I might just make it into napkins and enjoy the fabric as it is. Hmmm ... but then I might need to buy dishes to go with the napkins ... and then a tablecloth to go with the dishes ...

In keeping with my "I-don't-like-black-and-white" theme I set out to cover a lamp shade and make a modern looking lamp a little less severe. Here is an image of the lamp before I altered it.


This video, https://www.youtube.com/watch?v=SkrYoLPZGqY, showed me how to cut out fabric and apply it to the existing shade with spray adhesive. I also had my husband drill a hole in each finial so I could add two striped draw pulls I got from from Land of Nod. Here is the lamp after I recovered the shade with a Seuss wavy stripe and doctored the finials.


The oval shape still fits the side table for which it was intended yet, for very little effort, I think I turned what was a modern piece into a whimsical bit of fun that does not take itself so seriously.

I also sewed two pillows this week. I sewed a zipper in the bottom seam so they can be easily removed from the down pillow forms they cover. Come to think of it, it has been a long time since I have used a specialty zipper foot. I fell in love with the large scale graphic bird print. It is so cute how the mama bird is feeding her baby! Each pillow is 25" wide, so I got two pillow fronts out of one width of 54" wide upholstery wide fabric, even with generous 3/4" seams. The fabric is rated for indoor/outdoor use so hopefully the pillows will wear well. I fussy cut so that both the pillow front and back are the same. That way they will always match when side by side on the couch. I had planned ahead and decided a pillow height that would fit in well with the fabric repeat without a lot of waste. The pillows are about 16" tall.


Here are my statistics for this week's Work In Progress Wednesday at Freshly Pieced. I did not work on what I thought I would. Still, I enjoyed what I did do – and I felt productive.

Completed projects since 04/02/14 WIP post:
  1. Black vine stripe napkins
  2. Seuss striped lampshade
  3. Grey bird pillows
Ongoing projects:
  1. Monkey wall hanging kit (April 2, 2014 post) 
  2. Chicken quilt - awaiting FMQ
  3. Classic Cars strip quilt (August 3, 2013 post) - need to back, quilt, and bind
  4. Grinch quilt (May 22, 2013 post) - all borders added, need to back, quilt, and bind
  5. Overlapping square wall hanging - awaiting FMQ
  6. Mask quilt (October 19, 2011 post) - hidden away awaiting inspiration for arranging hexagons
New projects since 04/02/14 WIP post:  
  1. Black vine stripe napkins
  2. Seuss striped lampshade
  3. Grey bird pillows

Wednesday, August 21, 2013

WIP: New Hampshire Fabrics

During our Boston area trip August 7-15 my husband indulged me by adding a jaunt north up to Center Harbor, NH to check out  Keepsake Quilting, on the shore of Lake Winnipesaukee. I have gotten their catalog for many years, since I first got into the quilting hobby and I consider them an icon of the quilting community. When we were in Central California last year my husband wanted to visit the memorial for James Dean. For me, this visit to Keepsake's brick and mortar store was in sort of the same category. My life could still be complete without ever going there but I'd always been very curious.

The store was well within what I expected with no major surprises. I will say though that their sale outlet section of the store was unremarkable. To me ~10% off is no real sale.  Apparently they have a huge summer blowout each year during which it is a real mob scene, but throughout the store discounts are very minimal. Also, although they have many many bolts of fabric, there are very few fat quarters. Their policy is to only cut fat quarters when they are near the end of the bolt. In a way, this is to be commended as not wasting fabric; but somehow, a quilt store without bins or cubbies or baskets or drawers of fat quarters seems a bit weird to me.

I did pick up just a few pieces of fabric. I liked the quasi stripe on the left and found it very unusual.  I bought a half yard, maybe for binding. The central plaid was a brushed cotton and had a very, very soft hand to it. I liked the whimsy of the barbecue bugs on the right.


I also found this adorable animal print, perfect for a certain biology major friend of mine. I just love the variety of critters on the fabric, from many kingdoms, phyla and classes. I have now exhausted  my high school biology terminology.


And just look at all the colors involved! It is impressive that 18 different dyes went into this fabric as you can see by the numbered circles on the selvage. Having just visited the town of Lowell and touring the American Textile History Museum there, I am more appreciative of the effort involved to print this fabric and keep the colors registered correctly.


There were only fat quarters of Animal Alphabet Flash Cards available though. Due to Keepsake's sales methods, if you find a fat quarter, there is no bolt yardage left to purchase. I bought all remaining four fat quarters and have just made them into napkins. I guess by giving this away in my blog my friend may be surprised now instead of when she receives them in the mail in a few days.

It took me a while and a couple dozen tries before I figured out how to fold the napkins into this triangular packaging method for gifting. (All you vendors out there who do this routinely are laughing at me now.) I knew the equilateral triangle had to be folded at 60° but how to do so repeatedly and with only folded edges exposed was a challenge to figure out. I did not grasp the method readily. I had to figure it out each time for every one of the four napkins! I used the markings on my rectangular rule. I could not find the triangular ruler I knew I had. When I was tossing out the trimmings from the ribbon I tied the stack with, I found the triangular ruler. Wouldn't ya know it?


I am looking forward to checking out other folk's projects later this evening at
Here are my stats:

Completed projects since 7/31/13 WIP post:
  1. Critter napkins
  2. Lots of travel and fabric purchases (August 19, 2013 post)
Ongoing projects:  
  1. Firetruck pillowcase (July 24, 2013 post) - need fabric orientation post
  2. Christmas pillowcases - cut out awaiting stitching
  3. Classic Cars strip quilt (August 3, 2013 post)- need to back, quilt, and bind
  4. Grinch quilt (May 22,2013 post) - all borders added, need to back, quilt, and bind
  5. Jack O'Lantern Trio (February 2, 2013 post) - awaiting FMQ
  6. Chicken quilt - awaiting FMQ
  7. Overlapping square wall hanging - awaiting FMQ
  8. Mask quilt (October 19, 2011 post) - hidden away awaiting inspiration for arranging hexagons
New projects since 7/31/13 WIP post:  
  1. Critter napkins
Stats since last WIP:
     Completed  projects - 1
     Currently in progress - too many, ridiculous, but listing them keeps me honest
     New projects - 1