Showing posts with label CribSheets. Show all posts

Thursday, August 17, 2017

Spider-Man Crib Sheets

After a recent visit to Oklahoma City where my two-year old Grandson lives I could not help but notice his attraction to Spider-Man. I bought some themed fabrics – three different prints – from the Fat Quarter Shop and set to work to make him some crib sheets. He is in a toddler bed now but the mattress size is the same. I'd made him dinosaur sheets and bug sheets and blogged about them in my 9/16/15 post. After pre-washing my fabric I cut it into 70" length. I folded it in quarters and cut 8" squares from each corner. Four corners of fabric get joined with French seams and then elastic is run around in a casing along the outer edges. The original online tutorial for the sheets is in the Stitched in Colors blog post for November 4, 2014.


Using French seams assures that there would be no raw edges to fray in the finished sheets. I also did one extra step, not in the original tutorial. I ran a stitch parallel along the free edge of the seam a couple inches inward from the outer sheet edge so the encased seam would not flip over and cause problems when I was threading elastic through the casing. Threading 80" of elastic through that casing is straight forward but a bit time consuming. It makes my wrist sore so the removal of any obstructions is well worth the effort. See my post for 9/9/15 about making mini crib sheets for some elastic tips.


Here are the two finished sheets, folded in half. One is in red and shows Spider-Man swinging from building to building with his web.


The other print is in blue with a backdrop of sky.


I also made a matching cover for the changing pad. One side is in the red fabric and the other is in the blue. In the following photo the flap of the cover that folds under is flipped up to show the alternate print.


Since the foam pad is 1" thick I added a short seam across the French seam to make box corners.


The two crib sheets and two-sided pad cover are shown in the next photo.


This is the fabric I had left over, some 8" squares and two less than ½ yard lengths the width of the fabric. I'd bought three yards each of these two fabrics. I actually have 1½ yards of a large graphic print I did not use. The tag is wrong in the photo. Perhaps the 1½ yard piece will become a pillowcase or perhaps a dress for Isaiah's almost 5 year old sister who also loves Spider-Man.


I think Isaiah will be excited to sleep on these sheets. His mom will be excited if he sleeps at all since he is always in motion. Note the blurred hands.

.

Linking these little projects up to Let's Bee Social #190.

Wednesday, May 4, 2016

Isaiah's Turn

In all this frenzy to complete a quilt for Isaiah's cousin before she is born in May, my 8-month-old grandson's projects got set aside - and nearly forgotten.  I had completed the knitting on his sweater while visiting him and his sister in Oklahoma earlier this spring and wrote about it in my post for March 18, 2016, titled Knitting Queries, Quandaries, and Quiescence. All that remained to complete the garment was blocking the components and adding the bands on the two fronts and around the neck. The blocking task would not take long. I just had get over my inertia to start it. The ironing board was already out. The pressing cloth was hanging in readiness, pushed-pinned quite conspicuously on my bulletin board, as it had been for months.


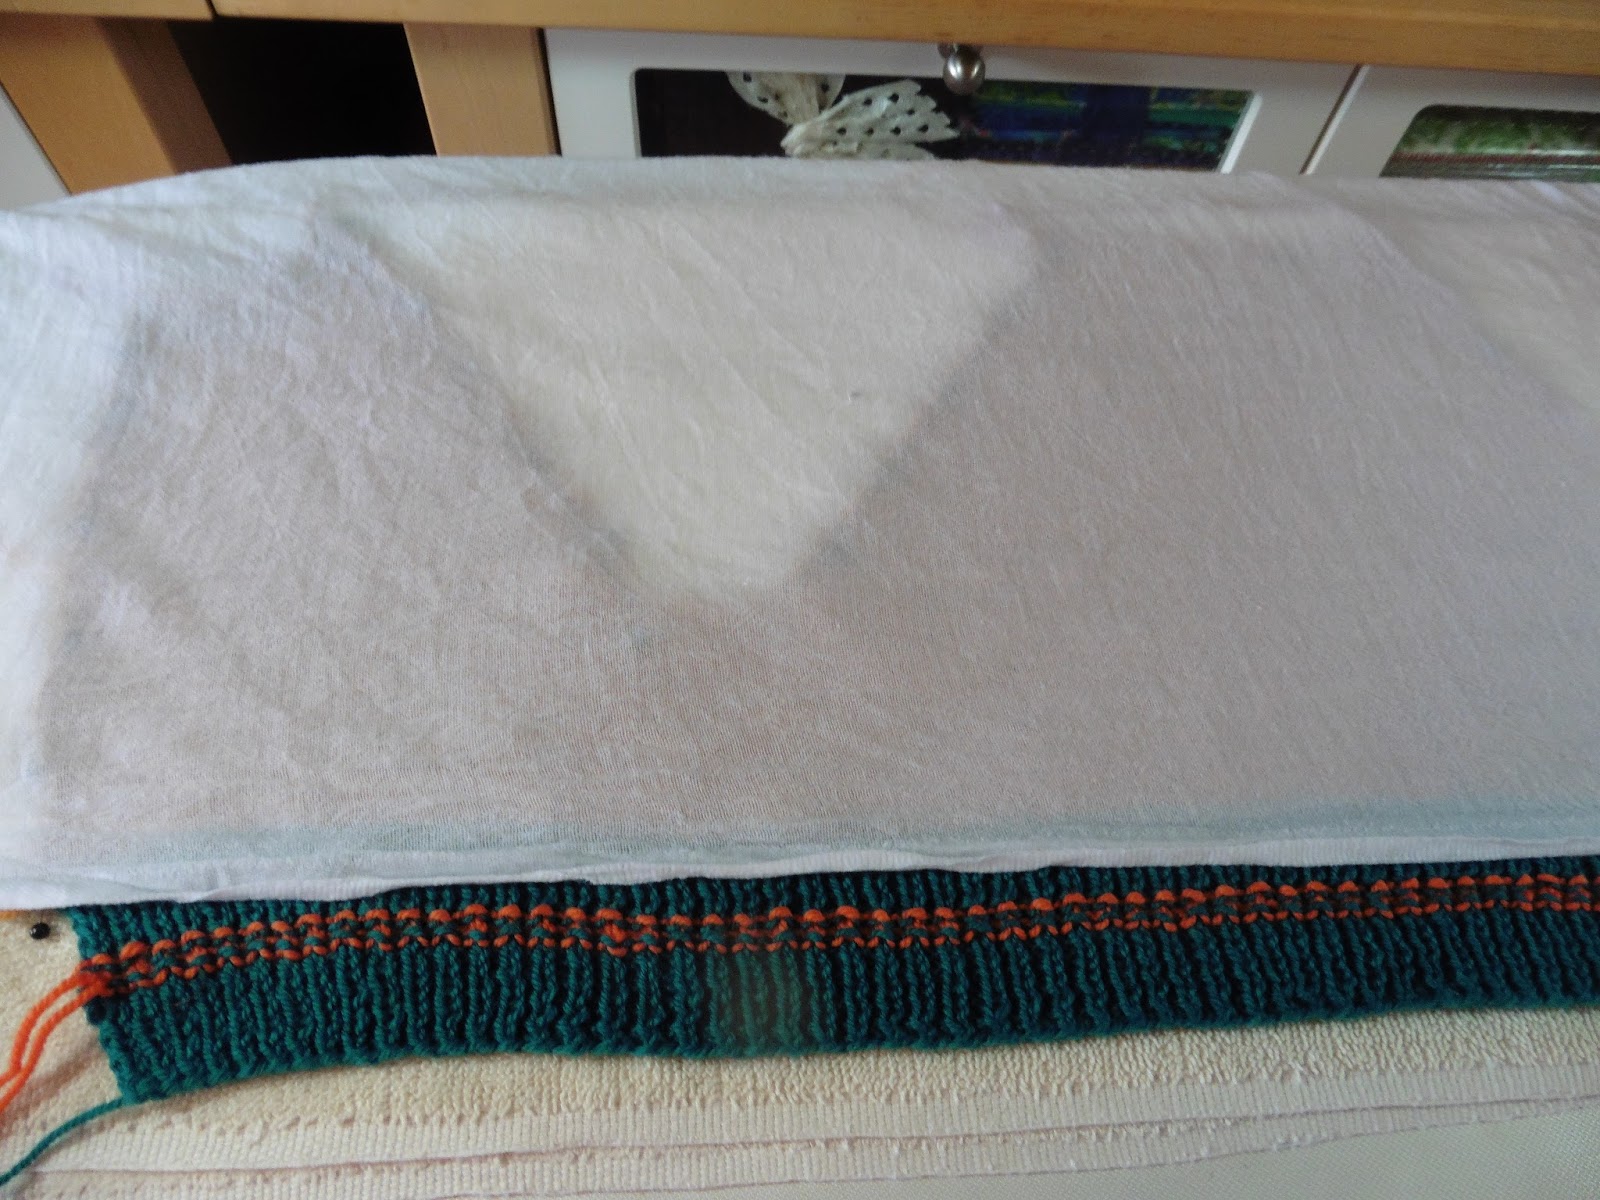
I pinned the top and two fronts right side down. I had knit it in one piece to avoid side seams. It barely fit on the double thickness towel I'd placed on the ironing board.


I saturated my pressing cloth and wrung it out. I laid it over the stockinette stitch portion avoiding flattening the ribbing. I steamed flat only the outer edges that were curling under along each front and along the raglan sleeve shoulder seams.


I repeated the process for each of the sleeves.


Here are all the pieces flat, right side up, and ready to be seamed. I will add the front and neck bands before seaming.


My next decision is in sizing the buttonholes. Because of the fine gauge of the yarn and the diameter of the shank buttons, I suspect a mere yarnover and a decrease will not be sufficient. I will need to knit up a trial swatch binding off and casting a few stitches. Two or three stitches is my best guess. Stay tuned.


So Isaiah is back in the running with Grandma projects. I need to finish his sweater real soon before it no longer fits him. Why do I so often underestimate how long something will take me? The weather in Oklahoma may already be approaching too hot to wear it but I am banking on him not having too big a growth spurt before fall. Am I being delusional?  I should learn my lesson and just aim for a bigger size. But then again you have to match the size with the season when the child will be that size. I guess a Grandma just needs a crystal ball. Sigh...

While I was on the topic of Isaiah, my daughter had seen my April 6, 2016 post about the sheet I'd sewn for a Pack 'n Play. I made it pillowcase style with no elastic needed. She thought it was a good use of my one yard size pieces of juvenile novelty prints in my stash. After all, I always claim that just about every  novelty print I cave on becomes a commitment to a quilt. Of course, there is the option of a pieced back but still, the colors are the colors, and the combination of them often presents a challenge to playing nice with others. My daughter asked for some covers for the pad on their changing table, giving its dimension as 34" long x 17"wide x 1" thick. It's girth calculates out as 2x17" + 2x1" = 36". I made two pad covers: one where the fabric's straight of grain ran parallel to the long dimension of the pad and one where the fabric's straight of grain ran parallel to the short dimension of the pad.

A fabric where the straight of grain runs parallel to the long dimension of the pad is the easier project. The first pad cover I made like this was straight forward. The striped pattern of zippy little cars runs along the straight of grain so the width of the fabric was plenty enough to circumvent the 36" girth with ease to spare. I cut off a 7"x36" band parallel to one of the selvages adn French seamed it as a tube. I only had a 1 yard length to use for the 34" long pad though so once I used ½" for seaming at the closed end on the left and used a ½" for a narrow hem at the open end on the right there was not much to overhang and tuck under. It is sufficient though.


The previous pad cover was certainly a simple approach but alas when fabrics are directional you need to follow their directions! On the second pad cover I made, the straight of grain ran parallel to the short dimension of the pad. I left the fabric at full width so there is plenty to tuck under at the open end on the right. I also left the selvages on and did not do any hemming on the open end. To calculate the girth around the pad I summed 2x17" + 2x1" and got exactly 36". There is no allowance for a seam in a one yard length of fabric. Especially if you figure the first time it is washed, it will shrink. With 3% shrinkage in cotton, that is about 1" per yard. I was quite fond of this whimsical doggie print but had to add side gussets since 36" was just not quite enough, I added a wide red and white stripe for the side edges. I made French seams that take ½" seam allowance and calculated (incorrectly) that I needed 1" side strips. The calculation was 2x17" (feature fabric), + 2x1" (inset gusset), plus an added 8x½" seam allowance, gives 40". I cut my side strips 2" wide. So far so good except when you take out the seam allowances I am back to 36" around and lose all ease. Note to self: with one yard of fabric I need to cut 2½" side strips even if they do creep up the side a bit when on the pad. This will give me 1" of ease for shrinkage during laundering. Second note to self: not to state the obvious but this project is even easier if I have 1⅛ yard of fabric so no side strips are needed at all!


The cover may fit now but it will be very snug when it shrinks! Perhaps when washed, my daughter can avoid a high heat setting on the dryer or take it out a bit damp. It seems like even with a changing table pad, where one size should fit all, I have trouble with making things too small. Sigh... Again...

Linking up with Let's Bee Social #123.

Wednesday, September 16, 2015

Baby and Quilt Show Prep Modes

BABY MODE
Once again I am in baby mode, making burp cloths. They may be mundane but they do serve the purpose of getting me out of any quilting slump I may be in. These eight are for a couple who just had their second boy baby. I mailed them off a few days ago. Burp cloths are my go-to baby gift. Each burp cloth can be made from two fat quarters or from a fat quarter and 1/4 yard WOF. I general use a half yard each of two fabrics and make them in complementary pairs. Four pairs are shown in the following photos - whales, gears, owls, and argyle – each paired with either stripes or dots. Here is the June 18, 2014 tutorial I posted on how to make these burp cloths.


But now I have crib sheets to add to my repertoire. I have two cut out for use with a standard size crib mattress and have begun stitching them up. The four corners get joined with French seams and then elastic is run around in a casing along the outer edges. The original online tutorial for the sheets in the Stitched in Colors blog post for November 4, 2014. It is not under her tutorial tab for some reason.

This first crib sheet will coordinate with the quilt my daughter is finishing up. You can see its initial design in her July 29th post to her RobinLovesQuilting blog titled Quiltus Interruptus. Her son was born on July 16th. You can not keep a good quilter inactive for long! She has follow on posts to her blog on September 14th and 15th describing her design process in her posts Dinosaur Panel Play 1 and Dinosaur Panel Play 2. I was bemused to see that like mother, like daughter, she too convinces herself of her design choices by adding words to explain why she made those decisions.


The coordinating crib sheet fabric comes from the largest scale print from the Have You Seen My Dinosaur line.


Here is the completed crib sheet stretched over a furniture cushion since I did not have a standard crib mattress available.


This second crib sheet will coordinate with the Bugs R Us quilt I made and showed completed in my post for July 15, 2015.


I picked the largest scale bug fabric from the Backyard Safari line. I am not sure I would want to sleep on something like this but he is a boy after all.


And once again, here is the completed crib sheet stretched over a furniture cushion. The lush foliage looks inviting and I suppose those bright colors do make the beetles kinda friendly - sort of... I say better these bug images on his bed sheets than real ones in his pockets!


QUILT SHOW PREP MODE
I also spent time this week making and attaching hanging sleeves on two quilts I am entering in my local guild's show this coming weekend. This is a dull task that I managed to complicate by deciding to piece one of the sleeves out of five fabrics to coordinate with the quilt. I did not have enough remaining backing fabric, I did not like anything from my stash as a sleeve fabric, and none of the five leftovers from the quilt front were wide enough nor long enough to use alone. This photo only reveals three of the five fabrics. There are two more hidden pieced sections on the side of the sleeve next to the quilt top. Two, not just one, but two seams run the length of the sleeve. Anal, right? I know. This quilt is my Simple Gifts seen in my post for June 10, 2015.


For the other quilt I am displaying I added a sleeve out of all one fabric and it was much simpler and quicker. But then my husband said, "Aren't you going to put those labels on like you do?". Well, no. I wasn't going to invest the time. But he was right, and I should. So I did. Here is the quilt name label. On an opposite corner is a similar label with my name and year of completion. Sunny Spring Frost is pictured in my post for July 24, 2013. Stitching on the sleeves by hand, making and adding the grosgrain ribbon labels, and basting on the paper identification tabs to each quilt took me the better part of a day. Aargh! But I am ready now.


The Diablo Valley Quilters' guild show is this weekend in Walnut Creek, CA.  Check out the show if you are near the area. Here is the link.


I am linking up now with this week's Freshly Pieced Works in Progress. I am fairly confident that other folk are piecing quilts and not dribbling their time away piecing quilt sleeves! In my defense, I did make eight burp cloths and two crib sheets, too – just not a lot of quilts. Hmmm. What is the name of this blog again? DianeLoves2Quilt?

Wednesday, September 9, 2015

Mini-Tips for Mini-Crib Sheets

I got back my sewing mojo on Labor Day and generated some simple projects - two crib sheets and some burp cloths. A few months ago in June I'd made a dinosaur crib sheet using the set of instructions, {Tutorial} Quilter's Crib Sheets by Stitched in Color. This was for a standard crib mattress which typically measures 52.5"x 27.5"x 5.5" thick. My daughter requested some crib sheets for use at daycare. Her daycare has smaller than standard mattresses in the infant room measuring 38"x 24"x 3" thick, so I adapted the pattern.

For standard crib mattress:  cut fabric 70" x WOF with 8" cut-out corners and 80" elastic
For a smaller crib mattress:  cut fabric 50" x 36" with 5" cut out corners and 60" elastic

On crib sheets there are two long edges and two short edges that need to be turned under 1/4" and 5/8" to form a casing for elastic. This is really the only tedious part about this project. Even the Dritz Ezy-Hem Gauge was not as convenient as I would have liked and, since it was metal, it did get heated up by the iron. I started out using it last time when I made a dinosaur sheet this past June but was not thrilled with it. I wanted to find a method simpler than measuring and pressing, measuring and pressing, inch by inch around the edge. Instead I let the throat plate on my Pfaff do the measuring for me. To turn an edge under 1/4", I ran a stitching line a scant 1/4" from the edge. I then went to my ironing board, folded over the edge so I could see the stitching line and pressed.

The fabric cooperated by bending near the stitching line. But I just discovered a great product that protects my fingertips while I do this. Dritz makes Thermal Thimbles. These are great for holding edges turned over when ironing. They sure helped me avoid the sore, singed, fingers-tips  – if not actual blisters – I usually get when I am too intent on holding fabric in place just so while I press. I tend to zap myself with a burst of steam, over and over again.


I normally hate thimbles and have never been able to adapt to using them. When stitching I would rather stick my fingers than lose the dexterity thimbles seem to snatch away from me; but I do not need a lot of finesse when steaming something so these shield my fingers without encumbering me. In fact, when I went back to my sewing machine, I'd forgotten they were on three fingers of my left hand. With the 1/4" turned under and pressed, I then stitched a line 5/8" inch from the folded under edge. The thermal thimbles even added a bit of grip when feeding an the fabric under the pressure foot. They come three in a pack, a thumb-sized one and two smaller-sized ones for the second and/or third fingers.

After I had run that second stitching line 5/8" in from the 1/4" folded under edge I did not even bother going back to the ironing board to press it under. I folded the edge over a second time on the stitching line as I stitched along a second track to close the casing. Not steam pressing first worked fine.


After the casing was in place, I needed to thread in the elastic. It is a long, long way around and I would like to do this only once. On my last attempt with the dinosaur sheets, I lost the elastic out of the threader and had to start again. Then I lost the free end by pulling it too far in and had to try a third time. Here are two tips from my new, improved, do-it-right-the-first-time method.

Yes, a safety pin will suffice, but Dritz makes elastic threaders that are very useful and do not cause fingers to cramp up like a small pin does. The elastic is threaded in and out two slots at the base and normally I find this sufficient to hold it in place. But when threading about two yards of elastic into a casing that is almost twice that length, the elastic does tend to work itself out of those slots with all the pushing and sliding. I put my machine on its longest stitch length and just ran a row of stitching down the length of the doubled over elastic.  Since the stitch was long it was easily removed once the elastic was threaded. My crib sheet was yellow so the yellow thread in the next photo is barely visible on the centerline of the white elastic but it is there and did its job.


I also made a point of safety pinning the opposite end of the elastic, the free end, to the casing so it did not snap inside as I stretched and pulled. It only took me one time, instead of three, to elasticize the casing for this crib sheet!


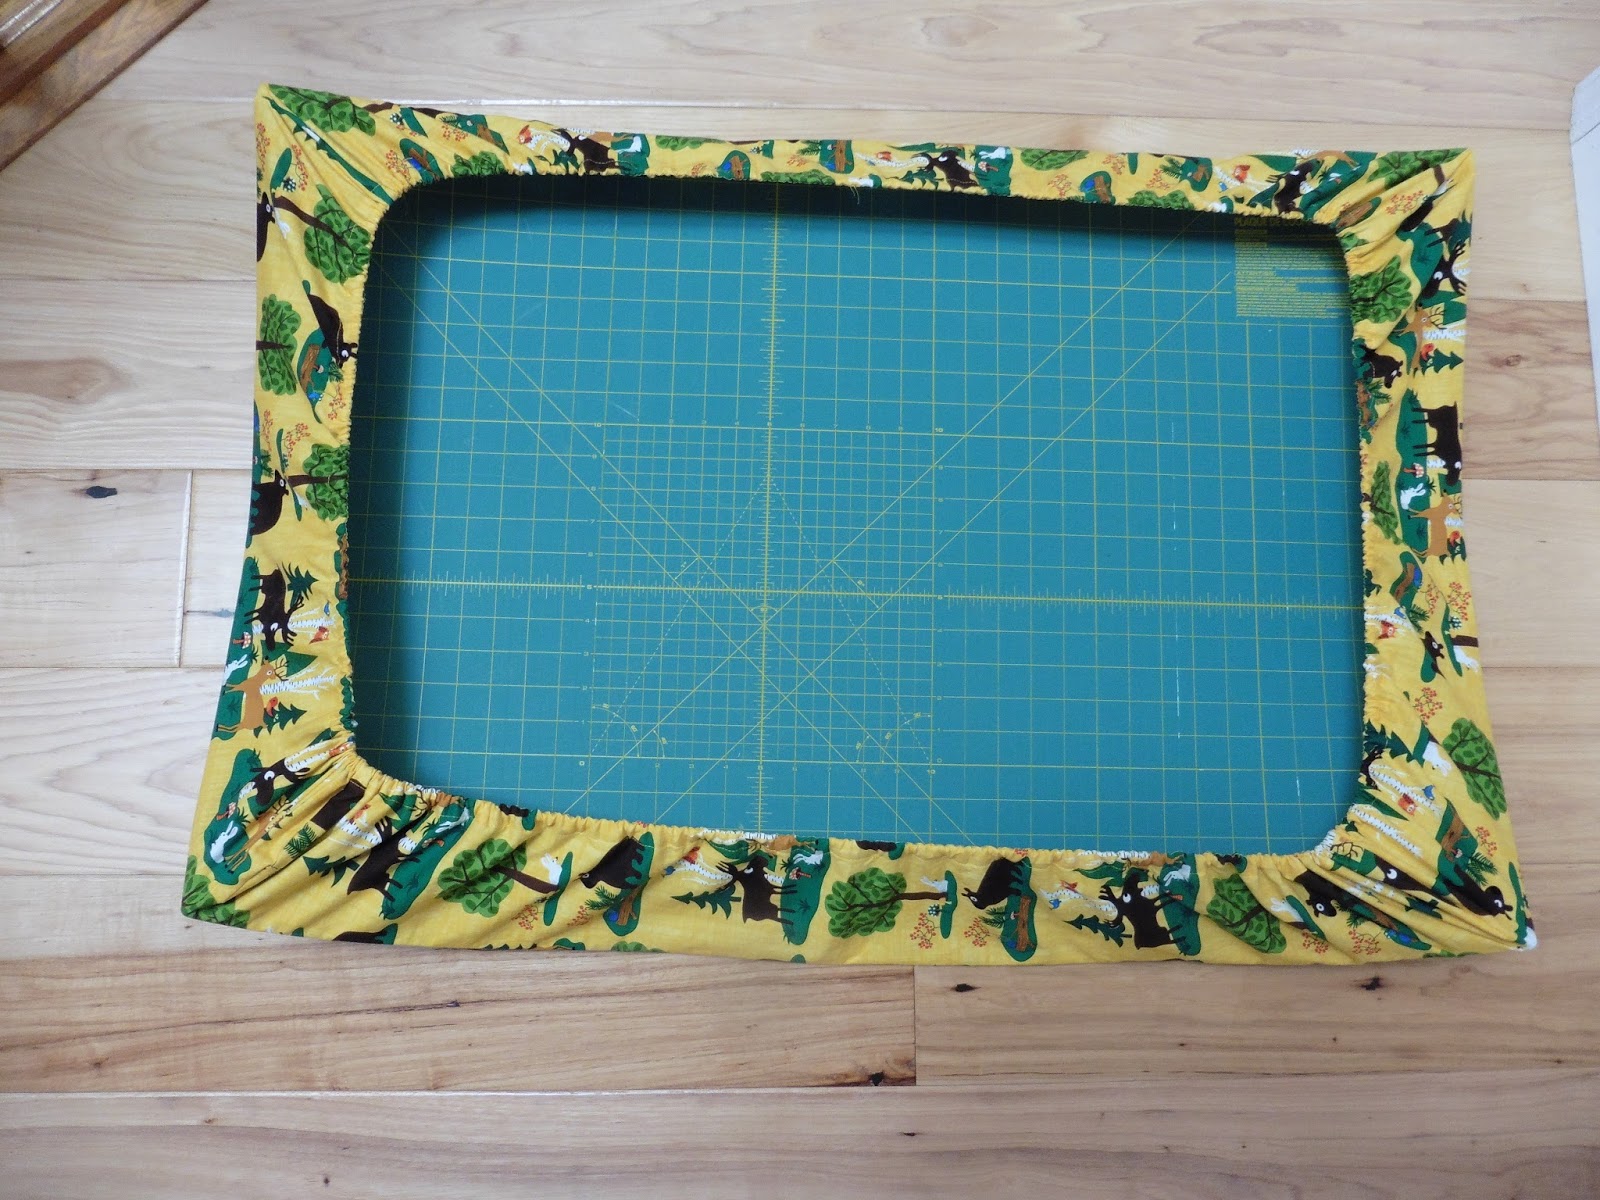
I inserted a 24"x36" rotary cutting mat inside to give an approximate idea of how the sheet will fit a 38"x24"x 3" mattress. Looks good!


Here is the crib sheet from the top. I love that camping bear and moose print. I would not want to make a whole quilt with it though, so this is a nice compromise to satisfy the sense of novelty without a large commitment.


The improved process went so quickly and smoothly I made a second crib sheet in red. It has the same fabric leftover from backing the Karate Kid Kwilt. I had to wash that red fabric three times until I was satisfied that the Shout Color Catchers were sufficiently pale to indicate the excess red was out. Look how red the first one was! Even the suds in the washing machine water were a bright, rosy pink! I hope the Karate Kid Kwilt is washed with those color catchers, too, the first few times at least.


Here is the red mini-crib sheet stretched over my rotary mat. I originally did this just to take a photo but found out doing this helps to evenly distribute the gathering of the casing around the elastic within.


Here the mini-sheet is in a top view like where the baby will sleep. Gee, it just occurred to me. I hope this bright color does not keep him awake! Call it wishful thinking but perhaps those undulating paisley waves will put him to sleep. They actually make me a bit dizzy if I stare at them too long.


I also made a pair of burp cloths to add to the package when I mail the sheets off.


I have some more burp cloths cut out to sew for another young couple and two standard crib sheets to make up for my daughter. I am so glad I've gotten out of my sewing slump. It feels great to get back to the zzzip of the rotary cutter, the whirrrr of the sewing machine, the shoosh of the steam iron, and the feel of the fabric. Aaah ... my form of yoga!

Linking up now to this week's Freshly Pieced's Work in Progress ...