Wednesday, October 29, 2014

Vintage Ornaments Finish

Last week was slow and steady but this week I crossed the finish line with my Vintage Ornaments quilt, even down to the label.


The quilting in the sashing came out with the effect I wanted. It looks like the path taken by little starbursts wandering among the ornament blocks. And, in the blocks where it shows up, I am pleased that I made the effort to quilt in two sizes of meandering.


I washed the quilt and it crinkled up with an old-time appearance. It fits in well with that time capsule feel of the ornaments and the backing fabric.


The weather (not enough sun and too much wind) did not make for a good photo opportunity but maybe I will get a better picture when I give it to the recipients in Southern California.


I also made a second Counting Monkey book, this one for my six-month old granddaughter. It has a built-in surprise for her, different from her cousin's book. I found an online source for the crinkly paper sometimes sewn into infant toys and her book will make noise when she turns the pages, or rather when she stuffs them in her mouth! I can't wait to read it to her and see that impish grin of hers in person.


Wednesday, October 15, 2014

WIP: Slow and Steady

Last week I had decided to rent time on a long arm to quilt the Vintage Ornaments and had needed to decide on a pattern by Monday. I explored Swirls, McTavishing, and Meandering and auditioned each on a pair of blocks that were complements of each other in terms of scale of print.


I finally down-selected to meandering and would address the scale issue by doing smaller meandering in the side bars and larger meandering in the center of each block. I realized the scale issue was dominated more by the area of the block to fill rather than the scale of the print.

I called on Sunday to confirm my Monday rental time on the long arm. I was told its stitch regulator was not working but I would be fine just keeping a steady pace. Everything else was in working order since it had just returned from being serviced. Being fairly new at this FMQing, I'd wanted the regulated stitch size option. But then again a 60" x 70" top is not that easy to do on a domestic sewing machine. Maybe I could just be "slow and steady" since I was doing a meander and not trying to follow specific lines. I really waffled over keeping the time slot. I decided to keep it and even brought along my handy-dandy loading diagram to help me be a bit more independent at the start. Loading the quilt took over an hour and a half, but, because I am inexperienced, that part was expected.


After that, things did not go well. A new clerk and I were equally ignorant, so the bobbins for the wrong machine were wound and they needed to be rewound on the correct bobbins. And as for "slow and steady" part... ? Apparently that was not an option. The 50% speed, the lowest the shop owner recommended I go, was way faster than I was comfortable with. It did not give me time to think but I was beginning to manage. I'd done one row of five blocks and advanced the quilt. I was on my second block in my second of six rows and the needle broke. Staff helped me replace the needle and I had to take time to pick out a large rats nest of snarls in the region where it had broken. When I tried out the new needle (off to the side of my quilt, fortunately) it did not feel "right" and so I asked staff to check it out and they broke a second needle. Although they assured me it was minor timing issue, I removed my quilt from the machine and decided to finish it at home. When I left, they had all three poles from the machine removed so they could turn the head on its side to work on it. It was already mid-afternoon and I had barely one-sixth of the quilt completed. It was time to go home and regroup.


The following day, I contemplated my path forward. I reassembled the quilt sandwich and safety pin basted it. Though I normally spray baste, that was problematic with a partially quilted top. At my daughter's suggestion I googled and I looked into some YouTube videos on "skinning" a quilt. I found it to be an interesting approach to remove stitching but decided not to try it. I would  just continue quilting and re-evaluate stitch removal at a later time. Fortunately I'd had the presence of mind to take the same thread with me for use at home. This size spool does not fit on my Pfaff. Again my daughter to the rescue. She and her husband had gifted me this cool flower thread feeder a few Christmases ago so it got pressed into service.


This morning I had all the pieces in place – realignment, basting, thread, to rip out or not to rip out – and I was refreshed, so I started to FMQ it on my Pfaff. I completed the second row of blocks. In the next picture the top two blocks are from the first row and were quilted on the longarm. The bottom right block is from the second row and was quilted on my domestic Pfaff. All this fuss and the quilting in the blocks really does not show that much.


The lower left block was quilted in part on each of the two machines. Here is a closeup. The top brown band was two-thirds longarm. The rest is my trusty Pfaff.


The pseudo-sashing is a story for another time. For now I am linking up to this Wednesday's Freshly Pieced's Works in Progress and then my blogging break is over. Slow and steady, Diane. Deep breaths. Slow and steady.

Wednesday, October 8, 2014

WIP: I'm Thinking

Earlier in the week I was stymied on the path forward for quilting my Vintage Ornaments Christmas Quilt. I was trying to decide between 1) sending it out, 2) renting time on a long arm, 3) FMQing it myself, or 4) just simply doing a stitch in the ditch approach with minimal quilting.

I decided on the second option and scheduled next Monday at my quasi-local quilt shop Always Quilting to rent time on their long-arm to quilt it. Now I need to decide a quilting pattern. Here are a couple options I am playing with. In the solid-colored pseudo-sashing I  think I want to do  some wavy or straight lines unevenly spaced with intermittent little bursts that I hope will look like dangling snowflakes or bows and not flower petals. I think if I keep the tips pointed and the loops skinny I can avoid the flower look. And the spikes echo the look of the pine needles. Since the solid color is discontinuous and not a true sashing, I have my fingers crossed that I can figure out a path once I am on the machine.


I am still undecided on what to do within the printed portion of the blocks. I usually just imitate the pattern in the prints in my quilts but I want to get to a skill level beyond this cheater fabric approach. Besides, each block has two different size scales of print. I paired them that way to get contrast within the block. But I had not considered that the scale of the quilting pattern to go with each. I think it would be too distracting, busy, and a logistical nightmare to quilt the center print and side bar prints differently. Most FMQ in the modern arena is on solids so this is a non-issue.

A swirl pattern is the first possibility I tried, aiming to imitate the effect of swirling snow like in Frozen. The jury is still out on this one. Even if I got really good at this pattern, there is usually not much swirling snow going on inside where vintage ornaments are typically hung. I signed up to take an online class on Craftsy by Leah Day on Free Motion Fillers. Although it is for FMQ and not longarm, I hope I get some inspiration on filler ideas to use within the printed fabrics of the blocks. This is my first time taking an online Craftsy class and so far, so good. I better learn fast and decide by Monday!

Until I come up with the quilting pattern, I've been taking my mind off it by doing little projects that I can finish in short order. I have made an alphabet cloth book for my older granddaughter complete with little animal inserts. The book is a Riley Blake panel that I bought in Oklahoma a few months ago while visiting my daughter. Details and a cute story about the purchase are in my post for March 26, 2014. I have a second one to make for my younger granddaughter in California.


A center pocket panel in the book holds the little critters. I used a fat quarter of the multi-colored polka dot fabric for the background of the pocket panel and I backed the critters with a cheery orange mini-polka dot. My California granddaughter's version will have different prints for the center panel and animal backings. I have already picked them out but am not revealing them yet.


I have also sewn the almost two-year old a pillowcases with a lion print because she really loves The Lion King. It is small, for a 12" x 16" pillow and I just shipped it off for her upcoming birthday.


I spent a good part of this week writing up my contribution for the Around the World Blog Hop which I published in my October 6, 2014 post. I has been a busy week. I am now linking up to this week's Freshly Pieced Works In Progress Wednesday.

Monday, October 6, 2014

Around the World Blog Hop

Have you heard about the Around the World Blog Hop? I am surprised and flattered to have been tagged by Ginette at the Quilting Princess to participate. I've been asked to answer the following four questions so here goes. Some responses are mostly pictures and others mostly text.

1. What am I working on?
The project spread out on the bed in the guest room right now is my Vintage Ornaments Quilt. I have just pieced the back and made the binding and I am now stymied on how to quilt it. The "sashings" are sort of staggered. It is 60" wide by 70" tall, right at the cusp of being too big for me to want to quilt myself on my domestic Pfaff. The quilting part is always my stall point on my projects. I am at a fork in the decision road right now on this one.


I also just completed knitting a tree sweater for a downtown community art project.


2. How does my work differ from others in its genre?
In my blog posts, although I am not heavy into formal tutorials, I usually explain why I do things a certain way or the background behind my choices. I know one picture is worth a thousand words but I like to use words, too! My blog is a bit different from others in that you will also see knitting and crocheting and baby items and home decor projects from time to time as well as quilts.

In terms of my quilt style, I like tidy and orderly but yet whimsical – a seeming contradiction in terms. I consider polka dots my signature and try to sneak them into every quilt to some extent. Using stripes or pseudo-stripes in borders and bindings is also a trait of mine. I have not ventured into the modern arena with solid fabrics and quilting negative space. My completed quilts for 2014 are shown in the following photos in reverse chronological order by completion.

Nautical Baby Quilt (August 27, 2014)
Commercial pattern, my color selection, FMQing on my Pfaff domestic, the type of piecing I love to do.


Grinch Quilt (July 2, 2014)
Totally my design, started with preprinted Grinch panel, my piecing and my first attempt FMQing on rented longarm, my attempt to let go and be wonky.


Monkey Quilt (May 26, 2014)
Store assembled kit, my piecing and FMQing on my Pfaff domestic.


Jack O'Lantern Trio (March 31, 2014)
Modified commercial pattern, my color palette and FMQing on my Pfaff domestic.


The Ghastlies (March 17, 2014)
Totally my design and FMQing on my Pfaff domestic.

Paisley Pearl (February 8, 2014)
Commercial pattern for large print fabrics, my color palette and FMQing on my Pfaff domestic.


You can get a flavor of my style and other needlecraft projects by scrolling through the photos in my earlier year-in-review posts. These links cover my previous two years.


My most heavily visited post to date has been my
Spiral Table Runner (November 4, 2011)
Commercial pattern, my color palette, simplistic early attempt at machine quilting


3. Why do I write/create what I do?
I love color and its energizes me to pick bright and cheerful ones or pull together unusual combinations of others! But quilting is also calming and I de-stress with it. Quilting is my yoga. But instead of chanting "ohm" I channel "fun". Getting up in the early morning and hand-stitching on a binding is a great start to my day as each neat stitch slips into place. Having multiple seams meet precisely in a pieced block is nirvana to me. I worked for over thirty years as a mechanical engineer and still love math and geometry and quilting carries forth that precision.

But I am retired just over a year now and want to use the creative right side of my brain more after using the logical left predominantly for so long. I find I like taking photos and writing about why I made certain choices in my projects. If I use some fabric or color because it just feels right to me, then once I think of a reason that it feels right, I am even more confident with my choice. Writing helps with this process. The blogging also keeps me close to my daughter, daughter-in-law, sister, and a couple friends since they read about what I am up to.

4. How does my writing/creating process work?
For quilts that are totally my design, I usually start with a feature fabric, such as in the previous examples of the Grinch panel or the Ghastlies fabric, and let the piecing format come from that. The Grinch needed to be wonky to be Seussian. The Ghastlies needed to be more of a strip quilt format to avoid chopping up the feature fabric too much.

For the quilts I make from published patterns, the creative part comes in my color palette and fabric selection. My quilts have prints or at most, prints that read like solids. This fabric selection part is my messiest part. I often leave my sewing room in shambles as I pull different fabric combinations from the shelves and drawers. I think this honeymoon part of the project is my favorite! No piece has been cut wrong, no seam has been misaligned, no quilting line has deviated crookedly from where planned. The project is all perfect potential at this point!

My fabric storage system works for me. Drawers with clear fronts are for fat quarters and less than one yard pieces. Closet shelves labeled by yardages (and not sorted by color) are for fabric lengths 1 yard and up. Random clear bins, open top boxes, and shallow baskets house odd shaped scraps.

To stretch myself outside my color comfort zone or technique comfort zone I watch for kits that are on sale or clearance. This helps me see what others would have done in an environment where the initial materials and instructions have already been provided.
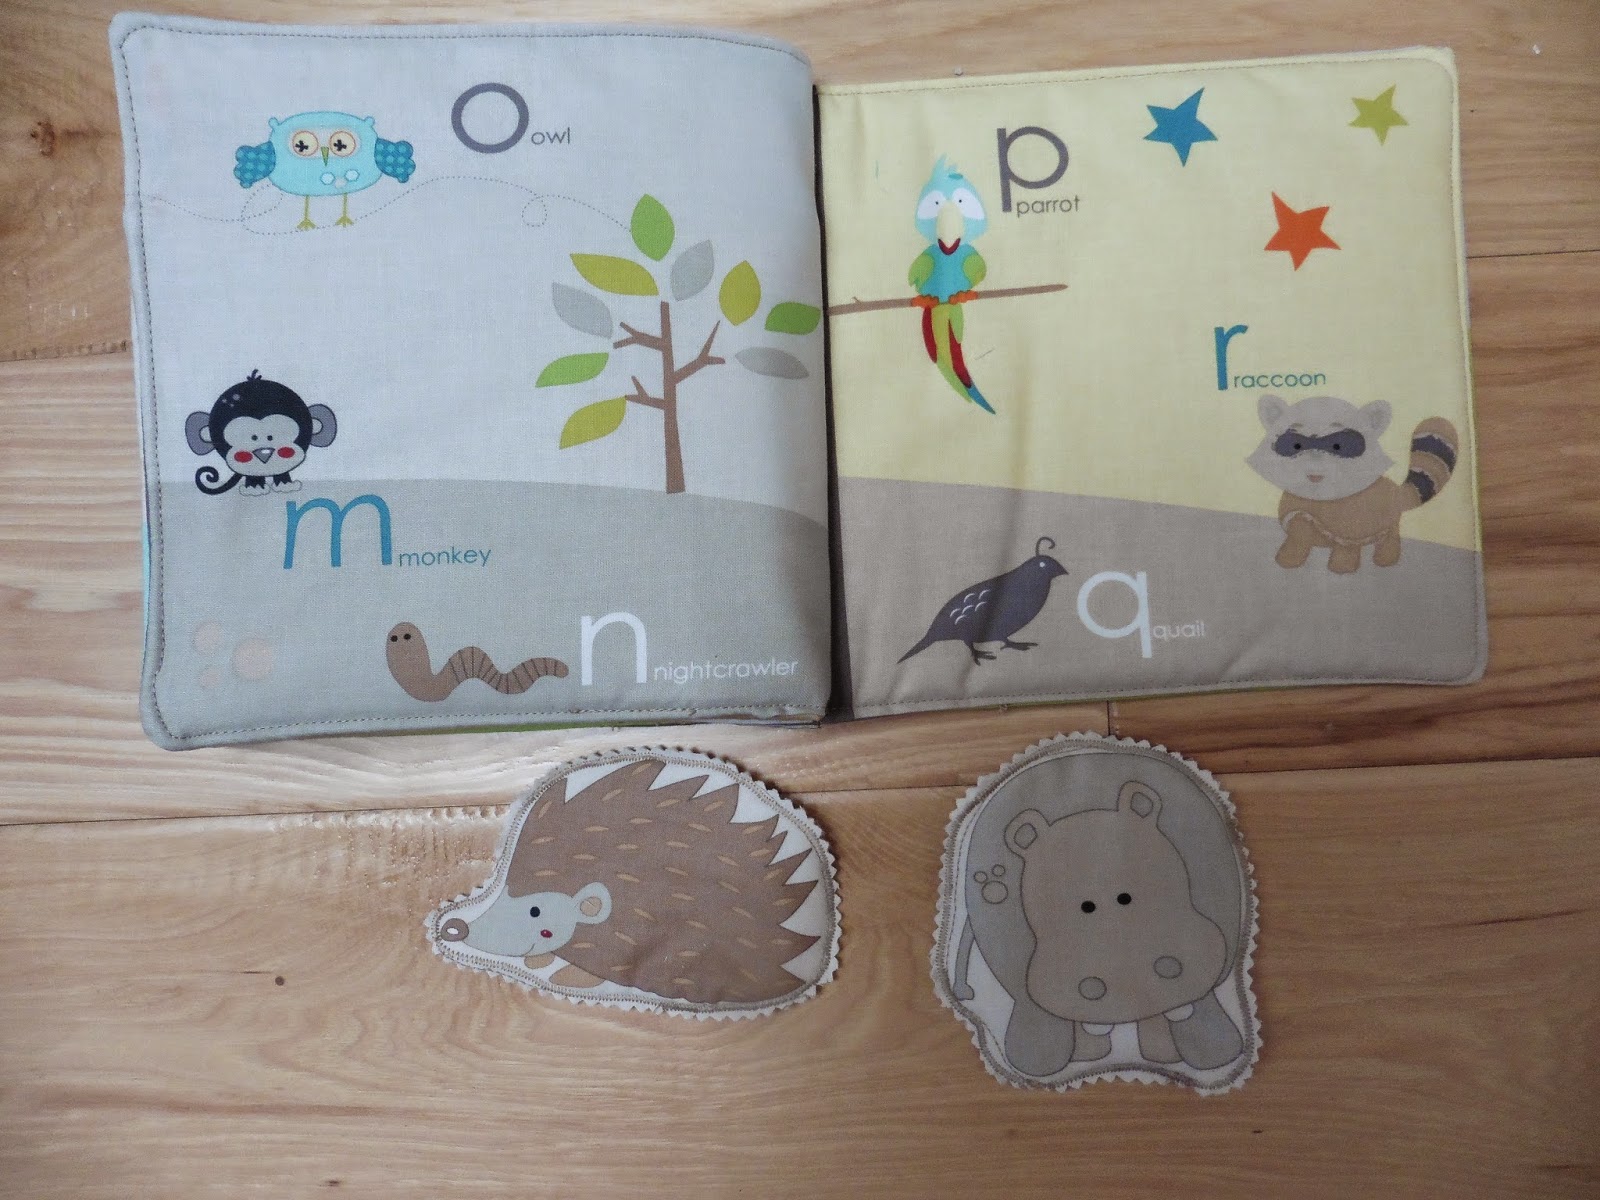
When I reach an impasse I take my mind off a decision by making other smaller projects than can be completed usually in one sitting. These include burp cloths, cloth books, pillowcases. I make lots and lots of those!

For my quilting design I place a plastic sheet protectors over a portion of the quilt and trace possibilities with a dry erase marker. I try to let the fabric print or the piecing pattern dictate the quilting pattern. Usually I am somewhat constrained in my choices by my ability to execute a quilting line smoothly and tidily but I am working on getting better. I have only my domestic sewing machine but have rented time on a longarm at a quasi-local quilt shop.


Other Around the World Blog Hop Participants
That's enough about me. I have invited the following two quilters to join in this Around the World Blog Hop. I think you will enjoy getting to know them. Look for their posts on or after Monday, October 13th.

Robin with her blog Robin Loves Quilting at
http://robinlovesquilting.blogspot.com/
Robin is my daughter who lives in Oklahoma. She has made pretty awesome quilts with Star Wars, Star Trek, Christmas, and Halloween themes. Her Wizard of Oz quilt and pillow series is truly amazing. Even with her nearly two year old daughter she finds time to blog and sew... and call her mother!

Tami with her blog Just One More Thing at
http://tdreads.blogspot.com/
You can click on Tami's "Crafts" label in the side bar of her blog and see her quilting work and her fascinating exploration into Zentangles, but there is so much more, like puzzles and book and movie reviews. Her blog posts often have topics that resonate with me and she writes well, presenting thought-provoking points of view. Be sure to read why she titled her blog what she did; it is a kick and what drew me in to following her in the first place.

Saturday, October 4, 2014

Intuitive Quilting

On the Monday after the Quilting in the Garden weekend my daughter and I took a class entitled Intuitive Quilting Workshop from Jean Wells, contemporory quilter, founder of the Sisters, Oregon Outdoors Quilt Show and 2010 inductee into The Quilters Hall of Fame. The class was hosted by Alden Lane Nursery as an extension of the garden show. It was based on many of the techniques in Jean Wells' book Intuitive Color and Design. The techniques taught in the class were exercises to encourage the students to cut intuitively without rulers to create and piece gentle curves. It was a process, not product, class. Although neither Robin nor I make "art" quilts, we were open to learn some of new methods and stretch ourselves outside our comfort zones.


Two class practices Jean Wells used were indicative of a good and experienced teacher. First, she split the class into two groups for her demos and taught each twice. The non-observing group worked on practicing what had just been demonstrated. The benefits of this were that with fewer folks, you could get closer to see what she was doing and you had the opportunity to hear it a second time if you were quiet, or peek in if you wanted to see something again. Second, she was very clever in not requiring you to bring fabric to the class. She provided 6" or so wide strips the length of a width of fabric and they were only solids. Her experience is that when people bring their own fabric they are more careful with it or try to save their favorites or part of their favorites. Having the material provided was very liberating. Plus, she assured that there were no prints, so consequently that decision point was removed from the design equation.

We were told to pick five fabric colors we wanted to work with for the day. I picked five colors I liked but did not make any effort to assure they went together. She then discussed the "palette" each of us picked. Whoops. I had only picked a rainbow assortment: red, orange, yellow, green, pale blue. Once we started our assignment we were told we could add a sixth fabric. I added a rustic brown. We began by making curved seams and adding in very narrow accent inserts. My accents were fine lines of yellow. Here is my sample of curved piecing, cut with a rotary cutter and no ruler.


Our next exercise was to make nine of something – loosely defined as nine very free-form nine-patch blocks. My nine shown in the next photo are not trimmed yet, obviously, and are backlit because our design wall of batting was taped over a window in the classroom. My creations are non-stellar but I had fun even though I found it hard  to throw caution to the wind. I can see the potential for a bit of stained glass funkiness in another different of nine blocks with a better chosen color palette and closer adherence to a common size.


The next topic was inspiration sources for art quilts. Jean Wells spoke of how she would go from a photo, to a line tracing, to a line art quilt, like the following example of crates on a wharf from her book Intuitive Color and Design.


I could relate to that sort of inspiration. I took this photo of a crosswalk in Snoqualmie Falls, Seattle last July because I thought its pattern could work up as an intricate quilt.


And wouldn't this overhead view of a milk crate of books make for strip pieced quilt with a diamond gridded border? The books just happen to be my daughter's from her adolescent years. They have been making a home in our garage for over a decade.


Robin and I had a blast taking this class together and the time just whizzed by. We came home and realized we had been so busy neither of us had taken any photos of each other or us with the teacher! But we agreed that our blogs would survive. With uncanny mother/daughter similarity, we realized we were both very tired from the exertion of trying to be creative and inventive in a random fashion. A non-logical, spontaneous approach is not in our nature but it was a challenging change. Ironically, relaxing and "letting it go" can be exhausting if it is not your norm!


Will I start making art quilts? Probably not but I would not "rule" it out. I took away some techniques from this workshop and I do think that little snippets of this curved line piecing may perhaps weasel its way into some of my blocks or borders. I might be tempted to try a somewhat ordered creation like this Jean Wells log cabin-like example.


Friday, October 3, 2014

Saturday Afternoon Quilting in the Garden

After the tree sweater installation Saturday morning (October 1, 2014 post) my daughter, my husband, and I went over to our local nursery Alden Lane which was hosting its annual outdoor quilt show. I had entered my Grinch quilt (July 2, 2014 post) and it was exciting to see it hanging clothes-line style among the trees with other quilts in the Christmas themed section.


Here I am pointing at it in a more head-on view that was taken when the breeze was more cooperative. It is number 7 in the middle.


The ambience of this quite extensive nursery during the two days of this annual event is even better than usual. Here is an overview photo I snagged from the Alden Lane web site. It was amusing to see a yarn bombed cow statue (lower left in the photo) this afternoon having just come from a knitted and crocheted Tree Sweater Forest in the morning a few hours before.


There were amusing signs to read and to pose at. The three voluptuous quilters in the following wanted poster board are dubbed Penny Cushion, Bernina A. Biasbottom, and Longarm Lucy. My daughter Robin posed in the center position. The footnote at the base of the sign reads
LAST SEEN WEARING DENIM AND CARRYING LARGE COLORFUL TOTES 
Hah! Scroll back up and look at me in the second photo. I am wearing jeans and have a hot pink tote slung over my shoulder.


Scattered throughout were clever little displays. I liked this wicker dress form, clothed in a skirt created of pattern tissue, with an apron from artfully draped muslin.


I've included photos of a couple of quilts that especially caught my eye. The border on this one is incredibly striking. Number 21 is title Mystery Quilt and is listed in the program as having been made by a local quilter B.J. Meier.


The double lined quilting detail on this quilt is unique. Having twice the stitching lines in the stems and leaves and apples lends it a sort of flair like an artist's sketch.


Here is a view of the entire quilt that had that stitching. It is called Apple Time and was in the portion of the show featuring quilt artists Diana McClun and Laura Nownes.


This event occurs annually the last weekend in September. I look forward to it every year.


This year the show fell on my husband's and my 39th wedding anniversary, September 27th. He enjoyed browsing the 2014 show with me and our daughter. Even though it may not be considered a standard romantic anniversary activity, he and I visit this show on our anniversary weekend most years. This tradition just might be a contributing factor to the longevity of our marriage.   :•)