Showing posts with label NestlingOwls. Show all posts

Wednesday, May 11, 2016

Nestling Owls Completed

This quilt for my granddaughter was inspired by three things:
  1. a fabric in my stash I loved, Moda's Full Moon Owls by Tula Pink, 
  2. a pattern by Quilter's Dream I have been hankering to try, Square Root of Nine, and 
  3. a desire to expand my FMQ bravery with a stitching path from Angela Walters book Shape by Shape.


Previous posts discussed the color selections, block placements, and border. What was left was the layering, quilting, and binding. For the FMQ I chose an Angela Walters quilting suggestion for squares, a four petaled pattern based on two diagonals within the square. I drew it below on a plastic sheet protector with a same block inserted inside.
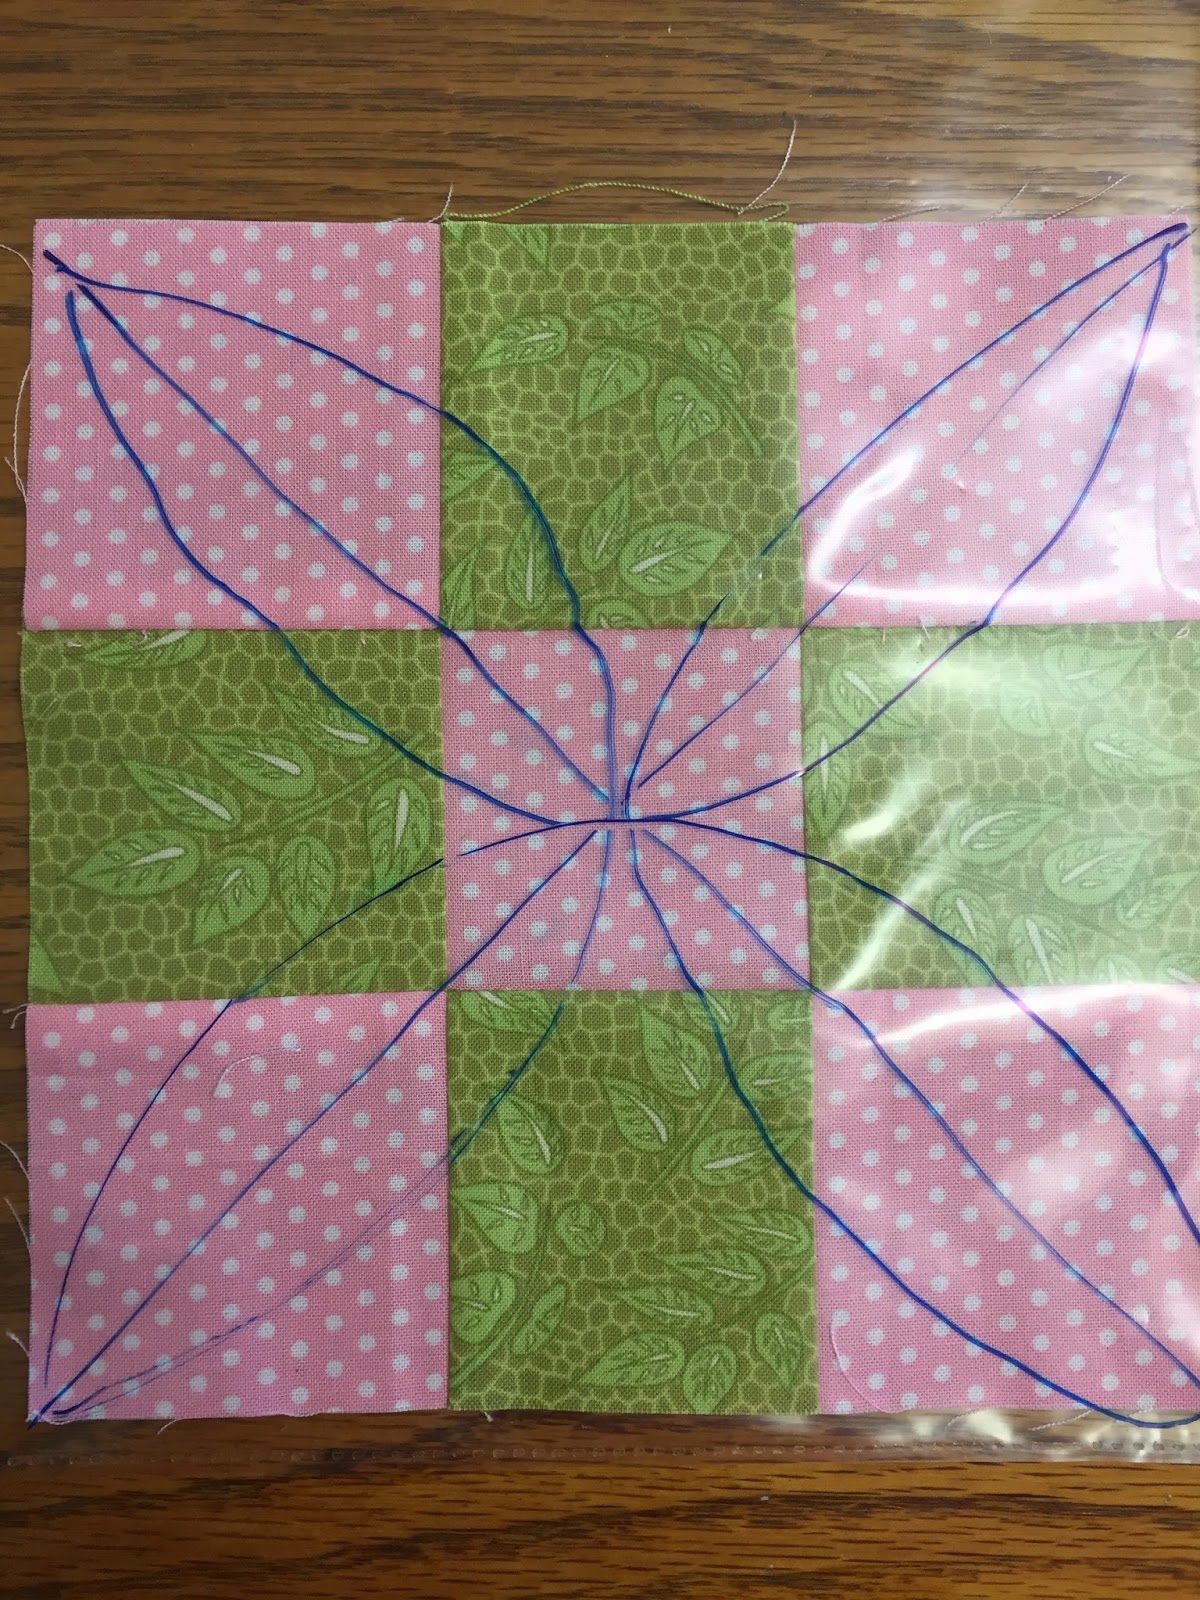

It shows up better on some blocks rather than others depending on the fabrics, but it fills the space nicely.


For the square within a square blocks I wanted to accentuated the offset diagonal nature and so only did a four petal pattern in the very center. I intentionally quilted down only one of the diagonals (not both) to add some interest but I did stitch in the ditch around each square. My original idea was to add loops along the diagonal but they looked more like a chain link fence rather than flower petal or leaf and were distracting so I omitted them in favor of a simpler approach.


I am glad I am getting enough braver to quilt in a non-matching thread color. It shows up so much better, adding visual interest as well as texture.


On the quilt top I mixed it up a bit and added the four lobed motif in different sizes throughout. This is my overall plan. I printed a photo of the assembled top and drew my proposed path on it. Note where there was not a complete nine patch I chose to break it up into a four patch and two singletons. This four lobe pattern scales well and easily.


I did the lobes free hand but I did use a ruler on my Handi-Quilter sit-down to get the diagonals straight and to help stitch in the ditch neatly.


I repeated the four lobe pattern in the border, keeping it the scale of three motifs to one block. For the square in a square blocks that did not have the natural seaming dividing it in thirds, I marked a piece of masking tape, using as a guide. It is low tack tape and I just peeled it and moved it to where I needed it. I do not mark my quilt tops, both because I am lazy and also because I fear I could be unsuccessful in removing the marking medium.


Having a border the same width as a third of a block helping in quilting around the corners. There were no cornerstone problems needing adjusting or fudging.


The motif blended very well from within the quilt top to along the borders


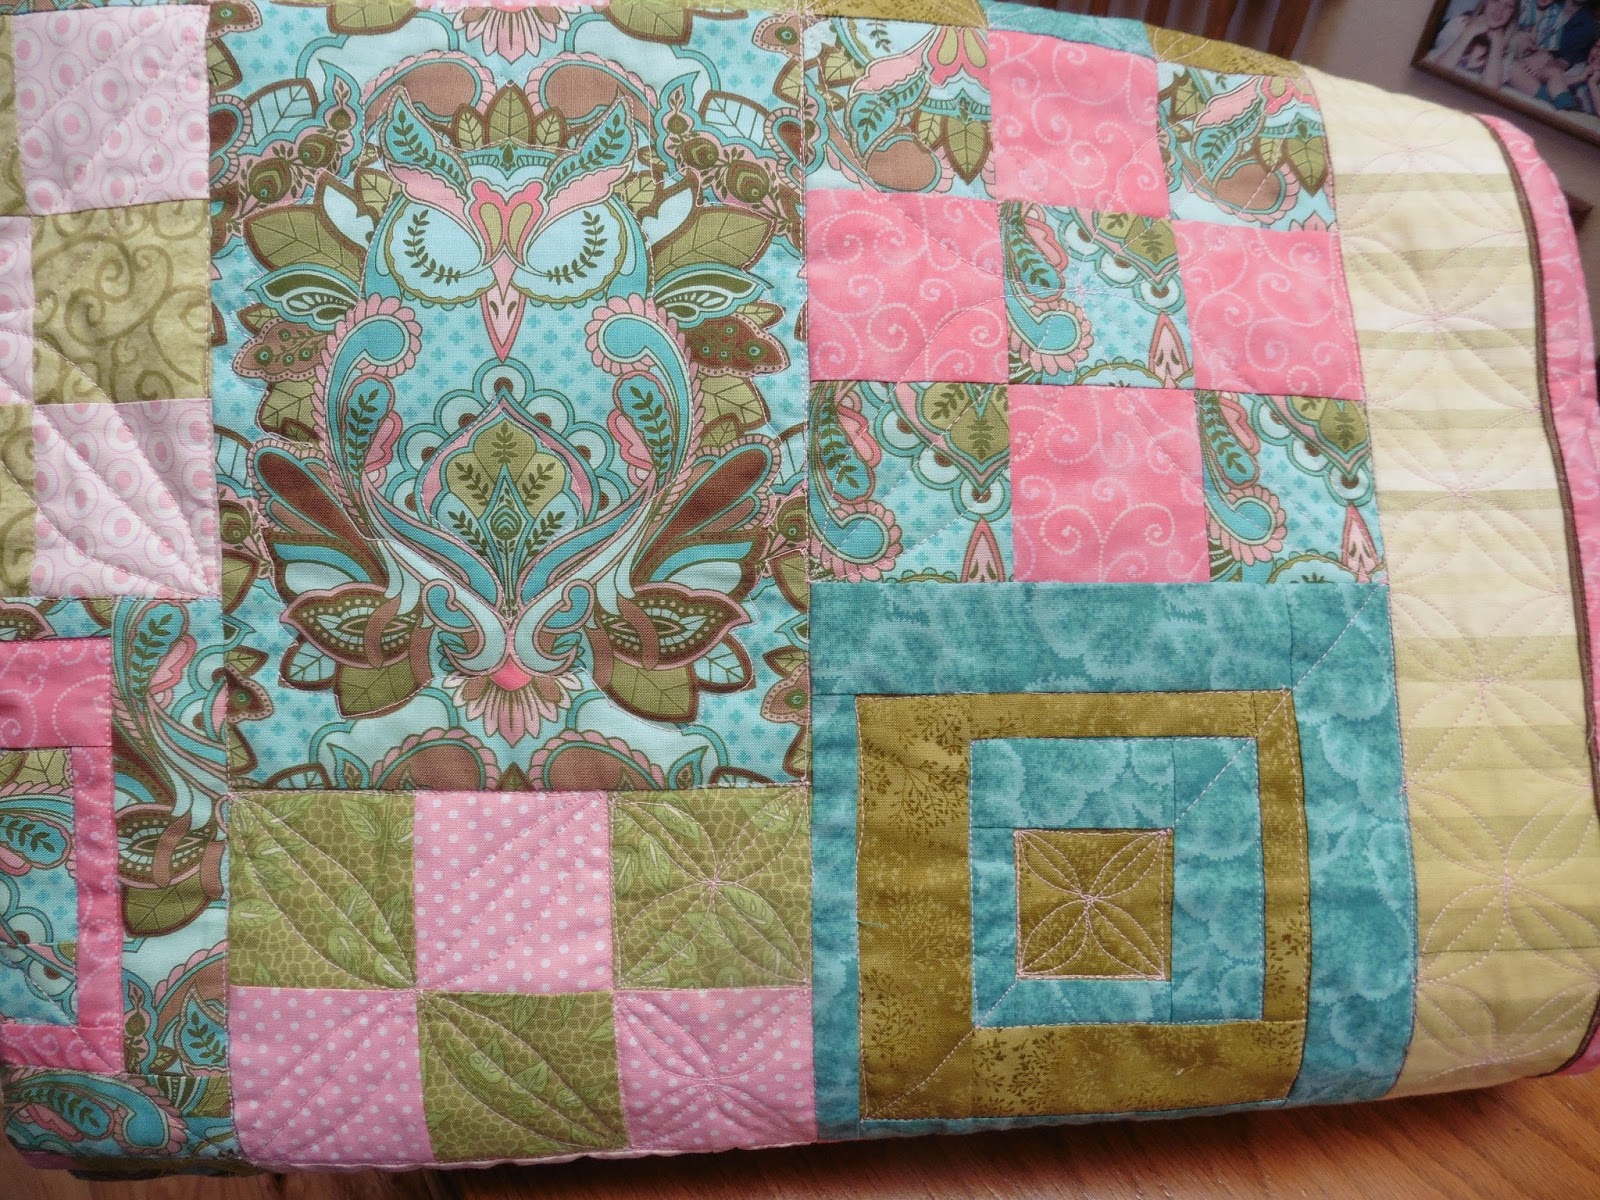
The following photo illustrates the six quilting regions, clockwise from top left.

  1. I sort of "winged" it on the owl blocks, pretty much echoing the owl's shape and the leaves surrounding. I was considering doing "feathers" but decided I wanted the owls to be puffier rather than flattened by excessive stitching.  
  2. Next is a large four lobed motif on a nine-patch block. 
  3. The border has a series of the motif lined up and scaled to one third the dimension of a block. 
  4. The two-tone magic binding has a stitching in the ditch along the chocolate accent flange. 
  5. A square in a square block has a diagonal, stitch in the ditch around the squares and a single small central motif. 
  6. Two-thirds of a nine-patch  block has a four patch medium size motif and two small individual motifs.

As the final touch I added labels to the quilt back. On the left is the quilt name Nestling Owls, and on the right, my initial and the year. I intentionally chose Nestling Owls not Nesting Owls because in my mind it conjures up images of cuddling.


Holding the quilt outdoors give a fair overall display, but colors are a bit muted in the shadows. Sunlight photos looked washed out. I keep gaining a growing appreciation for the photographers out there who can capture the essences of a quilt. Can you find the eight owls camouflaged in this quilt? I hope my granddaughter will enjoy looking for them.


Hanging the quilt indoors gives a bit more shadowed view that reveals the stitching. Yup. There are still eight owls there. Perhaps they are easier to spot now. Once you spot them will they be "spotted owls"? Groan...


Without seeing the stitching detail, the back side of the quilt looks quite flat and frankly, a tad boring, even though I do love this paisley-esque fabric.


Photographing in the sun at an angle show up more of the stitching and lends more interest.


I have washed it twice before gifting, and it did soften. I use 100% bamboo batting because I like its drape. Too much quilting makes for a quilt like flexible cardboard. Nestling Owls snuggles nicely into this chair.


The blog posts chronicling Nestling Owls creation and progress are as follows:

Pink and Green (March 31, 2016)
Paisley Owl Nesting (April 14, 2016)
Paisley Owl Rearranging (April 22, 2016)
Border Detail (April 27, 2016)
Nestling Owls Completed (May 11, 2016 - this post)

Now I will link up with Let's Bee Social #124 so I can share the good news of this quilt's completion.

Thursday, March 31, 2016

Pink and Green

My son and daughter-in-law are expecting a second daughter in May and I have started a quilt for her. I asked my daughter-in-law if she had a color preference in mind and she said "pink and green". The girls will be sharing a room eventually so that is the color theme. Here is the first daughter's quilt, created in response to a request for "green and brown with enough pink to know it's girl". I named the quilt Paisley Pearl (February 8, 2014). I wanted the second daughter's quilt to be distinguishable but set the same sort of quasi-modern mood.


I must confess, in an odd niggling sort of way that I cannot explain, I'd envisioned working on a turquoise quilt. To me turquoise is a girl color, where as true blue speaks "boy" to me. You will notice I snuck a bit of turquoise into the first daughter's quilt in some corner diagonals and the border. The second daughter's knitted blanket (3/21/16 post) had a bit of blue in it, also. But I dutifully went to my stash and started pulling pinks and greens for the second daughter's quilt. I love this stage of starting a new project. My sewing room looks like a fabric cyclone hit it while I am playing, but I love this stage.

I came across this piece of Tula Pink paisley owl fabric that I'd been saving for something special. I wonder if I subconsciously was thinking about it and it influenced my preconceived color inclination. The paisley swirls of it echo the swirls of the feature fabric of Paisley Pearl, but it is predominantly turquoiseOn closer inspection, it does have pinks, greens, and browns in it, though so "Bingo"! I pulled the subtle ombre stripe too just because it seemed to blend well.


I started pulling pinks and greens from my stash using the Tula Pink fabric as my inspiration and jumping off point. Here are the fat quarter pairings I pulled. In the bottom row, the pale pink with turquoise dots may be a bit weak and the broad stripe has all the right colors but the wide bands may be too strong. Nevertheless, I have not removed them from the mix just yet. That green in the upper right is just the perfect green but when I opened it up, alas, it was only a partial fat quarter.


I had used part of it, ironically on a pillow for the two little girls' daddy, my son. It was the background for a 14"x14" deer pillow (December 30, 2015) commemorating his first hunting experience. I am trying to find alternate greens and so far I am not completely satisfied. They need to be brownishly-olive in tone and not too brashly yellow. I am exploring some brownish greens and greenish browns. The rightmost brown shows promise, a good tone but perhaps too dark. The middle green is the right hue but somehow the plaid, even though tiny, just seems too masculine. The stripe is a good bridge fabric with the right colors but it may be too graphic and distracting. The taupe and beige on the far left do not excite me but neither do they clash.


The pattern I am using as a starting point is made from pairs of fat quarters so the ones I pulled are an experiment. I will make up the blocks from several of these pairings and omit the blocks that are too weak, too distracting, too graphic, or yes, too turquoise. Stitching up two fat quarters is not a lot to sacrifice, neither in time nor fabric, and sometimes I just need to see things made up to be decisive. I have shown a sample of some blocks stitched up and posted on my design wall. I do not want to reveal the entire pattern just yet - especially because I do not know how much I am going to deviate from it. I plan to feature that large scale print paisley owl fabric, fussy cut in some fashion, embedded amongst mostly pinks and greens as requested. That strong pink swirl tone-on-tone definitely needs to be in the quilt because it is a statement pink and goes real well with the paisley owl. I am curious to see how it all comes together.


In making those square within a square blocks, the pattern calls for an array of various sized rectangles. To keep them straight I use two notions called Alphabitties and Clover Wonder Clips.
I found that yes, I could make my own labels from paper, but these little sturdy plastic squares are reusable and show up on light or dark fabric. They are great to use in conjunction with the wonder clips to stack and keep organized various similarly sized pieces. I just clip my fabric pieces together with the defining letter on top.


I have discovered a small time saving tip when using these Alphabitties and clips. I used to store the clips in one container and then alphabetize, stack, and store the Alphabitties in another container. I then realized the Alphabitties are harder to pick up and stick together when stored in a stack. I now leave a clip on each one and store the clip/letter pair that way. When scattered on the table top or cutting board it is far easier to spot the letter desired and pick it up. Those are the individual letters with a pink clip. The blue clips still hold a stack that is pre-sorted and clipped together in numerical or alphabetical order. If you do not have them yet, these, stacking, interlocking, Lock-Up containers (see 8/23/13 post for more info) are great. I buy mine at the Container Store.


That is enough ramblings for now. I will link up with Let's Bee Social #118.