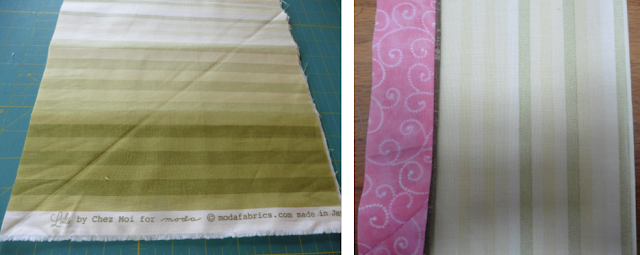
The stripe was just the perfect blend of soft tonality of greens - or so I thought. I had been unknowingly previewing the fabric folded up and so the full range of color intensity was not so obvious. I knew the darker stripes were there because I had accepted the tones as blending with the greens of the feature fabric, which also has tones more intense than pastel; but, I do not think I fully appreciated the dominance of the dark stripes once deployed in the quilt.
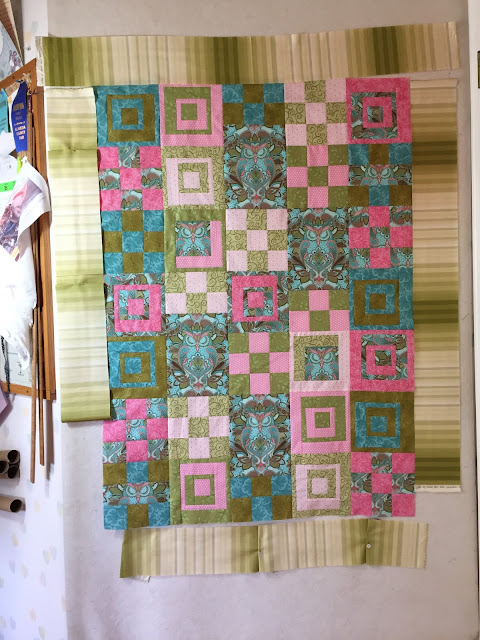
I cut 5" wide trial strips and placed them around the quilt top. The colors themselves were fine but that border looked like a traveling set of lights as on a neon sign outside a Las Vegas casino or as part of a garish Christmas display in a holiday light fight competition. Both of these were interpretations I did not expect nor did I want to promote. I had intended to subtly camouflage those owls, steeped deep their diurnal slumber, but I never intended to distract the eye so much that the viewer was blinded from discovering those nestled birds. Making the border narrower would decrease the distraction, but I needed more of a solution. I tried folding and pinning the dark stripes out of view on the left and bottom borders. Hmm... somewhat better.
I doubted the success of going on a quest for different fabric in just the right shades of green and I had my mind set on a green border. Then it occurred to me that I could surgically remove the offending dark stripes from the fabric and reassemble it into a subtler, less contrasting ombré. I cut a template so I would excise only the stripes I wanted to remove along the cut strips of the border fabric.
Ignoring the usual wisdom of seaming borders on a diagonal, I seamed the strips along the line of the stripes. They will be more hidden that way, especially when pressed and quilted. I now have all these squares in the middle remaining from the sections of dark stripes I cut out and of course I will not be able to throw them out!
There were two other things I did to calm down the border and make it less of a competitor with the central quilt. I made it narrower and I aligned the stripes so they looked a bit more orderly. The border width is that of one of the squares of a nine-patch block. I was lucky in that the stripe repeat was very, very close to a multiple of the block size. I centered a pale set of stripes in the top and bottom borders and centered a darker range of stripes in the side borders. The colors still vary along the edges but to less of an extreme and they no longer look like they are marching around the outside. The corners came out as medium dark squares. I confess, I did not plan it that way, but I liked those pseudo-cornerstones there!
I am often conflicted when making a gift quilt on whether to blog about it or save it as a surprise. This granddaughter is due to make her appearance into this world in May. How much should I "reveal"? Surprises last only a few minutes, seconds even. My blogging gives me hours of pleasure while I am doing it. Explaining my choices and seeing them displayed on a computer screen, crystalizes my thinking. The voice of my posts is like I am talking to an audience, but more likely I am talking to myself. Since my hobby is about process, often even more so than product, I choose to write info about it before it is complete. Besides, a quilt is not a quilt until it is quilted!
The top now measures 39" x 52½" before quilting. The quilt I'd made for this little girl's big sister, Paisley Pearl (post for February 8, 2014), had finished at 39" x 45" so this is comparable. My next step is to prepare the backing, sandwich with batting, and (gulp) "quilt as desired". Oh, and I have to name it. I am toying with Paisley Owls, or Nesting Owls or Nestling Owls. I have a leaning toward Nestling Owls. It conjures up cuddling.
Remember those two groups of eight blocks I decided to leave out? Here they are along with some partial blocks. I will have to do something with these, too! Eventually. Not now.
Linking up now with Let's Bee Social #122.


It looks lovely so far! Thanks for all the time, thought, and care you're putting into this quilt!
ReplyDeleteLooking good! Can't wait to see the final product. And, glad those "Mad Madam Mim" blocks went ;-)
ReplyDelete