Showing posts with label nautical. Show all posts

Wednesday, September 24, 2014

WIP: Wooden Quilt

Sometimes a burst of energy is followed by a period of lull in sewing. My most pressing tasks to do next were to wash the completed Nautical Baby quilt (August 27, 2014 post) before gifting and to piece the backing for the Vintage Ornaments quilt now that I have gathered the side border fabrics (September 18, 2104 post). But neither of those happened this week. The only time I spent in my sewing room was doing clean up and scrap management after those two projects. Here are the HSTs I salvaged, pressed, and trimmed from the Nautical Baby quilt. I will make something out of them someday after they have "ripened" in my scrap stash for a while. My quilting time this week was spent elsewhere – in the creation of a wooden quilt.


We are putting down hardwood floors in the master bedroom and my husband, Frank,  wanted it to be a DIY project. He expended a large effort in locating the flooring (distressed hickory - same as in the hallway), purchasing a sufficient supply of the expendables (paper, staples, tape), and assembling the tools (Father's Day gift compressor, nail gun, staple gun, table saw). Although, interestingly enough, despite the extent of my husband's arsenal of tools, we discovered that my large rotary cutter was the best choice for slicing through the foam underlayment of the carpeting. You can see the big yellow Olfa cutter on my husband's surgical table of tools near the foreground of the following photo. I have donated it to the cause. Like formerly dedicated fabric scissors, it will not grace the walls of my sewing room again, even with a fresh blade.


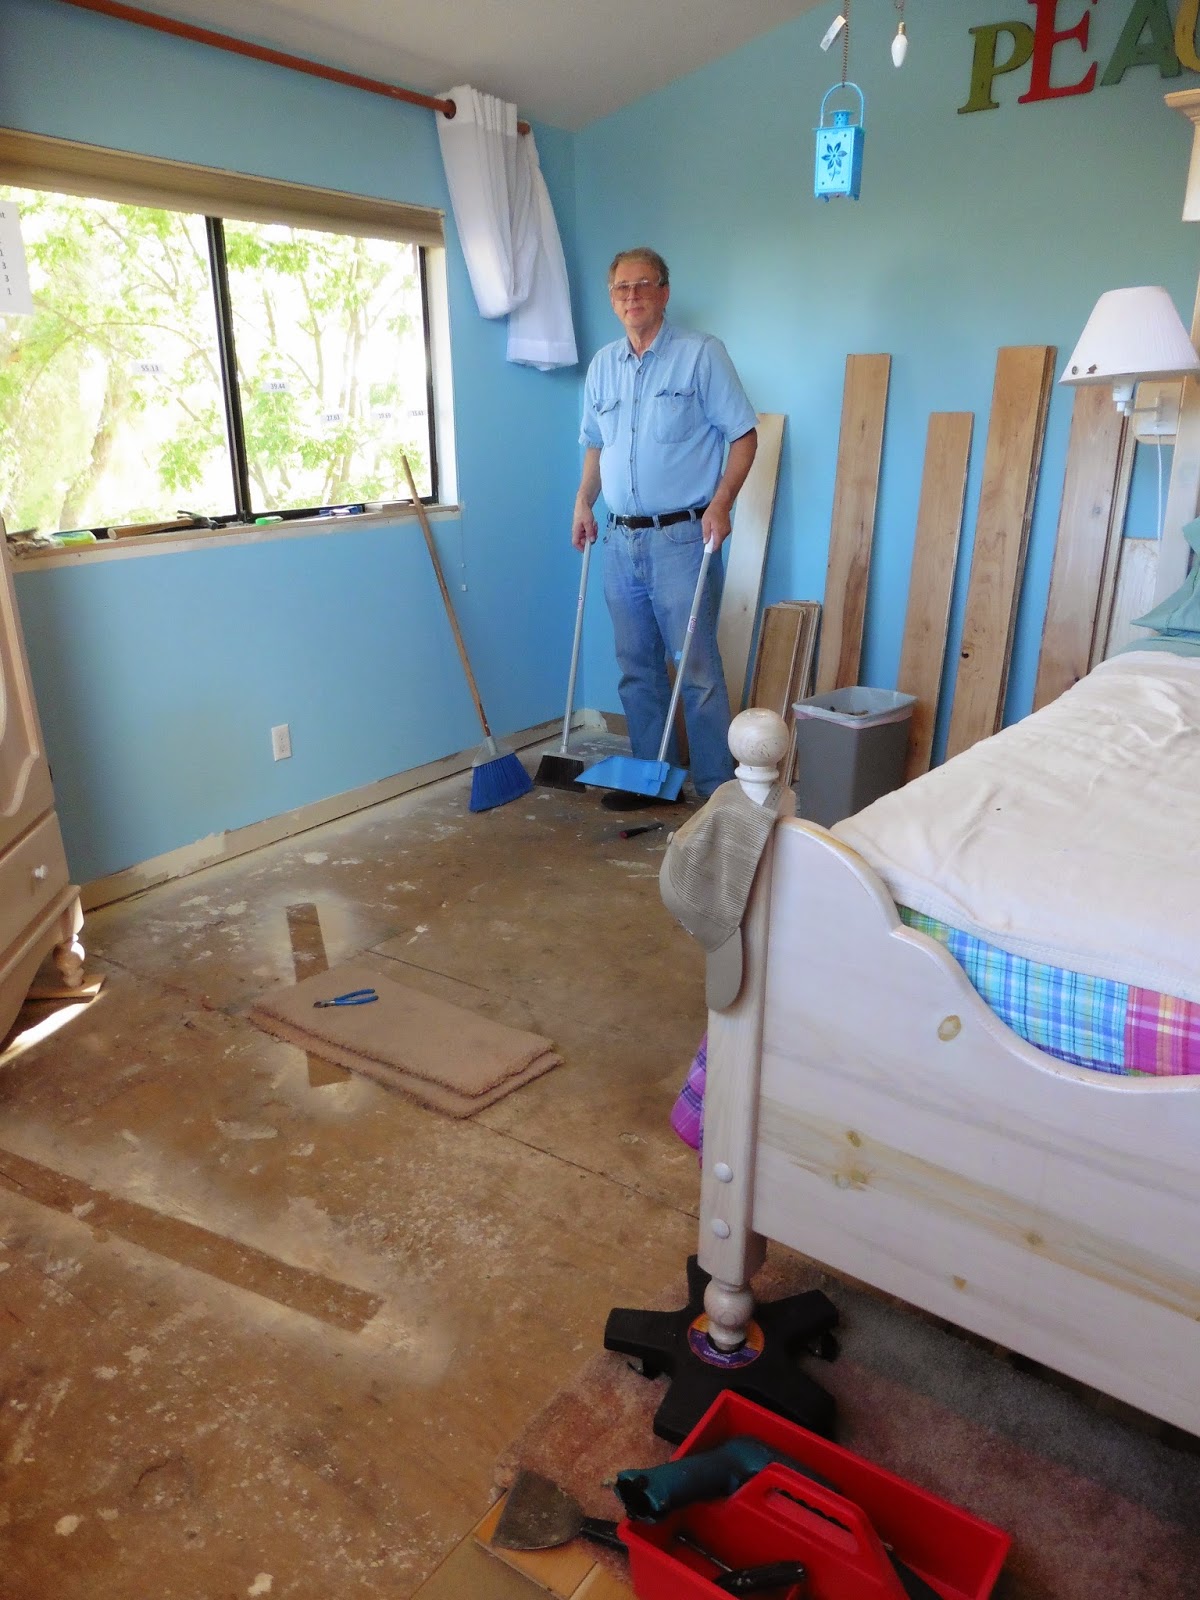
The demo before hand (removing baseboard, carpet, and pad) was nothing to sneeze at but I was not doing the hard labor. I fetched and stuffed trash bags, provided drinks and food, and pointed out obscure, but potentially troublesome, remaining nails, staples, etc. My husband enlisted the help of a friend Al for the first part of the demo and most of the actual lay down so far. Granted, most of the time is spent down on their knees. But power tools? A loud thundering compressor? Male bonding? What guy would not jump at an opportunity like that?


There is not much glory in doing the demo but somebody's got to do it. The HGTV design shows make it look like fun. Not! This is the quilter's equivalent of picking out free motion quilting gone awry. It is time consuming and there is little to show for it. But Frank forged ahead. Note the drop cloth on the bed. It makes for a very dull, rumpled quilt.


I have been drawn in to this new flooring undertaking with the role as the official "placer of planks person" so that the hickory boards look balanced and random in color and pattern. Joint placement is important too, since each wooden "seam" must be staggered at least six inches from an adjacent one. My husband called these my quilting talents. That is why I am tongue-in-cheek claiming that we are making a wooden quilt! I have moved or repositioned these planks pretty much as I would quilt blocks on a design wall. The guys then pounded them in and stapled them down. The photo below shows the status of this week's Work In Progress.


Color selection is another quilter's skill. This week I picked paint color for the walls. The bright aqua there now is just a tinted primer. We will probably go with a softer blue with a bit of a violet undertone like one of these samples. We will start with the lower down, bolder, darker one, and paint the wall behind the bed. But my husband agrees that if I think it is too strong to paint all over, we can go paler on the remaining walls. I just want to assure myself that there is sufficient contrast with the pale furniture to avoid a washed out feeling.


Enough of this room. Even if I did not quilt this week, I am sure others did and I can share vicariously in their progress. Setting aside the wooden quilt work and color selection, I am now linking up to view other works in progress at this week's Freshly Pieced.

Wednesday, August 27, 2014

WIP: Nautical Quilt Finish

This week I quilted and finished the nautical baby quilt. I quilted the central section diagonally with white thread as planned with my feed dogs engaged. I set the diagonal spacing and direction to match that of the wave blocks of half-square triangles. Turning was difficult at times as I changed the direction of the diagonals. But I wanted a zig-zag pattern like the sailboats make when they tack into the wind.


It was a bit trickier than I anticipated because on the diagonal there was more fabric to squeeze through the throat of my Pfaff.  I just eyeballed the lines and did not mark anything. I was lazy and leery – lazy about drawing all those lines and leery about getting the marking pen out of the white speckled background. I used safety pins along the striped inner border where there were no wave seams to act as a series of focus points. I aimed for where the designated stripe met the speckled background.


Having no markings on the fabric, I kept focused on an end point before turning. If I'd tried to keep on a drawn line I would have had a bunch of localized squiggles along the way as I corrected. With this long-range focus method, I just had a few bumps in places where I stalled because I had trouble cramming the quilt through. I was glad I did not try to free motion quilt the lines since the stitches would have been very uneven as I tried to stuff the quilt through the throat. The motion would not have been "free" at all!

The outer border I quilted with concentric rectangles with pale blue thread to match the background color of the sailboat print, again with feed dogs engaged. I spaced the quilting lines to create channels along the border that minimally crossed the sailboats.  I decided the channel spacing based on the side borders and kept the same spacing on the top and bottom borders. For straight lines in the borders I used one of my rulers as guidance. I just held it in place as I sewed. It actually worked well since I could have been tempted to follow the pattern of the sailboats which were not necessarily in non-drifting rows.


I sewed lines parallel to the stripes back and forth in the candy-striped inner border. I used white thread and stayed on the white pin-stripes. The quilting is not very visible, but I suspect it will puff up more once the quilt is washed. I did drop the feed dogs and free motion quilt this section. It was close enough to the edge and there were enough directional changes that I felt it was easier to propel the fabric myself than rely on the feed dogs.


Once I finished the last stitch in the binding I asked my husband to hold it up for me outside for a photo. Seeing it completed I am pleased that I went with a same fabric and not contrasting fabric for the binding. The quilted diagonal "tacking" lines are more visible in the sunlight, which is good. Not so good is that the sunshine also casts shadows that highlight horizontal wrinkles between the tacking lines, possibly due to sewing up diagonally on the bias one way and down on the bias back the other way. When I look more closely the fabric does not appear to be twisted or distorted within each channel though, and so I think a washing with soften these bumps. As the saying goes, "If you can't see it from a galloping horse, don't fret about it." I may just have to gallop very fast!


The channel stitching shows up nicely on the back. It is very odd how it is only alternate channels that display the horizontal ridges. And this was with feed dogs engaged - not FMQ - so I was going forward at all times. Perhaps one direction was the tight-squeeze- through-the-throat-of-the-machine direction and the other was the clear-sailing direction. Puzzling... In the lower left is my label, the last item I added.


Here is a close-up of the label showing my name and the year completed. All that is left is to pre-wash this quilt before gifting it. The front and back full quilt photos above appear to have a spot at the lower center on both sides. I was concerned that some liquid has seeped through since it was on both sides. I examined the quilt though, it is spot free, and the blur is an illusion. The brown smudge is an artifact from the camera lens. No need to worry if that will wash out. After laundering to set the dyes and soften the quilt,  I will snap a few more photos. Maybe I will even try some of those artsy shots where a quilt is draped over a bench or picket fence.


This week I also made a cloth book for my older granddaughter. You can see it in my August 26, 2014 post. At just over 21 months old she is slightly beyond the cloth book age but she is learning to count so I better give it to her now. I have a second one in the works for her cousin who is almost 5 months old now. Here are my stats for the week.


Completed projects (1):
  1. Nautical themed baby quilt (July 9, 2014 post, July 16, 2014 post, August 13, 2014 post, August 20, 2014)
Ongoing projects (4):
  1. Mask quilt (October 19, 2011 post) - after being hidden away for years awaiting inspiration for arranging hexagons, I got it out this week, laid some hexagons out on the bed, and ... contemplated them. (Hey, it's a start!)
  2. Chicken quilt - spray basted, awaiting embellishment (April 24, 2014 post)
  3. Overlapping square wall hanging - awaiting FMQ, I picked thread this week
  4. Classic Cars strip quilt (August 3, 2013 post) - need to back, quilt, and bind
New projects (1):
  1. Counting Monkey cloth book (August 26, 2014 post)
I am hooking up to today's Freshly Pieced post for WIP Wednesday.

Wednesday, August 20, 2014

WIP: Nautical Quilt Spray Basting

With my nautical quilt top complete and my backing all pieced, I forged ahead to layer top, batting, and backing in order to quilt this on my domestic Pfaff. In preparation I first gave my sewing room floor a quick swipe with a soft dry mop pad to get up strings, scraps, and dust. In the following photo I have pulled my cutting table out from the corner to the middle of the room, pulled up both leaves to full length, and laid the backing, batting, and top on it. Even though the quilt overhangs the edges, I find it a lot easier to smooth out all the bumps and wrinkles at table height while standing rather than crawling about on the quilt on the hard floor. I slide the three layer stack back and forth so different parts are overhanging and I can smooth out the parts supported by the cutting table. The batting cutting, layer aligning, and wrinkle smoothing seems to take forever. Maybe I fuss too much. In reality I did it the other night in less than an hour. I need to remember that I generally spend more time dreading than doing.


Once satisfied that the three layers were centered and wrinkle free, I loosely folded the combination and set it on the floor. Folding did not disturb the smoothing process nor introduce bumps or wrinkles. Yesterday, I collapsed one leaf of my cutting table and moved it back into the far corner, out of the way. That way I could tape my backing to the hardwood floor, using the seams between planks to double check that the layers were aligned parallel.


I taped down the backing on two corners using a low tack blue painters' masking tape. Next I unfurled the fabric sandwich roll and taped the other two corners and mid-length and mid-width edges. Next came the application of the temporary fabric adhesive.


First I flipped the top and batting layer as a two layer unit from the upper half downward as in the following photo. I did this just by picking up an edge and walking it forward, laying it down on the opposite half. The manufacturer's recommendation is to always apply the basting spray to the batting and not the fabric so I sprayed the exposed batting. Then I flipped the two layers up against the backing again by picking up the edge and walking it back upward. I smoothed the layers together from center to outer edges. I repeated for the lower half (no photo) by flipping the top and batting layer from the lower half upward, spraying the batting, and flipping batting and the top back down onto the backing.  That completed the backing/batting interface.


Now for the top/batting interface. I flipped the lower half of the top upward, spray basted the batting, then flipped the quilt top down onto it (photo). I repeated by flipping the upper half of the top downward, spray basting the batting, then flipping the lower half of the quilt top down onto the batting. (no photo).


I have found a batting that I am really pleased with, and located a basting spray that is effective, odorless, and washes out. I use 100% bamboo batting because the quilts I use it in drape so nicely and softly. The 505 basting spray does not gum up the needle on the sewing machine. The taping and spray basting takes less than fifteen minutes. There need be no fear of messing up. Things can be peeled apart and corrected. I really need to remember this next time I drag my feet at this step.


Tips Needed for Cutting Batting
So why, for something that takes just over an hour to accomplish, do I usually procrastinate when it comes to the quilt layering step? Perhaps because I find batting so awkward to measure and cut, struggling with laying out and cutting multiple layers of batting at once since the size is larger than my cutting mat and, unlike fabric, it puffs up as I cut. I resort to a large size 60 mm rotary cutter, or even, horror of horrors, scissors! I get an approximate size, because I am chicken about making it too small, and then wind up trimming a bit more several times. If anyone has suggestions for simplifying this process please clue me in.

A Case for Batting on a Roll
I generally buy my batting packaged in predetermined sizes, king, twin, etc. and then try to get several projects out of a package. Although I label each package with the dimensions of what is left in it, the remaining sizes seem to rarely be suitable.  Perhaps I need to learn how to piece batting with a zig zag stitch. Is this really feasible? I am considering changing my practice of buying pre-packaged batting. Instead, I'm considering buying my batting on a roll and cutting off the just the length or width I need. This would solve the issue of folds and wrinkles in the batting. I thought storage for a large roll would be an issue but storing these random odds and ends, even when folded neatly in bins, is not ideal either and probably is proving to be an inefficient use of the batting. Cloth books take relatively small scraps of batting I know I have a lot of cloths books on my to do list... but nonetheless...

Statistics
I have no new nor completed quilting projects this week. I did start a new knitting project, though. I am knitting a sweater for a tree. If you are curious, you can check it out at my previous post dated August 19, 2014. To see other folks' progress, I am linking up to this week's Freshly Pieced's WIP.

Wednesday, August 13, 2014

WIP: Nautical Borders, Backing, and Binding

WIP Wednesdays went on hiatus. The timing was great because it coincided with the week and a half my husband and I spent in Seattle with college friends. Before I'd left for vacation, I'd finish piecing the majority of the top of my nautical baby quilt. All that was left, was to add the narrow inner border and the wide outer border. My last post on this quilt was five weeks ago on July 16th. When I returned from Seattle, my daughter-in-law and four-month-old granddaughter were visiting for a week. Much as I love quilting, the presence of a granddaughter trumps being in my sewing room. Adding the borders to the nautical quilt waited a bit longer.


This week I ventured back into my forlorn and abandoned sewing room, which is more accustomed to nearly daily companionship. I added the two borders this week after mom and baby returned home. Here you can see the red and white candy striped inner border and the sailboat print outer border from the fabric line Seaworthy by Jack and Lulu for Dear Stella Fabrics. I was auditioning bindings in the far left side of this photo. At first I thought I wanted more of the candy stripe. I had a similar fabric but only in other stripe widths and they were a bit too graphic, even in the small dose of only a binding width. See the top-left and bottom-left fabrics. Perhaps something more subtle would fit better such as a binding of the zig-zag wave fabrics, also from the Seaworthy fabric line. I considered using one, the other, or possibly alternating both. Neither seemed right and seemed to distract from the feature boats, even though they were color matched and intended to coordinate. See two middle-left fabrics and the half-square-triangles of waves near mid-photo.


I then tried the same sailboat fabric from the wide outer border as the binding fabric. I usually contrast my binding but in this case I liked that it blended in and did not draw the eye outward. It is all the way on the right in the next photo. I made up my binding for the quilt, also, this week. I cut the binding strips from half widths of fabric rather than whole widths because that is what I had left. I actually think that approach will work out better because the pattern print changes more often within the binding itself. I am curious to see how it turns out when sewed on. I did not have enough fabric to cut each strip along the same horizontal line of sailboats and, even if I could have tailored the binding to the repeat of the fabric, it would have been very wasteful. Whoops! I just noticed in the photo a pucker by the lower rightmost wave and the candy stripe. Gotta fix that... Glad I spotted it before quilting...


I was determined not to buy backing material since I have  a lots of fabrics in my stash that I bought on sale for backing fabrics. I probably have more "backing fabrics" than I will ever make quilts in my lifetime! But let's not go there. That is true of my entire stash as well. I decided to piece this backing with an assortment of nautical prints I had from the Sail Away fabric line by Northcott Studio. I had one yard of each of these three prints, two with anchors and one with sailboats. None was long enough nor wide enough for the 58.6" wide x 61.5" tall quilt top.


The Sail Away red is a bit subdued and not as bright as the red in the Seaworthy line on the quilt top and the navy is a bit darker, but I felt it kept the theme alive and was fine as backing. I needed to make my three one yard cuts fit. All three prints were directional. I split the anchor ones in half crosswise and the sailboat one in half lengthwise and sewed them in somewhat of a checkerboard pattern for the back.


The block-like pattern remind me of nautical flags. Although there is no yellow, the back  is kind of bold with the same sort of rectangular elements. 


Alas, I am now at my pausing/stall point in my quilting process. I just need to forge ahead and layer that backing, batting, and top. But I can delay as I ponder my quilting pattern. The original pattern had swirls among the ships but I would like to deviate from that and use my feed dogs for control rather than free motion quilt.

At this point I am leaning toward parallel channel stitching the quilt on the diagonal to reinforce the slant direction of the sails and waves. I would like to just echo the stripes in the red and white candy stripe border, perhaps carrying the stitching out to the binding. This will work in the top and bottom borders. Since the sailboat heights may not be integral number of wave blocks, there might need to be some uneven spacing in the side borders. Here is my Power Point doodling as I figure this out.


I might wind up just straight stitching between the boats. Here are those options.


It has also been a long time since I have posted my project status list. Here it is updated from my post of July 2, 2014 without many changes. I've decided to post the status updates less often so that some ongoing projects – those I do not want to abandon yet am unwilling to tackle just yet – do not keep staring me in the face.


Completed projects (0):
  1. But I had a great vacation with college friends and a terrific visit with my granddaughter and daughter-in-law.
Ongoing projects (5):
  1. Nautical themed baby quilt ( July 9, 2014 post and July 16, 2014 post)
  2. Mask quilt (October 19, 2011 post) - hidden away awaiting inspiration for arranging hexagons
  3. Chicken quilt - spray basted, awaiting embellishment (April 24, 2014 post)
  4. Classic Cars strip quilt (August 3, 2013 post) - need to back, quilt, and bind
  5. Overlapping square wall hanging - awaiting FMQ
New projects (0):
  1. ... other than buying more fabric ...

Now that WIP Wednesdays are back, I am hooking up to today's Freshly Pieced post.

Wednesday, July 16, 2014

WIP: Boats, Bitties, and Blue Waves

In my July 9, 2014 WIP post I had just begun the fabric selection for my Nautical Baby Quilt. I'd picked out all fabric except the fabric for the waves, deferring that selection until I had some boats assembled. I cut out the pieces for the boats and background and tried out a new assembly system using Alphabitties I'd bought at the Fat Quarter Shop. Here are all my boat and background fabrics cut into pieces, dutifully labeled and stacked in my project case. I find scrapbooking cases work great for projects in progress. At first I was a tiny bit befuddled by multiple letters for the same fabric. In constructing the quilt top, though, it worked great with the Sew Emma pattern.


The letter represents not just the fabric, but the size of the piece as well, so, once you've cut it and labeled it, there is less opportunity for mixing up similar sized pieces of the same fabric. Instead of phrases like "use your 3x3 inch square of fabric A", the instruction would guide you through making T/D, R/D, and P/D units. At first skeptical about the Alphabitties – after all I can make my own letters out of scraps of paper – I found these sturdy reusable plastic tabs had a nice feel to them and they were enjoyable to work with. Their color stands out well against both light and dark fabrics. This is not a sales pitch folks, just my opinion. I own no stock in Alphabitties.


I made the hulls of the boats first using the squares on the corner and flip technique. I lined them up on my cutting board and cut off all those corners in one fell swoop. 


Never quite able to bring myself to throw out fabrics, I chain-pieced the triangles I cut off into HSTs. I left them connected to each other so as not to confuse them with my other pattern pieces for the quilt top. I will open them up, press, and store them for future projects. I'll leave the trimming until I know what size I'd want,


Next I made up all the HSTs for the sails. Again I sliced them all at once since that bias seam allowance is not critical once they are stitched. Then I trimmed each with my precision trimmer to square them up and remove the dog ears.


The Precision Trimmer 6™ is another great tool I'd recommend, by the way. (Not so much, though, the Precision Trimmer 3. It does not have as many markings and is not as versatile.)


I planned which mast colors went with each hull and sail combination for the nine boats. I laid them out and snapped a cell phone picture to remember. Those masts are 1" x1.5" bits of fabric. Because of examples like this my husband knows never to empty the trash in my sewing room. Unless it is sitting outside my door he leaves every itty-bitty, teeny-weeny scrap of fabric right where it is! He is a very knowledgable quilting husband, from quilt-show-purchased treasures to sewing-room-generated trash. He even recognizes when quilts are set on-point!


The boats did work up rather quickly. I needed to be careful though since some faced right and some faced left. I actually think I spent more time agonizing over my choice of wave fabrics than assembling those boats. But this week I reached the point of having to commit to wave fabric and so picked these two mini-chevron prints. They are subtle and not very graphic so they will not distract from the boats. And they were the correct blue, finally! I did have to do a bit of head scratching, though, since the prints were directional even though they read as a solid. I wanted to be sure the ripples remained horizontal. The waves had a right and left handedness to them as well, so that complicated things a bit too. I made myself some mockups out of paper to be sure I had it right before I sewed the fabric.


I finished two rows of waves. I have one more row of waves to complete. Somehow making fourteen HSTs at a time is a bit less daunting than trimming forty-two HSTs! Add the two wave rows to the nine boats and three suns I have already finished, and this quilt is well under way. Next task up will be assembling the rows and adding the borders.


In terms of my weekly statistics, I have not completed any projects this week but at least I have not started any new ones either. I am cruising along full speed ahead on this nautical quilt and it has my full attention for the moment. Now I will link up to this week's Freshly Pieced Works in Progress Wednesday.

Wednesday, July 9, 2014

WIP: Nautical Baby Quilt

In the housing market when a contractor speculates and builds a house without a buyer lined up he is said to be building it "on spec" and hoping the fruit of his labors will pay off in the future. I bought a pattern from the Fat Quarter Shop a several months ago "on spec", dutifully filing it away in one of the piles in my sewing room.


Coincidentally several weeks ago I bought a fat quarter bundle from my local quilt shop In Between Stitches from the fabric line Seaworthy by Jack and Lulu for Dear Stella Fabrics - also "on spec". (See doesn't "on spec" sound much more important and acceptable than "just because I liked it" or "because I caved"?) In Between Stitches has a clever, interleaving way of packing their bundles that I am still trying to figure out and hence my step by step photographic record of the bundle disassembly. The bundle contained these eight fabrics - sailboats, red zig-zags, navy with white stars, white with navy anchors, sea lions, miniscule two-blue chevrons, mermaids, and spouting whales. 


I did not intend for this bundle to be used for the Row, Row, Row Your Boat pattern. I find that fat quarter bundles usually need to be broken up or used with a pattern that is fat quarter friendly.

The pattern and fabric purchases were several weeks ago. A third happy happenstance came this week when a friend of my daughter-in-law, seeing a quilt I'd made for my granddaughter, hinted that if I had extra time and if I was inspired, that she and her little boy would love a nautical themed quilt. I was flattered and bemused. So this week I have been planning a nautical themed quilt for a baby boy.  It seems that buying fabric and downloading patterns "on spec" is not such a bad thing.

My goal is to make this gift quilt totally from fabrics out of my stash. That never works 100% but sometimes with my sizable stash I can come pretty close. The fabrics I will use from this Seaworthy bundle I just bought are the feature sailboats, navy stars, red zig-zag, and possibly minuscule two-blue chevrons and mini-anchors. The hulls of the boats will be these three bright fabrics - the red zig-zag and navy stars from this bundle and the orange dots from my stash. The white of the sails may be from the mini-anchor print, though one does not usually put such heavy weight up where the wind is supposed to blow... hmmm.


For the larger yardage areas, borders and background, I did go out and buy fabric specifically for this quilt. For the wide border I bought more of the sailboat feature fabric because I just love, love, love it. It has stripes and dots in the sails, both real favorites of mine.  The small inner border will be a red and white candy-stripe from my stash. For the background, the white fabric I had in my stash rows of hearts on it, which may be passable for a boy but I wanted something that was not directional. I hoped to find a blue background because it would be easier to keep clean for a baby, but I did not want a plain solid and I could not seem to find the right blue, that was non-directional but still had a bit of textural interest. Besides, I really wanted that sailboat fabric border and it would have been too much blue to have blue in a background as well. I bought some white with navy specks. If I change my mind, it is a neutral enough fabric to have in my stash. It may go in the sails as well instead of a mini-anchors print.


My undecided fabrics are for the three rows of half square triangles that represent waves. This is where I am stymied. I have a lot of fat quarters but the waves take 1/2 yard of a light blue and 1/2 yard of navy. I could use a fat quarter each and mix the two size navy dot fat quarters I have. Perhaps the larger ones are too graphic and distracting. I do have a 1/2 yard of the blue swirls but it is not quite the right blue. Maybe since it will be offset from the feature sailboat border fabric by the red candy stripe it will be fine. 

I am also considering not doing half-square triangles at all but instead using a wave-like fabric as a sort of sashing. I considered white/navy chevrons like this white/black chevron print from my stash. Each row is 3.5" high but the kicker is that the rows of a chevron print runs parallel to the selvage. I'd need 1.25 yards for the width of the quilt, unless I cut a bunch of short lengthwise strips and seam them several places. I'd have to find a place that sells it, too. I think it also may be a bit too graphic and compete with the boats for attention. It depends on how bold the chevron.


The chevron on the left below would be better than the one on the right. Even if I bought the 1.25 yards, I know from past experience that this chevron type fabric is not true to grain and so the waves would, well... waver. I think I just talked myself out of this option. Maybe. I may just get a half yard more of the minuscule chevrons and use that as a sashing for the waterline. Its waves run selvage to selvage - the right direction for my needs. After all it would be the least bold of the chevrons and the right blue, too. With its smaller scale, any off-grain would not be as pronounced. I could also use it alternating with two sizes of navy dot fat quarters I have in my stash to make half square triangle waves if I really feel guilty about leaving out the waves. It could be substituted for the not-quite-right-blue swirl fabric. 


I have other wave-candidate fabrics in my stash but the blues are wrong. They are more aqua or purplish. Looking at this subset of the blues from my stash, it is embarrassing to think I cannot make something work out of all these options.


I could also leave out this waterline row entirely. That would solve the problem and then I would not be buying even more fabric, either. Writing about my options has helped me clarify some of them. For now I think I will buy a half-yard of the minuscule chevrons from my local quilt shop. I will make up the boat blocks. After seeing them and after some some time has passed, the design will have mellowed in my brain and everything will be crystal clear... just like tropical waters!

The backing will be made of two or three of these nautical prints I had in my stash. I have a yard of each so I will combine them somehow for the back.


Cute as they are, I will not use the mermaids, sea lions, and spouting whales from the bundle. Although they are the right pale blue and the right navy, I do not want to chop them up for waves. They are "on spec" for something else someday.


So now I will link up to this week's Work In Progress Wednesday at Freshly Pieced and see what others are doing.