For standard crib mattress: cut fabric 70" x WOF with 8" cut-out corners and 80" elastic
For a smaller crib mattress: cut fabric 50" x 36" with 5" cut out corners and 60" elastic
On crib sheets there are two long edges and two short edges that need to be turned under 1/4" and 5/8" to form a casing for elastic. This is really the only tedious part about this project. Even the Dritz Ezy-Hem Gauge was not as convenient as I would have liked and, since it was metal, it did get heated up by the iron. I started out using it last time when I made a dinosaur sheet this past June but was not thrilled with it. I wanted to find a method simpler than measuring and pressing, measuring and pressing, inch by inch around the edge. Instead I let the throat plate on my Pfaff do the measuring for me. To turn an edge under 1/4", I ran a stitching line a scant 1/4" from the edge. I then went to my ironing board, folded over the edge so I could see the stitching line and pressed.
The fabric cooperated by bending near the stitching line. But I just discovered a great product that protects my fingertips while I do this. Dritz makes Thermal Thimbles. These are great for holding edges turned over when ironing. They sure helped me avoid the sore, singed, fingers-tips – if not actual blisters – I usually get when I am too intent on holding fabric in place just so while I press. I tend to zap myself with a burst of steam, over and over again.

I normally hate thimbles and have never been able to adapt to using them. When stitching I would rather stick my fingers than lose the dexterity thimbles seem to snatch away from me; but I do not need a lot of finesse when steaming something so these shield my fingers without encumbering me. In fact, when I went back to my sewing machine, I'd forgotten they were on three fingers of my left hand. With the 1/4" turned under and pressed, I then stitched a line 5/8" inch from the folded under edge. The thermal thimbles even added a bit of grip when feeding an the fabric under the pressure foot. They come three in a pack, a thumb-sized one and two smaller-sized ones for the second and/or third fingers.
After I had run that second stitching line 5/8" in from the 1/4" folded under edge I did not even bother going back to the ironing board to press it under. I folded the edge over a second time on the stitching line as I stitched along a second track to close the casing. Not steam pressing first worked fine.

After the casing was in place, I needed to thread in the elastic. It is a long, long way around and I would like to do this only once. On my last attempt with the dinosaur sheets, I lost the elastic out of the threader and had to start again. Then I lost the free end by pulling it too far in and had to try a third time. Here are two tips from my new, improved, do-it-right-the-first-time method.
Yes, a safety pin will suffice, but Dritz makes elastic threaders that are very useful and do not cause fingers to cramp up like a small pin does. The elastic is threaded in and out two slots at the base and normally I find this sufficient to hold it in place. But when threading about two yards of elastic into a casing that is almost twice that length, the elastic does tend to work itself out of those slots with all the pushing and sliding. I put my machine on its longest stitch length and just ran a row of stitching down the length of the doubled over elastic. Since the stitch was long it was easily removed once the elastic was threaded. My crib sheet was yellow so the yellow thread in the next photo is barely visible on the centerline of the white elastic but it is there and did its job.

I also made a point of safety pinning the opposite end of the elastic, the free end, to the casing so it did not snap inside as I stretched and pulled. It only took me one time, instead of three, to elasticize the casing for this crib sheet!

I inserted a 24"x36" rotary cutting mat inside to give an approximate idea of how the sheet will fit a 38"x24"x 3" mattress. Looks good!
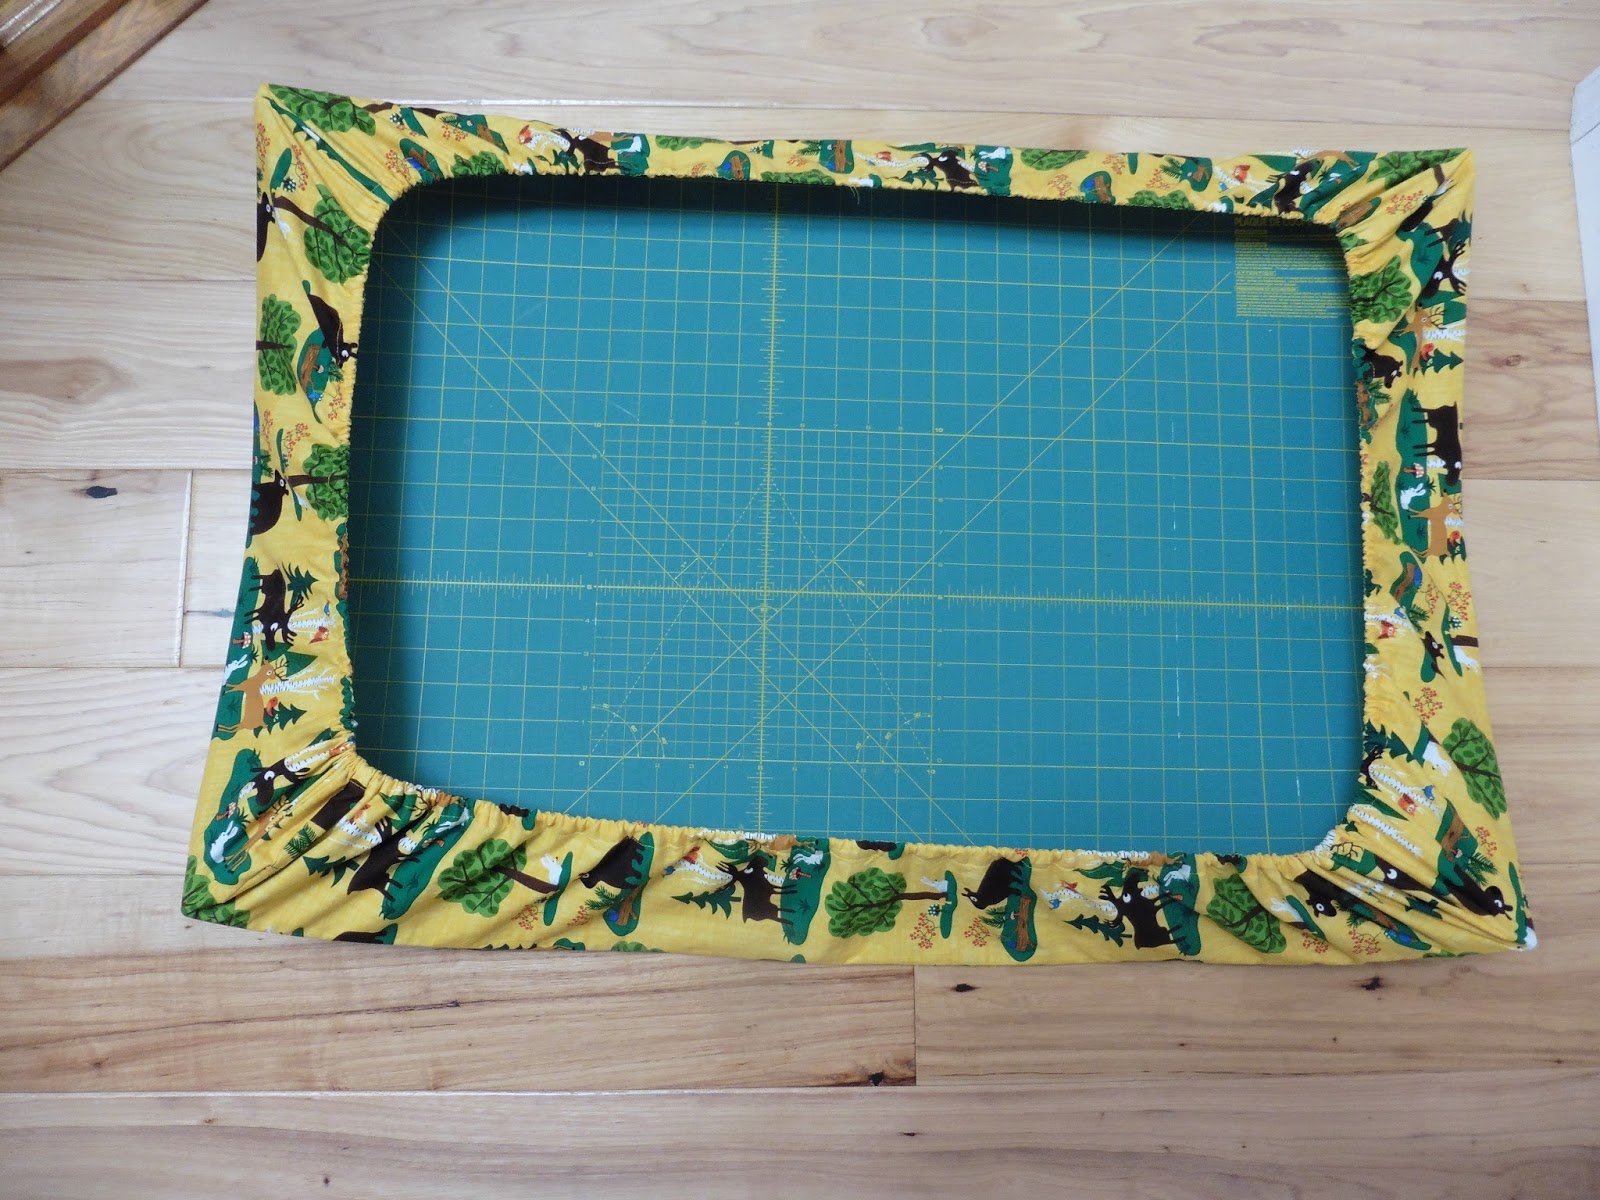
Here is the crib sheet from the top. I love that camping bear and moose print. I would not want to make a whole quilt with it though, so this is a nice compromise to satisfy the sense of novelty without a large commitment.

The improved process went so quickly and smoothly I made a second crib sheet in red. It has the same fabric leftover from backing the Karate Kid Kwilt. I had to wash that red fabric three times until I was satisfied that the Shout Color Catchers were sufficiently pale to indicate the excess red was out. Look how red the first one was! Even the suds in the washing machine water were a bright, rosy pink! I hope the Karate Kid Kwilt is washed with those color catchers, too, the first few times at least.

Here is the red mini-crib sheet stretched over my rotary mat. I originally did this just to take a photo but found out doing this helps to evenly distribute the gathering of the casing around the elastic within.

Here the mini-sheet is in a top view like where the baby will sleep. Gee, it just occurred to me. I hope this bright color does not keep him awake! Call it wishful thinking but perhaps those undulating paisley waves will put him to sleep. They actually make me a bit dizzy if I stare at them too long.

I also made a pair of burp cloths to add to the package when I mail the sheets off.

I have some more burp cloths cut out to sew for another young couple and two standard crib sheets to make up for my daughter. I am so glad I've gotten out of my sewing slump. It feels great to get back to the zzzip of the rotary cutter, the whirrrr of the sewing machine, the shoosh of the steam iron, and the feel of the fabric. Aaah ... my form of yoga!
Linking up now to this week's Freshly Pieced's Work in Progress ...
Have you ever seen a pattern to make quick-zip sheets? That's what we use for Vivian and they are awesome! They make changing the sheets so easy and quick (you know, since we don't have those dangerous drop-side cribs anymore that make bending over the crib less achy breaking on our backs). I recommend these sheets to all new moms. http://www.cloudsandstars.com/
ReplyDeleteI have not seen a pattern for those type of sheets. I suspect one is not needed. But I think the hardest part would be sourcing that extra long zipper. It is not a length normally stocked in fabric stores. I am guessing the sheet manufacturer may have a special order in bulk for them.
DeleteWhat cute sheets! Those are some good tips, I will have to try them. And that is some adorable monkey flannel! Can't wait to get little I's package in the mail :-)
ReplyDeleteBe careful with washing those sheets at first so you do not color all the rest of your laundry. Ironically the worst color offender in the yellow camping sheets was the dark green and not the yellow as I would have expected. And the red sheets... ? Well, red is red is red and always a threat so watch out. They both have been pre-washed two or three times but you never know.
DeleteI don't know if it will keep baby awake, but I *love* that red fabric! These crib sheets are so adorable! That elastic threader tool is pretty cool, I haven't seen it before and it looks like it works so much better than attaching a pin or needle.
ReplyDeleteI bought that red fabric as an impulse purchase just because I liked it. It was fun to see it found a home. Thanks for following and commenting.
Delete