Thursday, July 29, 2021

Sewcializing More MegaBlocks

I continue to work through my A Walk in the Woods fat quarter bundle and Sewcialites blocks. The first post on this project, for six MegaBlocks, was published  6/1/2021. Here are the next five.

 #12 Faithful Block: Camille Roskelley, Thimble Blossoms

Four blocks are shown in the preceding photo. I picked #12 Faithful Block because it had a lot of little pieces so I could use it for my small scale prints from the Moda A Walk in the Woods collection by Anna Hooey. The block skill level for #12 Faithful was listed as experienced but, other than quantity of pieces, I did not see anything particularly challenging. I deceived myself. Several times, even though I carefully laid out my components before joining them I managed to put pieces in backwards or whole rows upside down. Most of this was because of my anal goal to align the directional pink/white fabric in a predetermined manner rather than accepting random orientation. Notice the 4-patch corners; they have a handedness. Selecting a pressing direction for each seam was not as straight forward as one would hope with only two colors. I succeeded to press to the dark side for the most part but there were still some cases where I could not avoid a lumpy seam where both seam allowances were pressed in the same direction. I still find this preferable to a twisted seam that can cause problems during quilting. Instead I steam and pound down the lump and avoid stitching through it during FMQ. I liked this block and will probably use it again in a quilt. Sashings might help the lumpy intersection problems somewhat.


The preceding photos have four blocks, two each in pink/gray version and the other two in a gray/pink complement. In retrospect, it sure is a complicated way to get a 4x4 checkerboard at the four meeting corners. It reminds me of Four Corners in the United States where four states meet.


 #1 Harmony Block: Lissa Alexander, Moda Lissa
This block is quite similar in color and style to the previous. Since it again had a directional print that I wanted to orient consistently, I laid out all the pieces before joining. Those butterflies in the four corners had to each face outward. Once I completed the four blocks I rotated each 90° before making the quartet into an 18" MegaBlock.


 #17 Peace Block: Anne Sutton, Bunny Hill Designs
For variety, I wanted a simpler block without as many tiny pieces. The challenge I set for myself was to have all the lined pieces face the same way. I cut out four blocks at once. When I sewed the half-square triangles I made half the HSTs slant one way and half slant the other. Then I could pick and choose which HSTs to put in which corner positions to preserve one direction in each of the four the blocks. The final orientation came when I joined the four blocks to form the mega block. Rotating alternate block 90° looked too cacophonous. Having the dashes align in the hooks generated at the block junctions was much more restful; or perhaps I should say peaceful.


 #10 Sincere Block Pattern: April Rosenthal, Prairie Grass Patterns

Once again, as my selection for prints narrowed, I wanted a simpler block without as many tiny pieces. Again, I wanted all the lined pieces to face the same way. I laid out all the pieces to be sure of their orientation and then carefully sewed those four diagonal striped corner blocks first. As long as half of those diagonal face one way, and half faced the other, and the two triangles were consistently oriented I was successful. When I joined the four blocks into the one MegaBlock the secondary pattern of the smaller central X appeared without the distraction of the dashes going in two orthogonal directions.


 #14 Serenity Block Pattern: Chelsi Stratton, Chelsi Stratton Designs
For the eleventh and final block set of the fat quarter bundle A Walk in the Woods by Aneela Hoey, I surveyed the previous ten mega blocks I had made. I was a bit dismayed at how busy they all seemed together. That stacked bundle of fabrics seemed so much more coordinated. I reasoned a simple block with large pieces would again be a wise choice. I was also getting a bit worn out with this project at this point and controlling the orientation of a load of itty bitty HSTs did not appeal. I chose the final pattern as the serenity block. Serenity is defined as "the state of being calm, peaceful, and untroubled" which is exactly what I needed at this stage of this quilt – the stage when the joyful optimism of a new project dims a bit and the self doubts of "Whatever was I thinking", "How is this ever going to come together," and "Can I salvage this"creeps into the quilter's brain. Again within each block I oriented the lined fabric in a uniform direction when making the HSTs. When joining the four blocks, I auditioned both options and decided against the 90° rotated option on the right in favor of the more calming uniformly oriented option on the left. The assembled MegaBlock is in the second picture.


Somehow those prints seemed much more coordinated when they were stacked neatly in that fat quarter bundle than when they were sewn into the eleven MegaBlocks. I have consumed 22 of the 30 fat quarters, with the larger scale ones having been set aside for some special, yet-to-be-determined use. 


The first six MegaBlocks (post dated 6/1/21) were made from Sewcialites Quilt Along blocks
Spirited, Cheer, Virtue, Gratitude, Steadfast, and Delight

The next five MegaBlocks (this post dated 7/29/21) were made from Sewcialites Quilt Along blocks
Faithful, Harmony, Peace, Sincere, and Serenity.

I hope I can reflect at least some of those virtues as called out in the block names when I attempt to assemble the hodgepodge of MegaBlocks into a somewhat cohesive quilt. I will need to be at least Steadfast for sure. Sashing between the blocks will be a definite necessity!

Sunday, July 18, 2021

AVQ Fabric Sale

Friday July 16th, I went to my guild's fabric sale – over 10,000 yards of 100% quilting cotton for $3/yd. I really do not need more fabric and yet I had to support my guild's fund raiser, right?  My husband, Frank, came with me for companionship and his packhorse capabilities. Before we go to quilt or craft shows I always tell him what my goals are to get and what items to avoid. He is a pretty eagle-eyed shopper.

FABRIC
This time I told him no more kits; I have a backlog. I also asked for his intervention with no more novelties; every novelty fabric is another quilt. Exceptions might be prints in a large enough yardage to be used as backings. I was looking for mainly solids, even precuts in an assortment of solids. In that area all I found was 1½  yards of a solid orange and 2 yards of a mini-check that could be used as  graphic sashings or borders.


I used to have a dress in a drop-from-the-shoulders-frock-type style in the barnyard print, shown on the left, that Frank fondly called my bumpkin dress - as in country bumpkin. He brought me this roll of 3 yards and urged I buy it for nostalgia sake. He also found a 3 yard roll of the pale blue swirls on the right. Both can work as a backing.


I came across a bin of flannel and found four ½ yard pieces that will work great for burp cloths. Three out of the four will even go with fat quarters and ½ yard pieces I already have in my stash drawer of flannels. Two fat quarters make a burp cloth and I will use the pattern from my post dated 6/18/14.


Near the racks of hanging panels I found a bin of ornament panels. My kids were born in the 1980's when these panels were prevalent in the fabric stores. I would insert a ribbon loop at the top, sew and turn them, and the kids would help me stuff them. At the holidays, in addition to those we placed on the tree, we would have a sufficient surplus to hang many of them from curtain tension rods in windows and doorways. This next photo is of the grandkids in Thanksgiving of 2018 decorating our stairs with the same stuffed ornaments their mom did.


At 50¢ each, I bought eight of these panels: three houses, two calico toys, two nativity, and one gilded gold. I already have the Home for the Holidays made up from decades ago and they turned out really cute back then. I bought three more panels of those which will yield twenty-four (3x8) more stuffed houses. I already have the calico ornaments made up but still I bought two more panels which will yield twenty (2x10) more ornaments. The nativity scene I have never seen before. Each makes a scene of eight figures so there are sixteen more ornaments. The final panel has gold gilded ornament in deep green and red tones, also unseen before by me. When I unfolded the panel I noticed that someone had snipped off one of the squares but it will still yield the front and back of thirteen. Total: 24 + 20 +16 + 13 = 63 + an extra diamond that says Merry Christmas.


Yes, I know I said no more kits. But I found this kit for a 56"x56" Paddington Bear quilt. It does not have the pattern included but I was able to buy the pattern on eBay when I got home. Why is this an exception to my no more kits restriction? Because at the last AVQ fabric sale in September/October 2020, which I did not attend, my friend Mary Ann found and set aside for my purchase a Paddington bear quilt kit in a tin. I have it sewn and sandwiched, awaiting FMQ, and planned to gift it to my daughter's sister-in-law who is due in late September or early October. She just found out she is having twin boys. What luck to come upon another Paddington Bear quilt kit, similar but not exactly alike, which will be perfect for a second baby! Each have square panels for the blocks like for a cloth book. They even have the same striped fabric in common.  Although the one from the last sale measures 48"x48" and the one from this sale measure 56"x56", I can easily leave off one or more borders totaling 4", on the second one so the sizes match.


That's it for the potentially practical purchases. I did not, however, get away scott free on novelties! I caved and bought two ½ yard pieces of this funky chicken print novelty. Too discontinuous for a pillowcase, too small for a backing, too large a print for sashings – if not for it's unabashed cuteness it would be totally useless. I just liked it and it only totaled $3. Maybe for a pillow...?
 

PATTERNS:
I bought two old patterns that seemed interesting. One is a pieced version that imitates the intricate appliqué work of a Hawaiian quilt.  The other is from 2004 and introduces a "new" technique. I was curious. It looks like those blue flowers are about 12" tall. Just one would make a striking pillow. I read a cute statement somewhere suggesting that "pillows are stuffed animals for adults".


TOOLS:
I came across this set of craft scissors from Lakeshore. I have very artistic granddaughters who will love these. The names of the blades are amusing. Some shapes are understandable; others not so much.
Six colors on the left from pink to pale green:
     Volcano, Dragon Back, Jigsaw, Large Pinking, Majestic, Large Scallop
Six colors on the right from medium green to pale blue:
     Bat Wings, Cloud, Imperial, Cracker, Rockies, Small Wave 


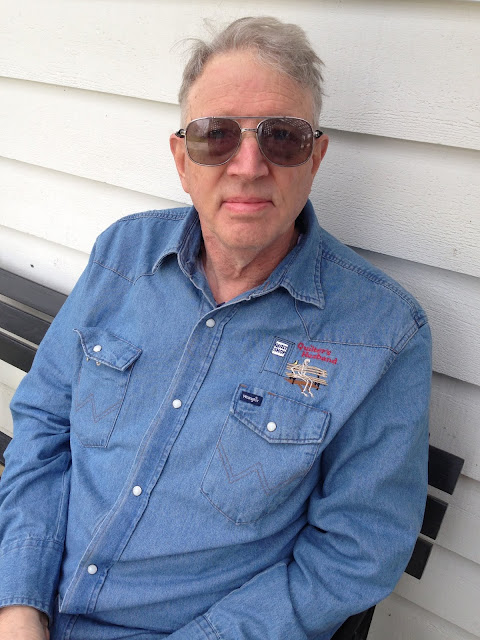
And as for my husband who came along... he only bought two plastic triangle rulers for his garage. Though maybe I can attribute the purchase of the bumpkin dress fabric to him.


Those who were at the sale when we were there and don't remember my husband, may possibly remember the closeups of the front and the back of his shirt.

Saturday, July 17, 2021

Third Saturday of July 2021

The theme for "Hang Your Quilt Day" this July was American patriotic, which I loosely interpreted as Americana. I wanted a change from red, white, and blue and for some reason sunflowers alway make me think of Americana. On the left is my newly completed Sunflowers. In the middle is an old wallhanging from June 2004. The third item on the right is not a quilt, but a tablecloth. It fits in with my sunflower Americana theme so I hung it with the other two.


Sunflowers 38½" x 53½"
Sunflowers is made from twelve Block of the Month kits from April this year. Yesterday's post dated 7/16/21 has more details about the block assembly and free motion quilting


Debbie Mumm inspired 40" x 40"

This wall hanging measures 40" x 40" and was completed in June of 2004 using a 2" grid of squares. It was born of a mystery project where once a week for four weeks participants were given a clue: make a certain number of HSTs, join them into a certain number of pinwheels, cut a certain number of background squares, assemble two style of block and alternate them to produce a secondary pattern. The background was a tonal collection of beige plaids and stripes. Although many squares do make for a lot of background piecing I like the overall mottled effect. Sunflowers were popular at a time when I was enamored with the designer Debbie Mumm. Though the barn red, mellow gold, and muted green colorway is from a different era, I still love that it has those cheery sunflowers sprinkled throughout which justified my adding it to this month's display. More details are included in my post for 3/31/2014.


Checkered table cloth
Some fabric is too cute to cutup. I hemmed these 3 yards of 54" wide fabric to use as a table cloth. I could not bear to slice up the borders with bicycles, sunflowers, lemonade, and watermelon. Because of its Americana feel and sunflowers, I gave myself permission to add it to in July's "Hang Your Quilt Day".


Hang Your Quilt Day Beginnings
Beginning April 2020, my quilt guild members began a tradition of hanging quilts in the front of their homes on the third Saturday of the month as a source of enjoyment for the community and as a thank you for the essential workers during the pandemic. My initial post about this practice is dated 4/22/20. I am pleased to see the displays are still going on and even more pleased that the pandemic restrictions have eased up.

Friday, July 16, 2021

Sunflower Quilt

Having just come off a one year tour doing Block of the Month for my guild, my co-chair and I had a dozen leftover unsold kits for a sunflower block for April. Twelve were was a few too many to add as giveaways to the winners, so I bought them myself to "quickly whip up" into a bright wall hanging.


Each block consists of a modified nine-patch block made from a central snowball block surrounded by four truncated QSTs and four corner squares. The original block pattern came from the Quilting Daily website and called sunrise star. Here is a summary of the basic construction steps from a sample practice block I made. First I made a central snowball block in brown and orange for the sunflower center.


Next I made four QSTs from the green background color, the orange of the inner sunflower petals, and the yellow of the outer petals.

Then I offset cut the four QSTs and assembled them about the central snowball, filling in the corners with four background squares. I saved the truncated edges of the QSTs to make a border later.


The kits for the monthly BOM were made up with stronger, more vibrant colors instead of the more subdues one of the sample. Once I pieced the 12 kits, I planned to assemble them in a 3 x 4 arrangement.

To add a bit of visual relief between the main body and the border, I added some striped fabric inserts. By varying the width of the inserts on the sides from those on the top/bottom I was able to make the corners come out "right", meaning I forced the border to be symmetric rounding the corners.

Since I wanted to keep the FMQ simple without fastidious ruler work, I used my favorite square-fill from the Shape by Shape free motion quilting book by Angela Walters (square #7) in the teal/green spaces with a King Tut 40 wt 3-ply variegated Fahl Green (an Egyptian clover) and then stitched free-form arcs around the four sided yellow "petals" of the sunflower with 3-ply 40 wt Essential cotton thread in Marigold #21171.


Hmmm... what to do in the brown centers of the sunflowers? I used my Coats & Clark Star 100% cotton thread in a matching brown. Ideally I wanted the bumpy texture of pebbles but I am not very skilled at that FMQ pattern. That meant I needed the practice. So I did one center in pebbles and decided it was too much work and did not show up very much anyway. I did the second center with a spiral pattern and a third center with a wavy grid. I decided I would do different centers in the sunflowers, four of each pattern. I did six sunflower centers one evening. They turned out fine (even if the dark brown thread barely showed up) and I returned to do the following six the next day.


The tension gremlins or lint goblins invaded my Sweet Sixteen overnight, or else the desire for perfection bug infected me. When stitching the remaining six sunflower centers, I saw some tiny dots of the pale thread peaking up to the front surface from the back and tweaked my tension, just a bit to eliminate them. Big Whoops! Four of my sunflower centers wound up with a huge mess on the back with lines of loopy brown thread snarls. So dismayed, I did not think to take a photo before I sheared off the bulk of the brown loopy "fur"; these photos show my progress as I snipped and picked at the pebbles, spiral, and wavy grid, in that photo order, to remove the remaining brown top thread remnants. My counter top was covered with those brown thread "hair" clippings much like the floor of a barber shop. The dark fuzz reminded me of my Wooly Willy magnetic hair toy from when I was a kid. Even more discouraging was the fact that I would need to FMQ that spiral and wavy line grid once again. I am considering leaving in that two pebbles ones on the back. They do not look so bad, perhaps... just like a scattering of poppy seeds. Oh, wait this is a sunflower, not a poppy. Eh, close enough.


I have lost my initial fear of free-motion quilting because I have learned from experience that most any errors can be plucked out. That does not imply however, that it is not painstaking to do so. After shearing off those brown thread loops, it took me longer to remove their remains with curved-blade snips and tweezers than it did to FMQ 12 brown centers, 96 yellow petals, and the green background, combined.  So much for "quickly whip up".  I am reminded of the saying "Man plans and God laughs". In honor of my Wooly Willy adventure, I considered naming this quilt SUNFLOWER SAM where SAM is an acronym for Such A Mess. It has a nice alliterate sound to it, like Sunbonnet Sue, and the name source could be my secret – except to those of you who read this post. Do I really need such a reminder though? Nah. I chickened out and named this quilt simply SUNFLOWERS.

I stitched scallops in the orange border and stitched parallel white lines piano-border-style in the striped inserted bands. I did use a scalloped ruler and a straight ruler for those border details. 


With my domestic Pfaff, I embroidered the labels on of grosgrain ribbon and then bound SUNFLOWERS in orange fabric that matched the outer peaked border.


The consistent thread color on the back of the quilt is a putty-colored, blah color called Stone that my Block of the Month co-chair gave me as a gift. She told me it blends in with everything. She was so right! It is 50 wt 2-ply Aurifil 100% cotton and it flowed like a dream in my bobbin thread. Thanks Liz! You have expanded my repertoire of favored threads. The two round shadowy regions are where my tension drifted on the pebbles.  I suspect the brownish area can be detected in the galloping horse test; i.e., if you can’t see the mistake when riding by on a horse at full gallop, then do not attempt to fix the "error".  I think those areas would be visible – I did not actually test from a galloping horse – but still I chose not to re-do those them, warning myself not to let perfect be the enemy of good. 


SUNFLOWERS finished 38½" wide by 53½" tall and the back is not visible unless you turn it over to look. This quilt was never intended as a county fair entry, anyway. It still makes me think of a field of cheery sunflowers and those brown spots are pockets of earth peeking through.