Thursday, September 29, 2022

Midnight Crossing - Layering, Binding Prep, Thread

I aim to piece my backings to be 2" larger than the finished top in both dimensions. The backing fabric was a small enough scale print that matching the piecing seam went well. Using glue to keep the seam aligned until I stitched it, I then pressed it open to even out bulk during the upcoming FMQ phase. I cut my bamboo batting 1" large in both dimensions then popped it in the dryer with a damp cloth to ease out the wrinkles and folds. I crawled around on the floor (ugh, my least favorite part) smoothing the backing, batting, and top layers together, then peeled back each layer to spray baste with Odif 505 temporary adhesive for fabric. For the quilting, I ordered thread in several pale orange colors, but need to wait for its arrival to down select. 

Meanwhile I worked on the binding. I fussy cut 8 widths of the remaining backing fabric in 2½" strips, a multiple of the X images, so the pattern did not drift around the bound edges. I joined the strips on the diagonal; I was pleased how well I was able to match those seams, camouflaged where the dog tails stick out before removing. Then I trimmed ¼" off along the entire length to arrive at my desired 2¼" binding width.


It was pouring rain that afternoon, September 20th, a welcome downpour for my drought tortured state of California. I felt snug in my sewing room gazing out the window while leisurely and carefully cutting off that ¼" along greater that 320 inches. I still need to press it in half along its length... but all in due time.


All this while I was thinking about my FMQ pattern to distract me from my tender knees and fickle back from layering and to waylay my impatience from waiting for my thread arrival. My thread finally arrived  – less than a week but still I mildly grumble finally. Here were my color options from palest to darkest from Essential Threads by Connecting Threads: 21582-Cantaloupe, 21120-Apricot, 21581-Chai. I chose Apricot, the medium of the three shades. Cantaloupe had too much pink and Chai was too strong.


I am in the process of quilting a band of petals in the sashings and quilting pillowcase edges in the checkered nine-patches on my HQ Sweet Sixteen sit-down. I am still contemplating what to do in the blocks themselves. I played with some heart templates but have not yet come up with an option that truly appeals. I will keep thinking and experimenting in PowerPoint while I continue stitching on the sashings and posts.


Saturday, September 17, 2022

Third Saturday of September 2022

For September I chose to display three small wall hangings. Apples for the teacher ties in with a Back to School theme. A windblown pattern of a mystery quilt makes me think of blustery hay rides in the fall. Then, for fun, I threw in some chickens that might be running around during apple picking or hay rides because the colors seemed to play well with the other two. The following pictures show the fronts and the backs of the quilts.


Apple  Quilt - measures 27" wide x 40" tall
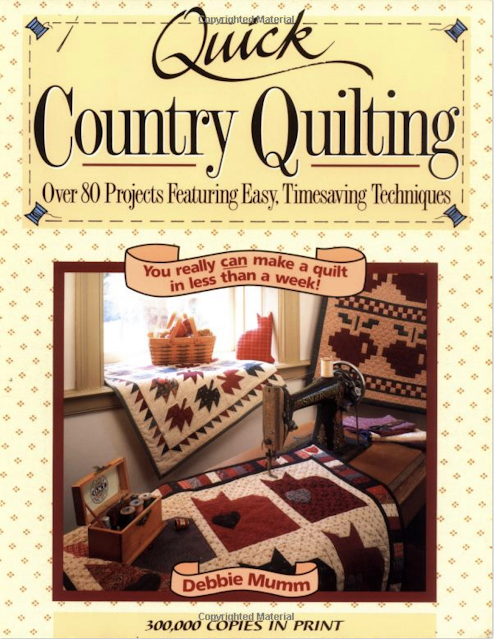
The pattern is a Debbie Mumm design from her book Quick Country Quilting ©1992. 
This wall hanging  pre-dates my blogging days so it has no DianeLoves2Quilt blog link. 


Windblown Quilt - measures 40" square.
This was a mystery quilt I made rom Debbie Mumm fabrics in her one of her signature color palettes of brick red, maize straw, and soft green. For the pale neutrals I drew from a fat quarter stack of subtle beige plaids and checks. This wall hanging also pre-dates my blogging days so it has no DianeLoves2Quilt blog link. 


Chicken Quilt - measures 34" square
The chicken quilt was started long ago from a Button Weeds pattern We're Chicken ©1994 but finally completed in 2014 in my blog post Chickened Out.


Hang Your Quilt Day
Beginning April 2020, my quilt guild members began a tradition of hanging quilts in the front of their homes on the third Saturday of the month as a source of enjoyment for the community and as a thank you for the essential workers during the pandemic. My initial post about this practice is in my blog post dated 4/22/2020.

Friday, September 16, 2022

Midnight Crossing - Borders

The outer sashing is a different fabric, a mini floral rather than the mini-dots of the inner sashing; I am pleased the subtle variation adds a bit more interest. I added the outer sashing two days ago and it took most of the afternoon. Since there are only four long seams I anticipated adding that sashing would go more quickly that it did; but I'd forgotten how much time it generally takes to match up all the existing seams at the corner posts with care to ensure the right angles mate well. I sewed slowly, also, to be sure that I did not nip off any star points and that the seam allowances from the blocks remained facing the preferred pressing direction.

The quilt in progress has now outgrown the bed and hangs over my upstairs railing. It awaits the inner grey border and the outer orange border. No seams to match or points to watch out for when I add those!


Inner and outer borders were added yesterday. Here is a quick look at the upper left corner. Borders really do add something. I must remember to do that framing touch to more of my quilts. (Hmmm... I really should have smoothed the folded top out better before photographing. It truly is more square than it looks.) The diagonal seaming for border length did camouflage well. Next up is piecing the back and sandwiching with batting.

Monday, September 12, 2022

Midnight Crossing - Inner Sashing

I was away on travel to Tennessee for a get together with college friends so sewing progress came to a temporary halt. But there was still forward movement on Midnight Crossing. I'd decided and ordered backing fabric online and it arrived while I was away. I am so pleased with my choice. Seeing it next to the cover photo on lid of the kit box showed off its great coordination. I liked how the X's on the backing fabric mirrored the centers of each block and the corner posts. I am also glad I reflect both major colors of Halloween instead of just an orange as I was considering with an orange floral option. The smaller scale print will be easier to match than the large floral, too. I may even use it for the binding instead of black.


Once home, after unpacking and doing laundry, I got back to sewing by making the horizontal sashings. Fortunately this step is not very thought intensive, since traveling kind of wears me out. The checkered corner posts were already made so I only needed to cut the cream print rectangles and join with the posts. Three horizontal rows were needed with three corner posts and four rectangles each.


Next up was the thought-requiring part of deciding where to place each of the sixteen blocks. After a moderate amount of deliberation I was content with the following layout. Each of the diagonals alternated fabric pattern: orange zig-zag with orange floral, and black floral with gray mini-dot. I spaced the X fabric (same as backing) and the almost solid black fabric away from the center since they both were strong and very graphic. The gray mini-dot also stood out as different yet subtle, so I wanted to feature it near the center.  I also wanted to feature the florals near the center since they are two of my favored prints from the kit. 


I joined the block rows and sashing rows to form the inner portion of the quilt. Yes, the two zig-zag fabrics, orange and black, are adjacent twice, but I could accept that. They are separated by sashing so that softens the proximity. In retrospect I suppose I could have  rotated one of the colors 90° so one ran horizontally and the other ran vertically, but that seemed weird to me even though the box lid from the kit shows the zig-zag as vertical. I would not have had two zig-zag fabrics to begin with, had I not substituted the orange zig-zag for the orange mini-dot fat quarter I cut wrong. That's OK. The Z's are "Zingier". I have run out of design wall space at this stage but that, too, is OK. There will be little decision making beyond this point: all that remains of the assembly is adding a mini-floral-print outer sashing and some gray, then orange, borders.

I spread the quilt-in-progress out on the bed in the adjacent bedroom. The quilt, assembled up through the inner sashings stage, is shown sideways in the following photo (rotated 90° counterclockwise from previous photos, since I took the photo from the side of the bed). My son likes bunnies and Mickey Mouse, hence the bunny tail and Mickey icon pillowcase on the left and the yellow Micky foot on the right. This non-cropped view may not be a professional approach, but the inclusions add a personal touch and allow me to use the space I have available.