I did not think to take a photo of the panel before cutting off the trim but a quick Google Image search with the phrase "colonial bunny fabric panel" yielded this result. It has poor image quality but you get the idea. My freebie was the bottom right quadrant only of this panel.
I cut off the checkered bordered with the black silhouette weather vanes - and did I discard that 18" strip? Of course not! You just never know when it will be the exact accent needed somewhere.
I realized I could update the panel by trimming off the narrow dated colonial beige and olive green border. The narrow accent also had small red hearts that did not give off a masculine vibe. I would substitute a black mini-print of some sort. The bunnies were such a close match to Alex's pet I could not pass it up.
For the back I chose a black and white funky uneven stripe. (It was left over from a lamp I revamped in my post for April 4, 2014.) I sandwiched the striped backing with a piece of bamboo batting and lightweight flannel backing to give the pillow surface a bit of substance and not wrinkle as readily. I used the sandwich as an opportunity to practice my FMQ on my HQ Sweet Sixteen. The lines are intentionally not ruler straight to retain the feel of the uneven stripes. I could have done this on my domestic Pfaff but I wanted to grow my FMQ skills. The longarm also has the added advantage of being able to stitch backward as well as forward. I FMQ'd only the white stripes so the black would stand out and give a textural feel to the surface. I kept the spacing uneven to add to the casualness. The result was subtle but worth the effort.
The stitching is more obvious on the flannel back, but that will be hidden on the inside of the pillow.
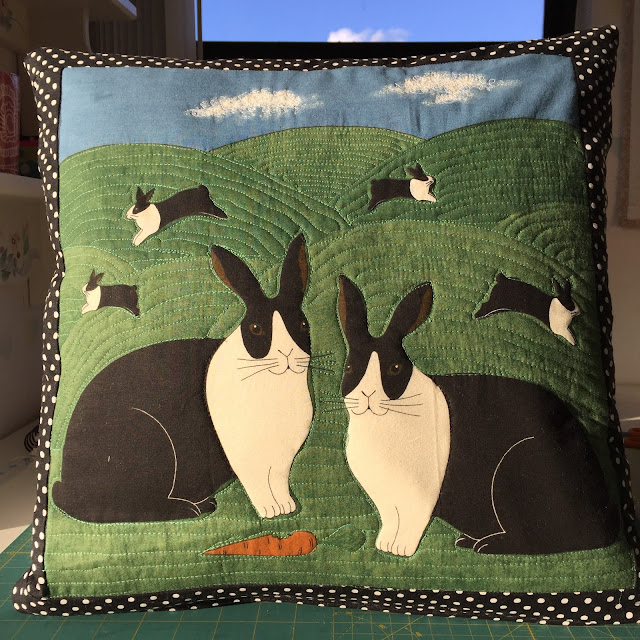
On the bunny panel itself I followed the contours of the hills and left the bunnies un-quilted so they would raise up. My hills contours looked relaxed, an effect I intended. I will confess however, were I more skilled, I would have had more control over the degree of "relaxation".
But the bunnies did stand out, as did the carrot. I used my domestic instead of my HQ16 to stitch in black along the black/white interface of the bunnies' bodies. I did not want to quilt that short isolated line in green nor did I want to wind a longarm bobbin in black for that little bit.
The clouds in the sky above the bunny romping in the distance called out for some fluffy white scribbles.
Here is the back of the quilted panel before assembling it into a pillow.
Here is the back. The quilting and textured gave it just the spark it needed to keep it from being boring.
After I'd uploaded the previous pictures and written this post I discovered on the computer screen that I had missed a spot of quilting right smack dab in the middle of the pillow front! Can you find it? I did go back and add it and take the following detail photo before I gifted the pillow. Hint – its omission is easier to spot in the all-white flannel view.
On Christmas Day, Alex opened up his bunny pillow present. He liked it. He is patting his chest as his sign that rabbits hop!
This came out cute enough that I am linking it to Let's Bee Social #157 to share.


What a cute pillow! I love the way you quilted the hills - so much movement sewn in : ) I'm glad Alex enjoyed his gift!
ReplyDeleteThank you. It was a fun, project that I enjoyed all the way through. Sometimes I get tired of something before I complete it but not this!
DeleteWhat a cute pillow! Although clearly I have to ask... where's the velcro? ;-) I like the lines on the hills and I think it came out wonderfully, plus it's nice to see Alex so excited about it. It's a beautiful job!
ReplyDeleteYour bunny pillow is awesome! I love the quilting details, and the backing, too! What a wonderful gift for Alex!!
ReplyDeleteSusie