When I try something new, I seem to have a knack for picking a hard version of it. Just learning to appliqué, I happened to pick a spiral shape that had the challenges of lots of bias and inside curves. I needed to make five pairs of spirals and I tried to adjust my technique just a bit with each one. So I made some tweaks to the appliqué process described in
my previous post.
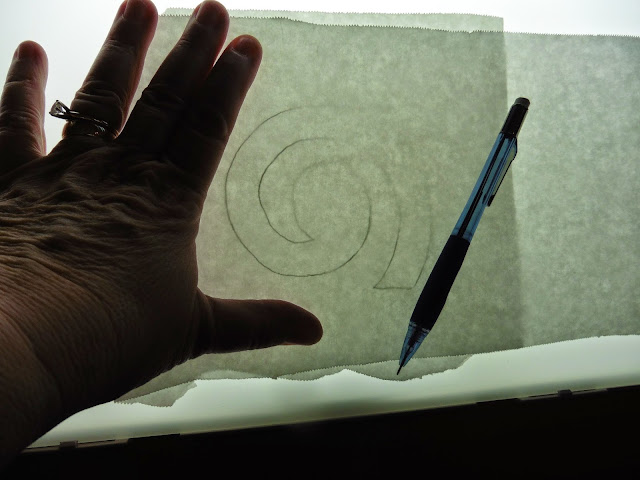
Using freezer paper with a light table to trace and make a template was great. Ironing the cut out template onto the front of the fabric worked well, too. I did not change either of those parts of the process.
Using an appliqué mini-iron is highly recommended. I think it would be very difficult to wield a full size iron to press under a narrow seam allowance on a small piece. But the little stand that comes with the iron is worthless. I had to work to balance the iron just right in the stand. It was too light weight and kept tipping over. I gave up and rested the iron on a spoon with a non-metal handle that would not get hot. It worked much better than the Clover wire and plastic stand that came with the mini-iron.
Cutting out the template with small scissors was good enough. I tried to get a less jagged edge by cutting the freezer paper with a small rotary cutter instead of scissors but that gave an awful, uncontrolled, more uneven, edge instead, worse than with the scissors. These are the leftovers from cutting out the templates. I think these shapes are kind of interesting with the outer corners I sliced off for ease of handling. The inner spiral edge is not as smooth a curve as I would like and this is the scissor cut version.
The most time consuming part of the process was turning under the seam allowance and I was not satisfied with the jagged non-smoothness of the curved edges so that is the part where I concentrated my energy on trying to improve.
Because my shape was a spiral, lots of edges were a stretchy bias. When I peeled my paper off the right side to move it to the wrong side I had no issues. It was helpful to have that paper on the backside as a guide as to where to put the edge crease for the seam allowance. But once I had pressed over the seam allowance and tried to remove the paper from the wrong side before attaching my spiral, I was unhappy with the results. The paper came off with an acceptable level of effort, though it was difficult enough that I was certainly glad I had removed it before stitching. The crease where I had pressed retained definition and I could tuck it under as I sewed. But I did not like how the tugging had distorted the shape of my spiral. I asked myself, "Did I
really need that freezer paper template on the inside to press over?"
I discovered that I cut smoother than I draw, and I stitch smoother than I cut. So how could I use this self-knowledge to make less jagged edges that would turn under better? Perhaps if I stitched around that paper template before removing it from the front, I would have a line of stitching that would nicely define where the edge crease should go.

I pressed the template onto the right side of the fabric as usual. Then I cut out the shape and stitched around the edge right next to the template. It was difficult to control that wiggly spiral. I did have to be careful though because if I stitched into the paper, especially along jagged sections where points protruded, the tugging I had to do to tear the paper loose could distort the spiral. On my next spiral I tried stitching around the shape after pressing it onto the right side but before cutting it out and that worked much better. The paper then lent stability to the stitching process as well as the cutting process. Spiral distortion was no longer an issue since the spiral had not yet been cut out at this point. Putting in the stitching was well worth the added step and the extra care. This would give me a place to align the template when I moved it to the wrong side. Pressing along that smooth, non-jagged stitching line worked better than pressing over the jagged paper edge. At this point I was still using the waxy side of the freezer paper to hold the turned over edge. But I removed it before sewing since the crease line stayed crisp enough. I was still dissatisfied with how removing that stuck paper distorted the spiral.

Then the light bulb went off in my brain. If I was not going to use the waxy feature of the freezer paper to hold the edge creased over, why did I need to move the freezer paper template to the wrong side at all? I left the paper template adhered on the right side of the fabric for stability and placed the spiral with template paper still attached on the ironing board paper side down wrong side of fabric up. Then I used used the stitching line to fold on. I used tweezers to bend up and hold those edges near the tip of the iron and pressed on the stitching line. Sorry, no picture for this. I was using both hands! Also having that stitching line helped me be braver in snipping up to it as must be done on those inside curves. The next photo shows what it would look like mid-process from the right side with just the outer edges turned under and the inner edges snipped. This method modification worked much better. The template peeled off easily after I had turned under my edges since it was not buried under the folded over edges. Distortion was avoided.
Using the tip of a seam ripper I could easily sweep the seam allowance under just before stitching the appliqué down.
So after ten spirals I finally figured out a process I liked. Because I learned a bit with each one, my spirals are not identical but I have convinced myself that that adds to the whimsy. The top pair, an early effort, shows the distortion in the uneven gap of the spiral and edges that have points. The lower pair, a later effort, are smoother and less distorted.
I like the look of top stitching along the edge of the appliqué, and although I wished my stitching were a bit tidier, I was not sorry that I had no more spirals to practice on. I was not going to re-do the first ones. I
may pick out some obviously wayward stitching lines but this effort had taken me an entire morning and then some and I had had my fill. The tweaks I made to the process were that I added a stitching line, avoided moving the template, and used a smooth stitch-line curve as a guide to fold on rather than a jagged drawn and cut edge to fold over. In summary, the appliqué process, tweaked a bit from
my previous post is:
- press freezer paper on right side
- stitch around paper template and leave template on
- cut out fabric leaving margin to turn under
- leave paper template on right side and place paper side down on ironing board
- turn edges over along stitching line using tweezers to avoid burning fingertips
- remove paper from right side
- sew onto background guiding seam allowance under with seam ripper
Hopefully in writing this up I will remember what I learned for the next time. There will be a next time. I have conquered my fear and repugnance for the "A" word. But I can most certainly guarantee that my next time will not be a Baltimore Album quilt nor a Hawaiian whole cloth quilt!


