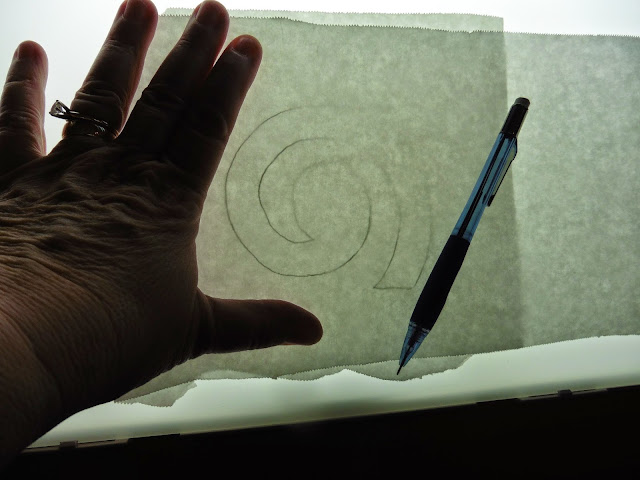
This week I started the bit of appliqué that is part of the quilt with checkerboards. I decided against a fusible method because I wanted to avoid stiff sections in the quilt and I did not want the look of zigzag over raw edges. After googling appliqué techniques and watching some YouTube videos I decided to go with a freezer paper technique so the raw edges would be turned under. I am fortunate that my husband has a light table for his model train hobby so I used it to trace my appliqué templates.
The freezer paper is translucent enough and the light is strong enough that I could use a simple mechanical pencil and trace the shape, no problem.
For a mirror image template I folded the freezer paper over on itself waxy sides together and traced the mirror image from the traced original. I realized afterward, as I was cutting out these templates, that I could have skipped drawing a mirror image. Instead I could have just cut on the drawn line for the first template through two thickness of freezer paper folded over on itself.
I cut out each paper spiral template on the drawn line. Then, using my standard Rowenta full-size iron, I pressed the freezer paper waxy side down on the right side of my appliqué fabric.
Then I cut each shape out of the fabric leaving a 1/4" or so seam allowance to turn under outside the drawn lines.
In the lower right is one of those spirals with the edges turned under surrounded by three other spirals waiting to be cut out. As I practice, I think those curved edges will become smoother even in the tighter central section of the spiral. I may need to re-do my first couple attempts perhaps.
In the interest of time and ability to withstand multiple launderings, I am choosing to skip needle turned hand appliqué in favor of attachment by machine. The instructor in the video used a stitch that goes just outside the appliqué and takes a nip inward every few stitches. With only a few stitches in the paper, it can probably be removed without too much trouble. I plan instead to stitch along very close to the edges with a straight stitch so if I left the paper in it might not come out easily. The top-stitching will show but I think it will secure the appliqué better and I am OK with that look. It will not be as broad as a raw edge satin stitch would be and I hope it still gives nice definition. I will post how that works out in practice when I do it.
For now I am linking up to WIP Wednesday at this week's Freshly Pieced.


Thank you for sharing your process for freezer paper applique. It is very helpful to see it. Love your fabric and your the shapes, and look forward to seeing what you do with them.
ReplyDeleteI am tickled that someone took the time to read about my learning curve. I have been shying away from appliqué (other than the fusing type) for years and what do you know, now that I tried it, someone is calling my novice attempts a "process". Cool! Thanks for visiting and commenting.
DeleteI have the same red and green deer fabric that you pictured. I can't wait to see what you do with it!
ReplyDeleteThanks for your enthusiasm. The deer fabric is a backing on my Simple Gifts quilt that I plan to finish within the next few days. Only the binding and label remains to do. I will caution you that the fabric is printed with a drift which gave me some challenges when trying to match the pieced backing. Here is the URL for the post about using the Jovial deer fabric:
Deletehttp://dianeloves2quilt.blogspot.com/2015/02/sandwich-making-some-nibbles.html
I am with you about pulling the paper out and stitching down by machine. I have done this, using quite a few pins and it worked out fine. Great project and fabric choice!
ReplyDeleteYes, the pins do work, no dots of glue necessary. Besides, aside from not wanting to cut a slit in the background, I learned that the paper is not so easy to pull out even before it is stitched down and even if I have not sewn through it. Thanks for visiting - and concurring with my decisions. :•)
DeleteI really want to try an appliqué that has turned edges. Thanks for sharing your process, it's very helpful!
ReplyDeleteThanks for your interest. I always admire the look of appliqué quilts but have been too impatient to try them - even the fusible approach. I would rather sew than spend time at the ironing board and I did not like the stiffness. I tweaked the process a bit in a follow on post where I added a stitching line as a guide to turn under. Now I feel that appliqué is a technique I will pursue as an occasional change from piecing, my first love. If you want to check out the modifications I made to the process, the URL is http://dianeloves2quilt.blogspot.com/2015/05/some-applique-process-tweaks.html
Delete