Part of the painstaking effort for this quilt of hexagons is pressing the seams in a consistent direction so as to avoid lumps. When I joined the line of hexagons point to point with diagonal seams I made sure the hexagon midline seams alternated direction so that diagonal seams nested. This line formed 15 columns, 8 columns twelve hexagons long and 7 columns eleven hexagons long. When I was about to join those columns at the outer flat edges of the hexagons, seam direction was already committed and I needed to proceed at a snail's pace so as not to twist or flip the press direction at each multi-seam intersection.

Still, flip or twist happened. I will admit, my patience for this part of the assembly was wearing thin. Careful as I was with those long seams joining the columns, I needed to do remedial seam direction flipping at several of the twenty-two 6-point seam intersections. It was just a few stitches to be picked out and less than ½" of seam to be re-sewn at each accidentally flip, but still I found the task annoying and tedious. But I had come this far, so I persevered. I certainly did not want the users of this bed quilt to suffer from The Princess and the Pea syndrome from scattered lumps throughout. The following photo shows ten columns but only five long joining seams. It was slow going, a column or two a day, because of my frustration level.

After sewing about six or seven of those fourteen between-column seams I realized that the flips were not random but consistent. Something must be flipping the seam allowances the wrong direction. I inspected my machine set up. I noticed there was a slight ridge between the cabinet and the front edge of the needle plate. I smoothed out that tiny level offset transition with a piece of masking tape and magically the problem disappeared – at least about 98% of the time. That simple fix was enough to encourage me to forge ahead and get those fifteen columns all joined. My rate picked up after my discovery and solution.

Then I made another design change. I was originally going to leave two opposing edges of the quilt straight and the other two opposing edges zig-zag. I did not want to not chop off parts of the protruding hexagons to even it out. I had planned to bind the jagged edge and turn all those corners. I had done that on my
Whirligiggles quilt
(3/23/20 post) and, although doable, it was an intricate effort. Instead on this quilt I would fill in those triangular gaps to make the edge straight.
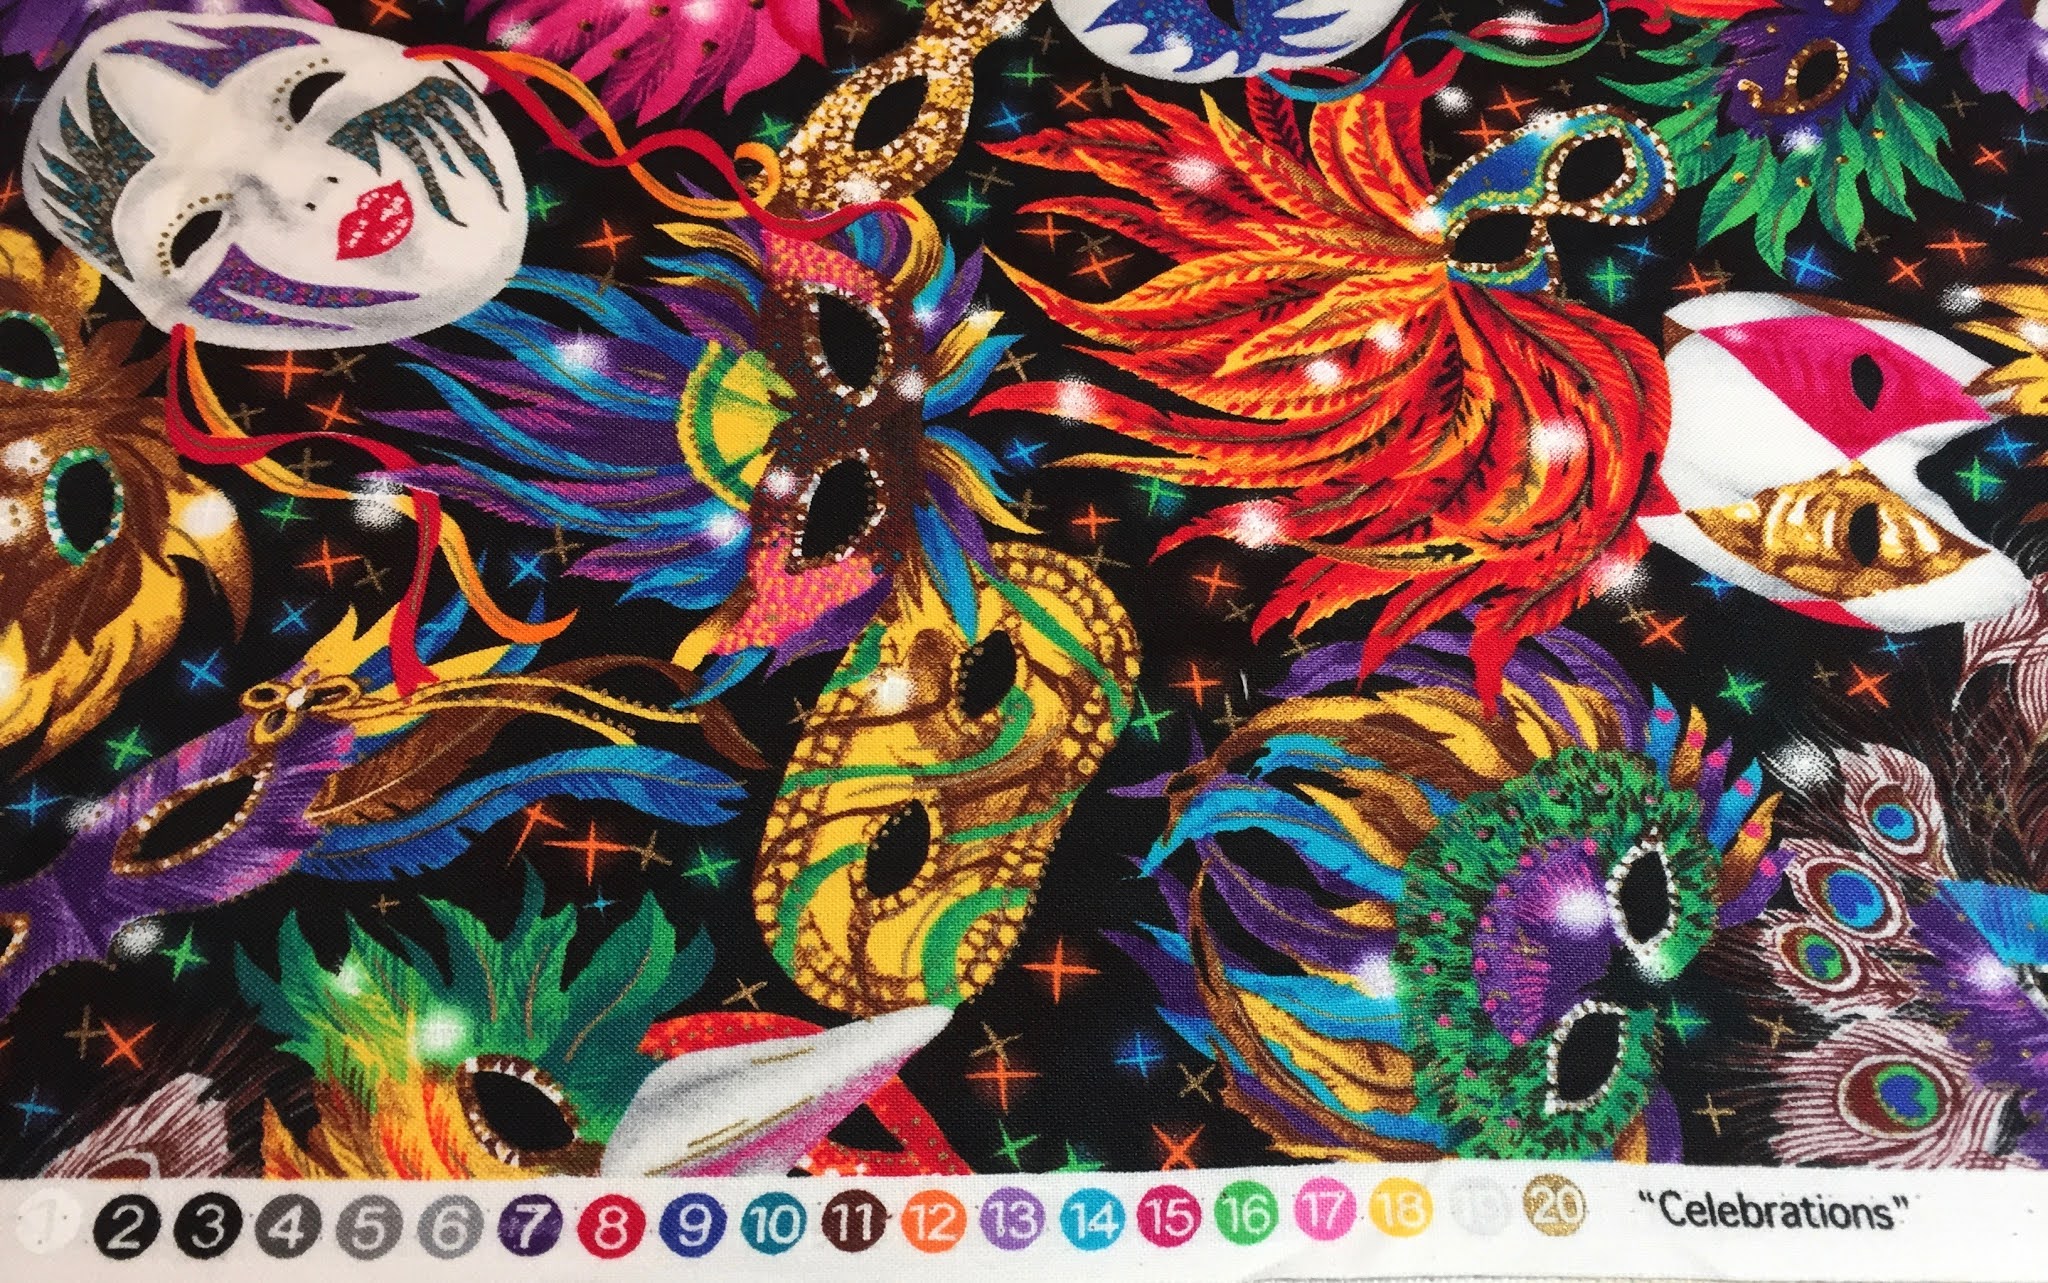
I chose to use the focus fabric that originated all those hexagons as the edge filler. It is called
Celebrations by Robert Kaufman. I had ⅞ yard left. Just look at all those colors in the registration dots along the selvage –
twenty of them! My daughter had expressed a desire to have the source fabric available for comparison on the quilt, so having it peeking out along two edges fits the bill. Those three hidden full hexagons also add to the hide-and-seek fun. See
previous post dated 8/27/20.


I first cut a 4" strip across the width of the fabric. Then I taped off my Hex N More ruler 4" from the tip of the triangle with a long piece of blue masking tape. (Ignore the short blue tape; that registration mark was for another project). I lined up the edge of the fabric strip with the edge of that long blue tape and the pointy left tip of the triangle base at the selvage. The ruler does not extend sufficiently in both directions to form a triangle with a base as large as I needed; I would have to shift the ruler somehow.
Here is my sequence in the next three photos. I made the first angle slice off the left end with the ruler triangle base-down and point-up so the long edge is on the left.
I flip the ruler to slice the other side on the right. Note I drew arrows on my tape to remind me which edge of the tape I am using as a guide. This cut is also the first side of the base-up point-down triangle which is next.
To cut the second side of base-up point-down triangle, I rotate the ruler and align its left side with the cut edge and the masking tape with the top edge. Using the right edge of the ruler as the guide, I slice the second side of the base-up point-down triangle. By alternating directions I am able to get five triangles out of one strip. I need only fourteen and so from 12" of fabric, three strips, I have one extra triangle, plus some partial-triangles at the selvage edges. I have ½ yard of fabric left. This fabric is still available on eBay, called Mardi Gras Masks with the pattern number D#4857. I have no desire for more.
Insetting the edge triangles required Y-seams. I had practiced many, many of them my Whirligiggles quilt
(3/23/20 post) so I was undaunted. But first I deliberated on which triangle went where. I think it is in my nature to always fret over something. In my quilting I am a
maximizer and not a
satisficer. When you Google these two terms you find a smattering of information about the two psychological terms.
Maximizing means expending time and effort to ensure you've solved something as best as possible. Satisficing means picking the first option that satisfies the requirements. ... Prefer a faster decision to the best decision.
AND
A satisficer is a pragmatic individual who makes decisions based on meeting requirements in a timely manner, finding the “good enough” solution and moving on. The word is a portmanteau of the words satisfy and suffice.
A satisficer would randomly inset those border triangles wherever, the only criteria being, "Do they fit the space?". Check. "Situation decided. Move on". However, let me give some examples of how I decided to inset those border triangles. In each case the inset triangle echoed a central feature in the hexagon above it. On the left, it is the brown peacock feathers and black starry background; on the right, it is the pink feathers of one mask and the partial face of the another.

Seeing them all inset in along one edge, I acknowledge that perhaps I may have fussed too much. They all kind of blend in. But then again, maybe if I had not preplanned, they would have stuck out awkwardly.
The top measures 84" x 89", close enough to being square that I will need to be careful of orientation when I attach the batting and backing. Piecing the backing and making that quilt sandwich is my next step and the topic of a future post.


No comments:
Post a Comment