Monday, December 2, 2024

Oh, Deer Completion

Piecing this quilt is described in my previous post dated 11/26/24. The next step, selecting my FMQ pattern for the quilting, is always a challenge for me. Doing an allover meander is probably the simplest approach except that I am terrible at meandering smoothly and not getting stuck in a corner. I generally opt for ruler work instead which is time-consuming but provides me with guidance. I compromised by doing free-hand arcs in the two bands of stars at the top and bottom of the quilt to give a tufted pillow effect. For the major section of the deer head I did something more controlled.


I used my Handi Quilter multi clamshell template for the deer portion. Orienting the clamshell "upside-down" gave the effect of the roof on a gingerbread house or draped garlands.


A portion of the deer section quilted in clamshells gives the nice effect that I was seeking.


Now, what to do in the narrow white bands on either side of the inserted blue stripe? I have a Handi Quilter wave template with an 4" wavelength and two different depths of the waves. I used the shallower 0.75" wave in the inner border and the deeper 1.5" wave in the larger outside border. I attempted to line them up relative to each other and centered on each side. I started in the middle of each edge and worked my way toward each corner. The quilting lines on the corners will fall where they may but at least they will look similar among the corners. A black and white pinstripe binds the outer edges of the quilt and relates back to the deer's antlers.


The backing was from a  fabric called Glad Tidings by the Whole Country Caboodle for Henry Glass. I thought the fabric title of Glad Tidings was clever since the hanging ornaments say "comfort and joy". I knew it would be perfect paired with the Deerly Loved pattern because of the Christmas balls hanging from the antlers. The following image is a closeup of the backing fabric. 


I made cranberry colored labels with white embroidery out of grosgrain ribbon for the two lower corners. Cranberry blended with the backing fabric better than a bright Christmas red would have. The quilt name, my name, and the year completed are recorded on the labels. The pattern by Coriander Quilts was called Deerly Loved but I have named this quilt Oh Deer


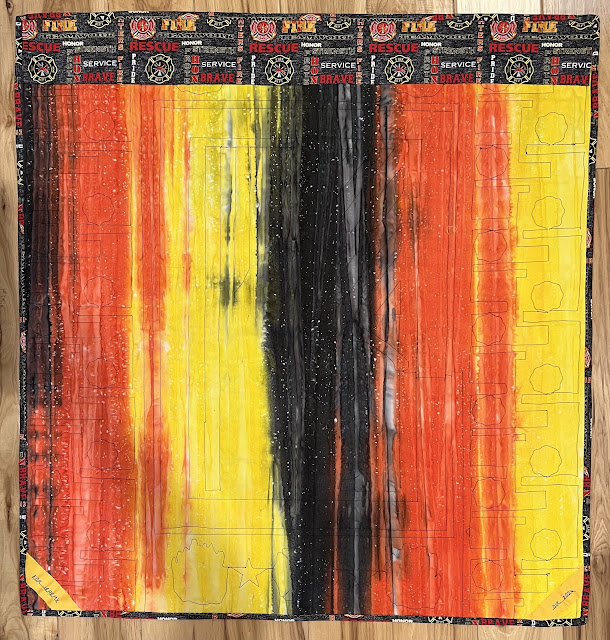
The back side of the quilt is also fun. The stripe on the backing ran parallel to the selvage. The height was adequate since it was the width of fabric. But, because I'd bought the remnant at a craft show already cut to a one yard length, I did not have enough width. Hence, I added the white edges. 


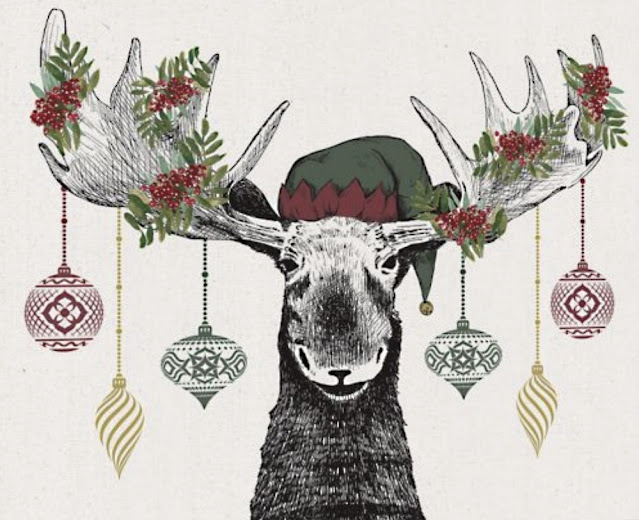
Here is the front view of the completed quilt. Oh Deer measures 41" wide x 40" tall. I plan to hang it on the wall of our stairwell next to the Christmas Moose canvas shown after. The canvas measure 20" wide x 16" tall. The moose is half as wide as the deer so I will have to see how they look side by side. No matter where they are placed, each will add to the festive "Deck the Halls" mood of the season.


Tuesday, November 26, 2024

Oh, Deer

There are many projects in my wings waiting to be completed. I was preparing to start the FMQ on my layer cake batik from July 6, 2024 when my Handi-Quilter bobbin winder ceased to function. I am awaiting its repair or replacement. I am not too bummed though. Piecing is my first love anyway and I was itching to try out this Deerly Loved pattern from Coriander Quilts.


The time it took me to cut out all the pieces exceeded my expectations, needing my investment a whole day's time. I should know this by now, but hope springs eternal. The diagram for the head of the deer is shown in the next image. Not shown to cut out are ten stars in the upper and lower bands. 

The colored fabrics added up to 105 pieces (blue letters A-U); the white background required 144 pieces (blue letters A-U + pink letters A-K) totals 105 pieces colors. I have not cut out the black border; I am undecided on my fabric choice and size for it.


I finished assembling the antlers. I was pleased that I had been able to fussy cut the black and white medallion fabric so the discs were centered along the two horizontal branches and also along each vertical branch.


I also centered a medallion in each eye and in the nose. In retrospect, I was not thrilled with my black/white medallion fabric choice for the facial features. I was so focused on achieving a contrast with the white background for the face that I was hesitant to use the beige floral called out in the pattern. The brown fabric that I chose instead had mini swirls in it that reminded me of fur, but it is dark enough that I lost contrast with the nose and eyes. Or maybe the black print is just too busy. Oh, well. I will plunge on. At the end, if I am still malcontent, I can appliqué or insert a different eye and nose fabric in those three spots. Hmm... maybe blue eyes and a red nose...  perhaps?


While pondering this decision,  I tackled the dangling ornaments in the red (L) and green (M) bubble fabrics with the beige plaid (O) for the hanging ribbons. Here they are the left pair and the right pair. The ornaments are pretty straightforward modified snowball block piecing. They are baubles so, fittingly, I made them from bubbles.


I assembled the deer face with its antlers and ornaments. Then I definitely decided I did not like the black and white medallion fabric for the nose and eyes. I kept the nose as is and did not change it to red. After all, this is a deer and not a reindeer, and so there is no reason for his nose to be red like Rudolph's. However, the eyes did not sit well with me, plus the medallions were not centered the same on the two eyes. I switched the eyes out to blue. This switch made the medallion print nose all the more distracting. I removed the nose and replaced it with solid black. Solid black is not as creative, true, but sometimes safe is more appealing than creative.


I moved on to making the bands of stars. Quite pleasingly, not all the stars were the same. The green and black ones are sawtooth stars and the red one is an Ohio Star. Those quarter square triangle units on the red stars took a bit more time to make, but the crispness of the points really paid off.


This switch to blue eyes was a bit stark being the only blue in the top. I toned it down by contemplating pupils for the eyes. Should I insert the triangles or appliqué them on top? Iron on adhesive was an option instead of needle turn appliqué and would avoid opening up that seam yet again. The seam would get stretched out no matter how careful I was. Also, with the iron on I used only one layer of fabric instead of the four layer bulk created by backed triangles. The black pupil detail was not enough to distract from the stark singleness of the the only blue in the top. I further deflected the distraction by inserting a narrow band of blue in the outer sashings to draw the eye toward the edges as well. 


I'd already planned to leave off the black borders to decrease the overall size and also because I thought them too dark and brooding. Here is the assembled top, ready to be FMQ'd. Hmm...  more decisions. Decisions are what slow me down. Next post will show FMQ, labels, and binding.


Wednesday, November 20, 2024

Chemo Chaos Completion

This quilt top has remained dormant since July. The post for 7/5/24 looked at the contrast of the layer cake fabrics from the Bobbins and Bits selection in Sept 2013 by designer Pat Sloan. The post for 7/6/24 displayed the block designs for the layer cake fabrics and explained my choice of the name Chemo Chaos. Then the perfect batik fabric for the backing went on clearance sale at my local quilt shop. It is a whimsical orange batik with stylized ladybug images. There was enough of the backing fabric to use it for my binding as well. I set those glasses on the piece of fabric for scale. In retrospect, probably a ruler would have been a better choice to show scale.

Since the quilt top is 48½" wide, greater than one width of fabric, I needed to add an insert or edging. I placed four remaining 10" squares from the layer cake in a column onto the back interspersed with more ladybug batik. Three of my these leftover squares have words. Batiks do not really have a right and wrong side but I found an exception. I did not notice this detail until they were sewed into a column. I had to remove one and flip it so that the phrases such as MAKE DO AND MEND and  STITCH ON! were not reading backward.

My idea was to have the FMQ accentuate the secondary patterns in top...  small and big diamonds and perhaps that octagon with maybe some smaller squares. I've shown my scribbles in PowerPoint although the actual decision would be finalized in real time. Those four-petal motifs are a go-to pattern of mine so perhaps setting them on point in the bigger diamonds might add interest. How to handle the zig-zag fabric remained an unknown. Maybe a large scale wave at the outer edges... ?


Here is how that center square of sixteen four-petal motifs came out, followed by how one of those orange pointed diamonds looks with four three-leaf motifs in the center bordered by parallel lines.


Quilting this top was a true adventure. I used King Tut 40 weight variegated thread with the recommended #90/14 needle with a side-spooling rather than an end-spooling spindle, and yet the thread periodically shredded and broke, even when loosening the top tension... frustrating to say the least. I muddled through by changing the needle (in case there was a burr or I had installed it incorrectly) and rethreading in case there was something I had overlooked. I then threaded through only two of the three top holes; doing that did not eliminate my breakage but it did reduce it.  I would do a trial on a practice sandwich and all would go fine. Then I'd switched to the quilt top and, not immediately, but eventually, the thread would shred and break once again. Bad thread maybe? Top and backing were batiks, maybe they are tougher? Also twice I managed to catch a corner of the quilt under the quilting area that cost me some remedial tear-out time. Grrr...! Maybe the quilt's feelings are hurt by my proposed name of Chemo Chaos? If so, that moniker is well deserved! 

My envisioned variety of FMQ patterns became less and less ambitious; I just wanted to get it done! I wound up with a combination of parallel lines in the secondary pattern of smaller diamonds and my go-to four petal motif elsewhere. 


I kept the Chemo Chaos name. Here are my grosgrain ribbon labels stitched on the two lower back corners.


The following two images are the front and back of completed Chemo Chaos.


This quilt is a lighthearted reminder of my battles and triumphs with my surprise diagnosis and treatment of lung cancer per my brief 6/13/24 post on the topic. As it says on the back inserts, MAKE DO AND MEND. Yes, indeed!

Friday, October 11, 2024

Quilt, Craft & Sewing Festival

Thursday October 10th  I went with my husband to the Quilt, Craft, and Sewing Festival in Pleasanton, CA sponsored by the The Rusty Barn Group. There is no entry fee for the show but it does cost $15 to park. There are some about a half-dozen free seminars and a handful of make-and-take workshops, but for the most part it is a gathering of vendors. The participating vendor list is in the following image. Many of these vendors I have frequented through the years.


I bought very little at this event, mostly I think due to my mood rather that the show contents. My husband supports my quilting purchases. When I was ready to leave to go to the show he gave me this advice. "If you see something you are waffling on send me a text and I will help you decide. If you see something that you really like, but are hesitant to take the plunge, then send me a letter." He then chose to come with me, even wearing his special shirt that says "Quilters Husband".


I bought one yard of a Christmas fabric to use as a backing on a Christmas wallhanging I plan to make. I already own the #206 Deerly Loved pattern by Corey Yoder. The fabric bands run parallel to the selvage and there are four bands across the WOF. I was only able to get one yard and the pattern finishes at 42" x 42" so I will need to add to the edges. This may be the tail wagging the dog, but I will select the fabrics for the wallhanging front based on the striped backing fabric. My goal is to make it for this Christmas. There. I have put the commitment in writing. Actually, it is more a hope rather than a commitment, so I have just given myself some wiggle room.


I also bought  two patterns, both for bags not quilts. I am curious and have often wondered about those Japanese knot bags so I intend to try one of them out relatively soon.


Rounding out my sparse purchases was a black and white fat quarter for $1.50.


That's it for my visual aids. I have no pictures of quilt kits for sale. I have sworn off buying them anyway until I sew down my backlog. Also, the show does have a rule that
Photography, video taping, or sketching of the exhibitors' booths or merchandise is not permitted.

It was fun looking at "stuff" and I enjoyed the outing with my husband. We have had such a heat wave lately, that we have not ventured out of the house much, so this was a welcome change.

Monday, October 7, 2024

Nativity Christmas Ornaments

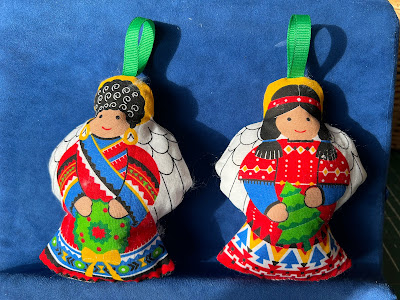
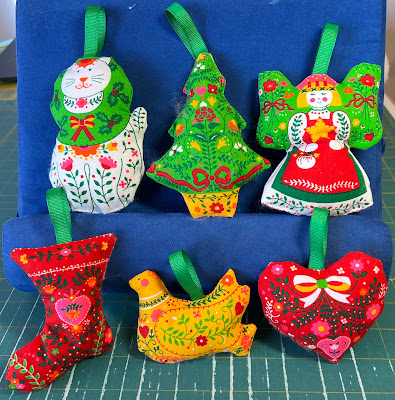
At my quilt guild's fabric sale in July 2021 I bought two of these nativity scene panels at 50¢ each along with six other Christmas ornament panels: namely three house panels, two panels of calico toys, and one panel of gilded gold ornaments. I was determined that this year I would have them all sewn up before the holidays and no longer lingering in my stash. My latest progress forward is on the first of the nativity panels. I cut out the eight figures and bought grosgrain ribbon for hanging loops on top. I can get eight 4½" loops from one yard of ribbon.


This is the stuffing I use for these ornaments. Actually I use it for all of my stuffing needs, such as pillows and toys. It is polyester and has a soft silky feel to it. It is not at all itchy or scratchy as some fills can be.


This week, after sewing, turning, and stuffing the eight ornaments, I whipstitched each closed with matching color thread: royal blue for Mary and one king, brown for Joseph and the shepherd, white for the sheep and the ermine trimmed cloak of another king, turquoise for the gown of the angel, and gold for the hem of a third king. I chose purple ribbon for the hanging loops. These ornaments are quite large and I stuff them minimally so the figures remain soft and cuddly should they be used for play.


My goal to sew up all my backlog of panels before Christmas has been thwarted by my having lost the remaining panels yet to be finished somewhere in my sewing room. I have misplaced two panels of twelve calico ornaments each and one remaining nativity panel. Other panels I have completed. I plan to use turquoise loops for a second nativity set ... when I find it!

Thursday, October 3, 2024

Spooky and Sweet Completion

In my post for 9/20/24 I discussed my cutting and piecing for Spooky & Sweet, a four-week quilt-a-long project sponsored by the Fat Quarter Shop with free pdf pattern downloads and online tutorials. This blog post addresses the quilting, labeling, and binding the top I pieced. The first challenge I faced was the dreaded phrase "quilt as desired". The image at the Fat Quarter Shop website shows an all over quilting pattern with computerized ghost motifs.  After a bit of study I could figure out the quilting path — up the left side of ghost, detour at the top of his head to insert two eyes, come down the right side of the ghost, detour to insert a star, complete ghost bottom, then meander off to repeat the motif inserting a star along the way. I have a sit down Handi-Quilter Sweet Sixteen which is not computerized nor does it have pantograph capability. Ghost motifs would fit well with a Halloween theme but the entire top is a witchy ghost and a vampire ghost so quilted ghosts are not a necessity. Yes, this design could be quilted free-hand, but I doubted my skill level to carry that out without a ton of practice. I opted instead for a pattern more controlled and less free form. I do not do well with too much two-dimensional freedom. 

I chose to do some wavy ruler work using a Hand-Quilter F wavelength template. It has a wavelength of 4" and a choice of a .75" or 1.5" depth. I decided the shallower depth would be better and needed to settle on an appropriate distance between the waves. I sketched some options with paper and pencil and then auditioned two down-selected spacings on clear plastic page protectors, deciding I preferred the larger vertical spacing. Larger spacing also means fewer waves and less work. The upper group is spaced 0.75" apart and the lower grouping is 1.5" apart. I quilted the waves starting at the bottom and worked my way upward. The blue masking tape helped me determine how far up to move the ruler between rows. The large dips of the lower ruler edge helped me center each wave above the one beneath it. The gridlines on the ruler served as a reminder to keep the waves orthogonal to the piecing.


I considered a gray variegated thread but instead went with a pale gray thread. Too much variation in the quilting lines I thought might distract from the pieced characters and stars. It took four or five hours to work my way up from the bottom of the 30½" x 34½" quilt. I did it in two sittings, one in the evening and finishing up the rest the next morning. Fortunately I had only a few glitches due to slips of the ruler but I could move on and pick them out later. The following photos are close-ups of the wavy quilt lines.


Two embroidered grosgrain labels sit on the bottom corners. The name Spooky and Sweet was too long and my Pfaff does not have the "&" symbol to allow shortening the name to Spooky & Sweet. For brevity the name became Spooky_Sweet.


The overall waves gave a pleasing appearance on the front. The pale gray blended in well with the white faces and was not distracting; that initial concern of mine was luckily not realized.


When I turned Spooky_Sweet over to look at the back I was bemused. The first thought that struck me was that it looked like one of those pads put on furniture to keep it from scratching during a move. Perhaps I should have named this quilt U-Haul!