Thursday, February 27, 2020

Baby Girl Burpcloths

Good friends of ours who live on the East Coast just found out they will be grandparents for the first time. I made burp cloths of course for the baby-to-be, expected in May. Can you guess the gender from my fabric selections? The following photos show the four complementary pairs. Each is folded in thirds. 


The flannel is a fairly recent design so it probably is still available. Here are the selvages for the source information. Top and bottom flannels had no info on them. Other selvages read Bunnies by the Bay from Timeless Treasures. Note the cute carrots for the color registration "dots". The freeform polka dots are by designer Ann Kelle for Robert Kaufman fabrics. I wrote a tutorial on how to make these burp cloths in my blog post for June 18, 2014 for those interested.


Perhaps these flannel burp cloths will have a home at Grandma and Grandpa's house for those dainty little upchucks when their precious granddaughter is visiting. Instead Grandma and Grandpa may pass them on for daily use by mom and dad. They are fun to make, super absorbent with the triple thick center, and so soft to cuddle I had to give each an extra squeeze before tucking it in the box to mail. 

Sunday, February 23, 2020

My DL2Q Blog Book - Vol. 12

I have added Volume 12 of my DianeLoves2Quilt blog book to my ongoing series that I make from the online service Blog2Print.

Volume 12: Jan 1, 2019 - Jun 8, 2019
Volume 12 contains 293 pages and 24 posts. The front cover features my husband Frank and me in our pair of quilting shirts which we wore visiting quilt shops during our Country Heritage Quilt Tour: People Places & Quilts in Summerville, SC; Sew Much More in Savannah, GA; and Cinnamon's in Jacksonville, FL. Posts on the three quilt shops are dated 3/27/19 for SC, 3/28/19 for GA, and 3/29/19 for FL. Featured on the back cover is Oh, Boy a baby quilt I made for my daughter's nephew. The post for the baby boy quilt is dated 2/21/2019.


The Dedication for Volume 12 reads
Volume 12 includes shopping expeditions at three quilt stores in South Carolina, Georgia, and Florida during a week long Country Heritages Quilt Tour. Sewing projects were small: one baby quilt, Block of the Month projects, two dresses, and many pillowcases. Went to a local yarn craft show so knitting posts are prevalent.
– Diane Chambers
Here is the Table of Contents for Volume 12.


With a dozen books under my belt, it is time to be retrospective and generate an overview. I claimed that when I retired I wanted to use the creative right side of my brain instead of the logical left, but the left keeps clamoring for attention. So here are some statistics on the hard copy books I have created for my DianeLoves2Quilt blog. One of my guidelines was to keep the number of posts per book at 24, since more than that causes the Table of Contents to spill over to a second page. I have kept that goal for the previous three books.


However, I am realizing that it is the overall page count, not the one extra page in the Table of Contents, that should concern me more and merit my attention. These twelve volumes are far from being uniform in thickness and weight. In fact, once the page count reaches the three hundred or four hundred range, that book is quite heavy to browse comfortably. It is difficult to sense how many pages will result from a collection of posts. Volumes 11 and 12 did well on holding to a limit of 24 posts in the Table of Contents but nevertheless, at approximately three hundred pages each, they are awkward to hold easily.


I needed a better way to determine when it is time to create another book. My present method hinges heavily on when Blog2Print is hosting a sale. But there is no reason I cannot create a book when I have accumulated enough substance – not too much – then wait for the sale. My post lengths have been averaging 10-12 pages. Not all of that is writing: I have lots of pictures. I can estimate for me that an adequately sized 220 page book will be reached after 20 or so posts and not my 24-post Table of Contents guideline.


I plan to make more volumes of DianeLoves2Quilt (DL2Q) but armed with this knowledge, I aim to make them more uniform in size and less unwieldy to peruse. Seeing that I write around 50 pages per month and based on past history, a good self-imposed guideline for me is to create and publish an additional blog book roughly every four months, or three times a year. It looks like I am ready to create and publish Volume 13. Then I will wait for a sale to purchase! 


This post is mainly a cumulative collection of notes to myself. I am sharing my reminder notes for best layout and to achieve consistency in future volumes.
  • Refer to Volume 1 post for overall tips
  • Do not add captions to blog photos (explained in post for Volumes 3 and 4)
  • Keep number of included posts at 24 or less for one page Table of Contents
  • (*new*) For page quantities around 220 maximum, limit to 20 or so posts
  • (*new*) Rule of thumb is that every four months should result in a good sized book
  • Photo format for best cover layout are, in priority order: square, portrait, landscape
  • Include comments in the book and maximize the photo size
  • Opt neither to reposition nor resize photos to minimize pages; keep formatting same as when posts are published online; be sure to select Snapshot and not the default Compact when determining page layout options.
These are links to discussions of making my previous volumes and reminders about what covers I selected:
DL2Q Volume 12 posted 02/23/2020 cover choice Waves-N-Whirls
DL2Q Volume 11 posted 03/04/2019 cover choice Tree
DL2Q Volume 10 posted 07/05/2018 cover choice Brown Swirls
DL2Q Volume 9 posted  06/22/2018 cover choice Polka Dots - green
DL2Q Volume 8 posted  06/27/2017 cover choice Polka Dots - blue
DL2Q Volume 7 posted  06/27/2017 cover choice Polka Dots - pink
DL2Q Volume 6 posted  06/27/2017 cover choice Red Swirls
DL2Q Volume 5 posted  12/16/2015 cover choice Green Swirls
DL2Q Volume 4 posted  03/18/2015 cover choice Plum Flowers
DL2Q Volume 3 posted  03/18/2015 cover choice Flowers - yellow
DL2Q Volume 2 posted  04/14/2014 cover choice Flowers - pink
DL2Q Volume 1 posted  04/17/2013 cover choice Blue Swirls

Wednesday, February 12, 2020

Hawaiian Shirts

The February block of the month for my guild, Amador Valley Quilters, was this cute pieced Hawaiian shirt. I bought three blocks and assembled them, tripling my chances of winning several more in the monthly drawing when I enter three raffle tickets at the March meeting. The prints are so fun. When the block of the month chair made her sales pitch, she commented that the pattern would be a good one to use for the Hawaiian print fabrics we all have in our stashes. I realized she had a valid point.


I have this bundle of six one-yard pieces I bought on impulse at Houston when I went to the Festival with my daughter in 2017 (post for 11/9/2017). That package of those luscious colors – purple, aqua, rose, orange, blue, and yellow – was delightfully bright and it was bundled in a fashion that made me drool.


I am grateful for the idea I got from the February Block of the Month for using a tan fabric for the background. The color makes me think of sand on a beach and wiggling your toes in it, a perfect complement to Hawaiian shirts. That image made me call to mind the Slicin' Sand song. There are two versions. I listened to both via YouTube for nostalgia purposes. The one with which I am most familiar, courtesy of my three kids, is from a Beach Party at Walt Disney World. We watched that video over, and over, and over. The other – and probably original – version was in the Elvis Presley 1961 movie Blue Hawaii. These are the lyrics so you can follow along if you choose to listen to either or both at the previously provided YouTube links.
Take off your shoes, let down your hair
Turn on the music and we'll get somewhere
Dance, dance, dance, til your toes gets tanned
We're gonna have us a ball on the beach
Slicin' sand
Hug me a heap, swing me a lot
We got a lot of ocean if it gets too hot
O-o-o, o-o-o, baby, take my hand
We'll have some real rockin' fun in the sun
Slicin' sand
Come baby, come, let's dig some holes
You'll find it's heaven with sand on your soles
Yeah!
Slice through to the left, slice to the right
Slash down the middle baby hold me tight
O-o-o, o-o-o, baby, hold my hand
We'll have some real rockin' fun in the sun
Slicin' sand
Just think – all those memories and images and sound bites from an itty-bitty block of the month. That's one of the reasons I love quilting. It is so multi-faceted it can lead you anywhere.

Tuesday, February 11, 2020

Barn Quilts

At my quilt guild's meeting this past Saturday, February 8th, the speaker was Suzi Parron, and her topic was barn quilts. She was a lively, engaging speaker and I became fascinated with her subject. She told of the history of painting quilt blocks on barns and their associated meaning and symbolism. In her talk she showed photos and informed our guild members that many counties all throughout the country have trails allowing travelers to take driving tours featuring collections of these huge painted images, usually 8' x 8'. Suzi Parron is the author of two books, both of which I bought at the AVQ (Amador Valley Quilters) meeting.


I also signed up for the Sunday workshop where participants would paint a 2' x 2' quilt block of their own. I must confess, I rarely sign up for workshops because I do not want to create another UFO. But this workshop promised we would finish within the class time and have a hang-ready product to bring home. It is painted with exterior paint and suitable for outdoor hanging. In my 2020 quilting resolutions (post for 1/24/2020) I vowed to try new crafts and this fit the bill perfectly. Plus it decorates outdoors so I would not be adding to my indoor clutter, which I am working assiduously to reduce. I also recently tried painting mandala rocks as a new craft (post for 1/26/2020) and found I enjoyed the painting medium.

We were given a selection of block patterns from which to choose. Although it is not typical of a quilt block, I chose the Folded Flag in the upper right corner. It never hurts to show a bit of patriotism on the front of your house. Plus this design freed me from the burden of making snap color decisions during the allotted workshop time.


We were taught how to draft our design on a board Suzi had pre-primed. Then we taped off along the lines outside the areas we were going to paint and and colored one area at a time. For the flag, red was the first color to be applied. Those random snippets of green tape designated those spaces not to be painted with the current color.


We used disposable foam brushes, one per color. The red stripes needed three coats! Since I did them first I felt I was falling behind in the class; but I wasn't – not really. Unlike my other blog posts, I have no other in-process photos. I was too busy concentrating on painting away to take them. The star was made with a template but still needed painstaking taping of both the exterior of the star to paint it white, two coats, and equally painstaking re-taping of the interior of the star to paint the surrounding space navy blue, two coats. 


Here I am proudly holding my finished block.


As folks were cleaning up and getting ready to leave I took a few photos at random of some of my workshop buddies. We were pretty varied in our choices for the block pattern and presented a representative sampling. I thought the dashed lines in the basket part of the first photo was creative and added a nice detail. The second photo shows a cardinal. Suzi said that this was the first class she taught that someone had chosen to do the cardinal. She revealed that she has taught this class 399 times! 


After class when I got home I checked Amazon to see if Suzi's books were there. They were but so was some Barn Quilt fabric from Elizabeth's Studio. I love the artistry and quality print from this mill and find my self buying other fabrics from Elizabeth's studio. It is an English company and the artists it employs are marvelous. Other fabrics from Elizabeth's Studio are also in my post from 3/27/2019. This barn quilt fabric is by artist Billy Jacobs from the fabric line Heading' Home. Of course I bought some, 2 yards. I also bought the coordinating panel which measures approximately 24" x 42" with fifteen 7" square blocks. At the February AVQ meeting I had donated a shopping bag full of panels for our upcoming sale extravaganza. Guess I can't resist re-stocking.


Here are two enlargements of the block pictures. I think they are lovely.


Amazon has its clutches in me. When I go for something I go whole hog. I also bought this 1000 piece jigsaw puzzle of – what else– Barn  Quilts!

Thursday, February 6, 2020

Seaming a Backing for Taupe Black White Gray

Seaming the backing for my taupe, black, white, and gray top took me all day. Yes, one seam took me all day. Sigh... piecing goes so much faster for me. My top is 83" long. I had 5 ⅜ yard of backing fabric. Half of that in inches is 96 ¾" so I certainly had some breathing space, even with making my backing 4" longer than the top. But I wanted to match the seam so I fiddled around with where the 12¼" repeats would fall, and cut the backing fabric into two unequal lengths. The familiar saying is, "Measure twice and cut once."  The first length was 87".  I did not cut the remaining yardage until after completing my seam. Manipulating 5 ⅜ yards of fabric was a struggle and I spent a lot of time checking and rechecking my calculations. There must be an easier way because my cautiousness sucked up a lot of my time.

Then there was the question of seaming along the length, matching the motifs. It is not like I could simply put the two selvages together and zoom down, voila! Maybe the fabric was a drop match vertically but I need to shift the fabric horizontally to match the motifs. The stitching line was a different distance from each selvage. I drew lines through matching parts of repeats on the right side of the fabric on each of the two lengths. Sewing along those lines should hide them.


Then I folded the upper length of fabric on the line and pressed the crease in. The crease would be my guide for the stitching line when I sewed from the wrong side and could not see the pencil mark. The pins set the alignment for the cross grain of the fabric along the stitching line.

  
I double checked that the two lines aligned and then sewed on the crease line. The crease line is shadow dependent and not always as crisply clear as I would like it to be. A possible future improvement to my method could be to repeat drawing that line on the wrong side as well using a light table or to insert carbon tracing paper underneath when I draw the original pencil line. I still think I would double check that the lines align with each other periodically as I sew a few inches at a time.


Things were going along swimmingly and then my machine started making an odd sound. I traveled along, hoping it was a brief anomaly that would self-correct; but I stubbornly and stupidly traveled about 8" before I turned it over to check it out. Something had been mis-threaded or come unthreaded. Note the ragged loops.


All the extra loops were from the top thread not the bobbin thread. The upper thread might have slipped out of the tension discs, or when I had to change spools, I neglected to be sure the tension discs were filled properly. I re-threaded the top thread, and I took out and re-inserted the bobbin as well. A few inches of stitching on a scrap confirmed that all was well again and the problem disappeared. Luckily such loose loops spread apart easily and could be easily clipped with thread snips.

And I had just been to a Sew Day for my guild where I was given this handy dandy scrap bucket so I had a place for all those thread snippets I had to painstakingly remove. The tape measure and scissor buttons are adorable on two of the three folded over sides.


The button on the third side is a sewing machine.


The base is triangular and the print is an adorable Minnie Mouse floral. I must admit if you have to rip out, a cute trash collector makes the task so much more pleasant.


Back to my backing seaming. I distract so easily. The uneven sides of the seam allowance show up clearly in the next photo. I scratched my head on whether if I had shifted the fabric lengthwise half a fabric repeat would it have matched. If that possibility were to indeed be a successful alternate approach, the "how" eluded me. I had no problem with cutting off the excess. My top is 63" wide and even with my margin of 4" added to that, I was still less that a double WOF, about 84". 


Once I steam-set the seam, I trimmed the allowance to ¾" and pressed to one side.


The matching came out pretty good – not perfect in all places  –  but pretty good overall.  Once quilted I believe it will be further camouflaged.


I am truly grateful that when I cut the batting it does not need to be seamed nor matched. I buy bamboo batting by the 10 yard, 96" wide roll from Winline Textiles and they ship for free. I will cut it 2" longer in length than the top and 2" wider in width. Doing so allows me 1" wiggle room on each edge. Tomorrow or the next day, I will moan and groan as I crawl on the floor, spray basting the three-layer sandwich together. But I am determined not to lose momentum on this project!

Tuesday, February 4, 2020

Taupe Black White Gray

Those colors sound dull, don't they? They do to me. Nevertheless, in one of McCall's Quilting magazines, the Spring 2013 edition of America Makes Fast Quilts, a neutral-toned quilt titled Odds and Ends surprisingly caught my eye, even with the unexciting (in my opinion) hues. 


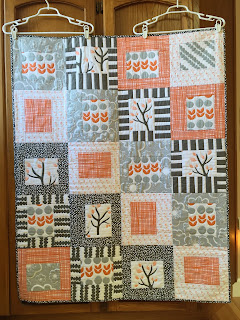
Unlike the quilts on the magazine cover, Odds and Ends is made from a dark gray solid, a light gray solid, and nine fat quarters in white, taupe, black, and grays. I tend to favor brights and jewel tones and will be drawn to pastels occasionally if in the right combination, but generally I avoid beiges, browns, and blacks. Here are the last two quilts – and perhaps the only two quilts –  I made with gray or beige in them: Orange and Grey (8/10/16 post) and Oh Boy (2/21/19 post). Note that even then, I cheated by adding a bright orange or bright turquoise so neither quilt is far from neutral.


I knew if left to my own devices I would not buy neutral fabrics on my own but I liked the overall effect of the quilt. The taupe in the fabric line seemed warm enough to make the black and gray welcoming, the white brought brightness to the palette, and the pattern had a modern feel to it. So I bought the kit offered in the magazine to stretch my color palette and tentatively venture into the modern regime. Can something seven years old still be considered modern? Plus, I also may have been stuck in the same color palette for even longer than seven years! It is time to break the mold. I made up the following sets of four blocks each that showcases each of the nine fat quarter fabrics. Each fat quarter makes four blocks. There will be one left over because the arrangement is 5 x 7 blocks and so I need only 35. The first twelve blocks (three sets of four) contain a large-scale two-color floral (left), a two-color mini-print (middle), and a dark two-color bold abstract (right).


The second twelve blocks contain a large-scale three-color light background floral (left), a two-color mini-print (middle), and a light two-color bold abstract (right). The light two-color bold abstract will be repeated in the binding.


The third twelve blocks contain a bold stripe with chevrons with a modern vibe or men's suiting vibe (left). Although it is masculine it is softened with nearby florals. And yes, I did fussy cut so the stripe was centered. (I also fussy cut the mini-print in the center of two previous photos. I really have a problem with being random.) The large-scale three-color dark floral is repeated in border (middle). I omitted one of those blocks in order to meet the 35 block limit. A large-scale three-color medium-toned background floral completes the array (right).


When joined together the blocks alternate in horizontal or vertical format so their light gray frames appear to interlock. The pieced border was interesting with inserts that served as completion pieces for the light grey surrounds on two sides of each block.


The assembled quilt top measure 62½" x 82½". It will be the largest quilt I have yet attempted on my Handiquilter Sweet Sixteen sit-down long arm. The name Odds and Ends does not excite me, so I will be thinking up a different one. The quilt looks to me like it has a lot of windows or picture frames so I will ponder along that path of reasoning.


While I have momentum, I will prepare the binding. Then my next step will be to piece the backing for the top. I was grateful I had purchased the optional backing yardage with the kit. It saves me from an excuse to procrastinate at this point, as I am prone to do. Hopefully I will not lose steam when it comes time to layering the quilt sandwich.